How to organise photos in iOS and Android
We show you how to organise your photos on the move, on iOS or Android, so they're all sorted before you even get home
An easy way to improve the quality of your photos is to take masses and only share the very best ones. A great composition or a winning smile is often captured by chance, so take ten times more photos than you need and you’ll stack the odds heavily in your favour.
The downside is that it takes time to sift through hundreds of photos to pick out the best ones. The whole thing backfires if you never get around to doing this you’ll end up with thousands of photos that never see the light of day.
The solution is to get them organised before you get home. Journeys home from holidays and days out are ideal for sifting through your photos. Rather than just gaze at them admiringly, why not get them organised and pick out your favourites?
You could do this simply by reviewing the photos on the camera and jotting down the file names of your favourites. However, getting your smartphone or tablet involved can make the experience much more convenient and rewarding. For one thing, their screens are significantly bigger and sharper than the screens on the back of cameras. With the right app, you can tag and rate photos so they’re already neatly organised when you copy them onto your computer. In fact, you can skip the computer’s involvement entirely and upload your favourite photos directly from your phone or tablet to an online photo-sharing service.
Some cameras, such as recent Canon EOS SLRs, let you add star ratings to photos directly in the camera. With the EOS 6D and 70D, you can also do this via the EOS Remote app and take advantage of a smartphone or tablet’s bigger screen. However, while each photo can be given a rating from one to five stars, it’s not possible to sort or filter them by ratings.
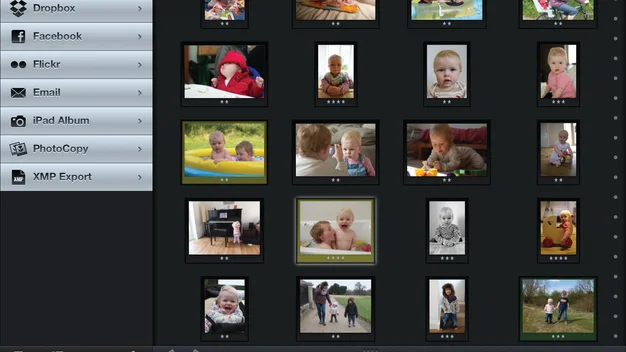
This is a crucial feature for our preferred method for picking the best photos from a large set. It allows you to go through and award one star to all photos that have some merit. Then you can go through these one-star photos and promote the better ones to two stars. Repeat this process as necessary and you quickly end up with a small selection of the very best photos. It’s also useful to have a reserves list, in case you suddenly realise there are no photos of a particular person in the set. You might also want to share half a dozen on Facebook but include 20 or 30 to share with close friends and family. Using a five-star rating system lets you handle these tasks quickly and easily.
^ The EOS Remote app for Wi-Fi-enabled Canon SLRs let you rate photos without the need to copy them to a phone or tablet
To sort a folder of photos by star rating in Windows Explorer, right-click the folder and select Group by, More, tick Rating and click OK. You’ll then need to right-click again and select Group by, Rating.
Transferring photos
Before you can rate your photos using an app, you need to get them onto the smartphone or tablet. It’s clearly not an issue if you’re using the device’s integrated camera. It’s also pretty easy if your camera has Wi-Fi built in. All the Wi-Fi cameras we’ve seen recently have companion apps for both iOS and Android that handle wireless transfers to the device’s local storage. If your camera doesn’t include this function, consider getting an Eye-Fi card. These SD cards cost from £32 and have Wi-Fi adapters built in for wireless transfers to iOS and Android devices. The more expensive Eye-Fi Pro X2 cards can also transfer to PCs and support RAW format images – more on this later.
Another option is to plug your camera’s memory card into your phone or tablet. For the latest Apple devices, you’ll need the Apple Lightning to SD Card Camera Reader or, for older devices, the Apple iPad Camera Connection Kit. Both cost £25 from http://store.apple.com/uk.
If your Android device has a microSD card slot, you could simply use a microSD card in your camera. These tiny cards usually come with an adapter so you can use them in your camera’s standard SD slot. Their prices and performance compare reasonably well with standard-sized SD cards. One advantage of this method is that you don’t have to copy the photos onto the Android device’s internal storage; the Android photo-viewing app (see below) should be able to access the microSD card directly.
If your Android device doesn’t have a microSD slot or you don’t want to ditch your full-size SD card collection, you might be able to use a USB Host On The Go (OTG) cable. This has a Micro USB plug at one end for the Android device and a full-size USB socket on the other. You can use this to connect either your camera directly (using the USB cable that came with the camera) or a USB card reader. Not all Android devices support USB Host OTG, and it’s not always easy to find out which ones do and don’t. The Lenovo Yoga tablet we used for testing worked fine but our Nexus 4 phone didn’t. These cables only cost a pound or two, though, so it’s not too expensive to give it a test run. Again, the app should be able to access the memory card directly without having to copy photos to the Android device’s local storage first.