To help us provide you with free impartial advice, we may earn a commission if you buy through links on our site. Learn more
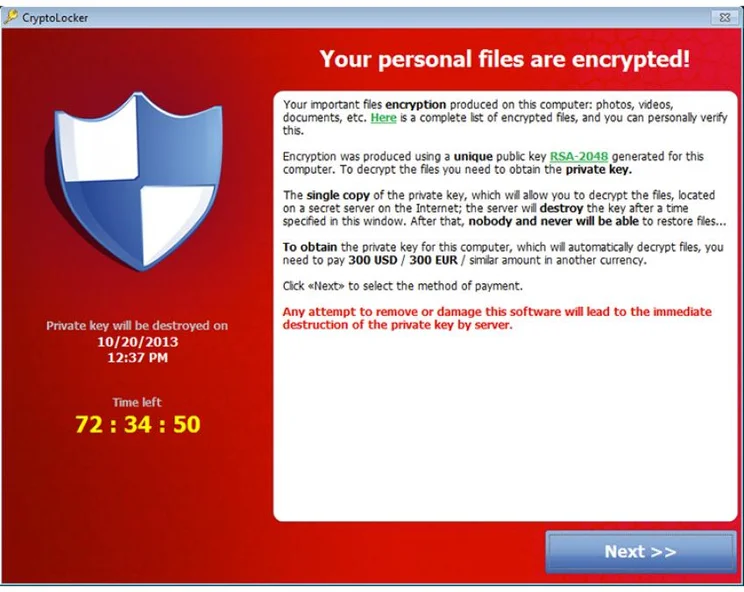


Ransom-ware is a type of malicious program that infects your computer and demands payment before restoring access to your computer or its files. A particularly fearsome type of ransom-ware has appeared over the last few months that encrypts files using a very strong method that is currently not breakable. It then offers to decrypt the files for those who pay the ransom and threatens to delete the decryption key if the money is not delivered.
The Cryptolocker threat could really ruin your day but the good news is that it’s quite easy to remove. Any anti-virus program should be able to do manage this (we recommend Kaspersky Internet Security), but no currently security product is able to recover the files. That’s the very bad news.
The best possible solution to recovering your data is to restore your files from a backup, once you have removed the malware. However, we know that in reality lots of people do not back up their files. Another option is to pay the ransom. The criminals involved ask for payment in BitCoins and, as the real-world value of this virtual currency fluctuates, so does the ransom amount. At the time of writing you might expect to pay around £150.
If you are one of those unfortunate victims of Cryptolocker (or similar) who does not have the luxury of a full file backup (and refuses to pay, either due to principle or because you don’t believe that you’ll ever see your data again once the money’s gone), read on to find out how you may be able to save at least some of your most important files. Remember, there are no guarantees and a full file backup is the best protection.
The trick to recovering your data is to understand how it has been taken from you. The malicious software first encrypts the files and then deletes them. This means that the unencrypted files still exist on the hard disk, although they are invisible when viewing folders using Windows Explorer. The missing files are also liable to being overwritten with other data at some stage.
STEP 1
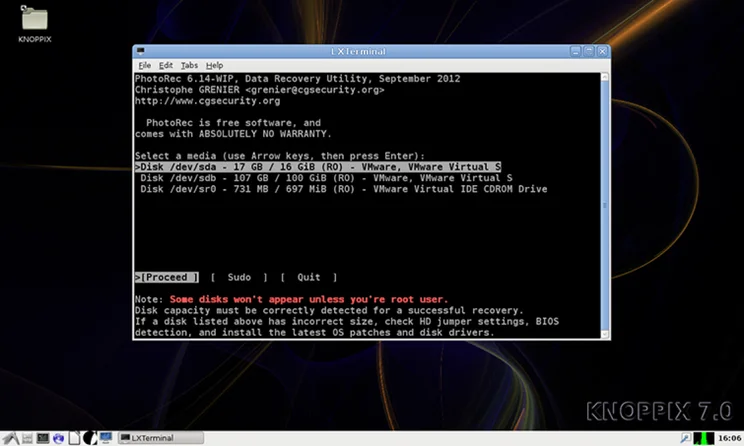
You don’t want to overwrite your files so it’s wise to remove your hard disk and connect it to another computer, possibly using a USB hard disk cradle. Don’t boot off this disk, though. It needs to appear as a secondary disk. Alternatively, if you have only one PC, boot from a Linux rescue CD. Knoppix is a good choice as it includes a version of the tool that we’re going to use in the next steps. It works in exactly the same way as the Windows version. Attach a USB flash drive as a place to save the recovered files. Open a terminal windows and type: photorec.

STEP 2
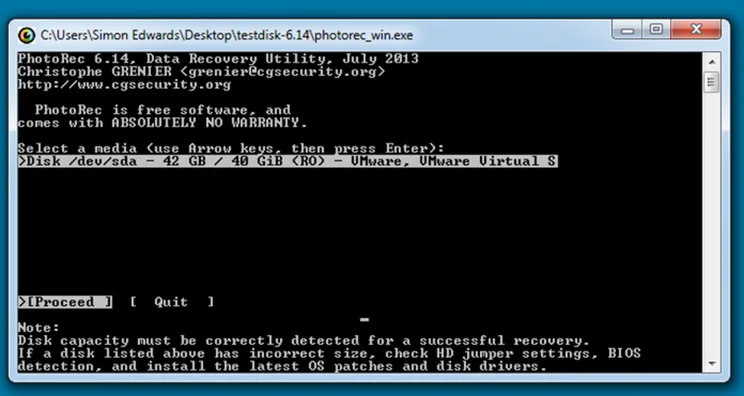
Create a new folder on the USB drive and called it Recovery or similar and then download PhotoRec. Even if you are using 64-bit Windows, choose the 32-bit version, which is labelled simply as “Windows”. There is no installer, so save the Zip file that you download to your Desktop and extract it to a folder. Open this folder and double-click the file called photorec_win.exe.
STEP 3
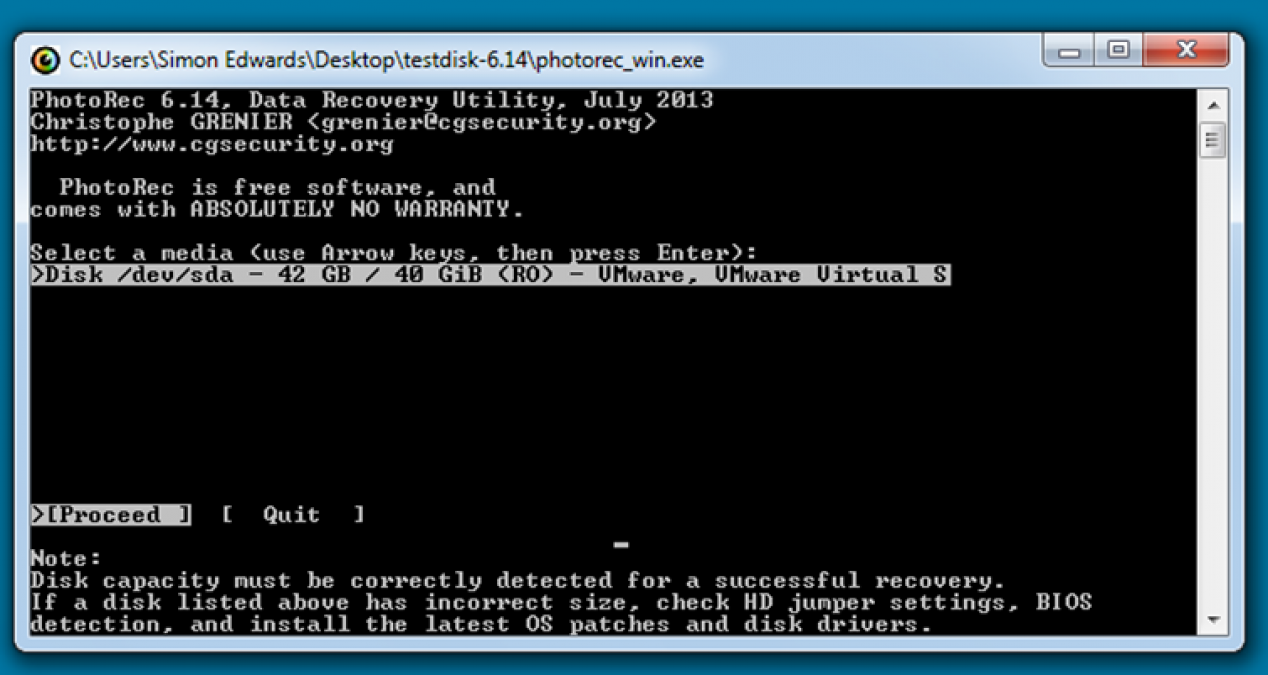
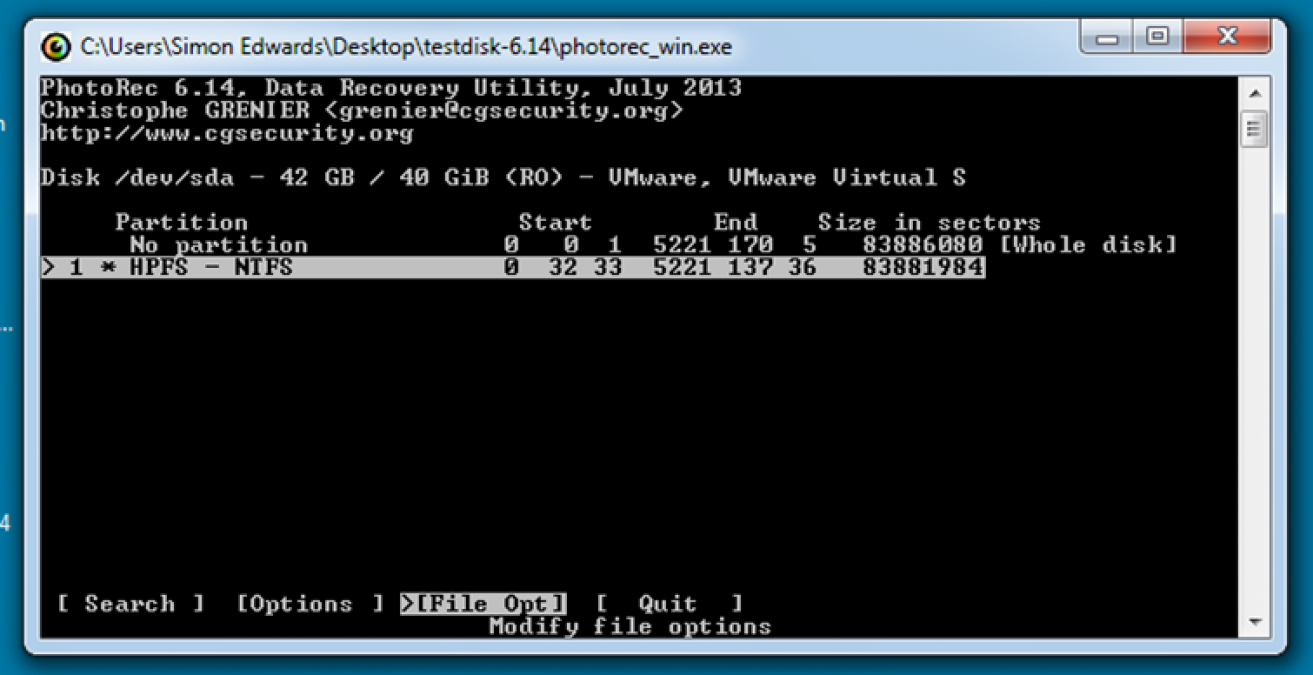
In this example we’re examining the system’s own disk, so there is only one listed. If you are sensible and have attached your damaged disk to a separate computer then you’ll see two. Choose the affected disk using the arrow keys and press Enter. You’ll then see a list of partitions. Before you choose the one that contains the deleted data consider the types of files that you want to recover. Let’s say that you are only interested in .rtf and .jpg files. Use the arrow keys to highlight File Opt and press Enter.
STEP 4
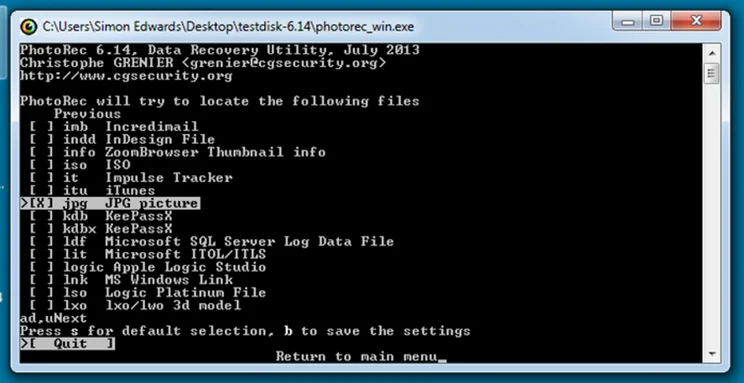
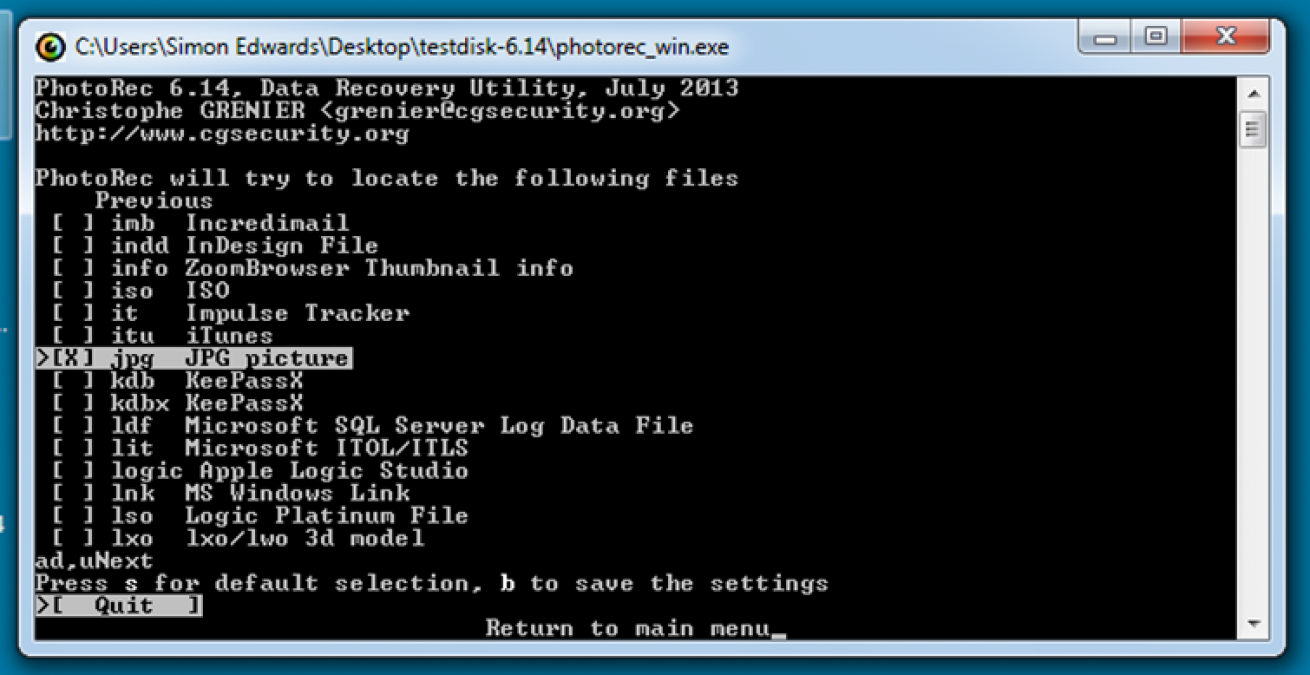
By default a vast number of file types will be selected. If you don’t know what you want to recover you might as well leave them all enabled. However, you’ll create an overwhelming number of useless files as well as the ones you want so, as we want to recover specific files, we’ll press ‘s’ to clear the selection and find ‘Text file with headers’ and JPG picture. With each highlighted in turn press the Space bar to select these file types. Press ‘b’ to save your settings, then ‘q’ to return to the main menu.
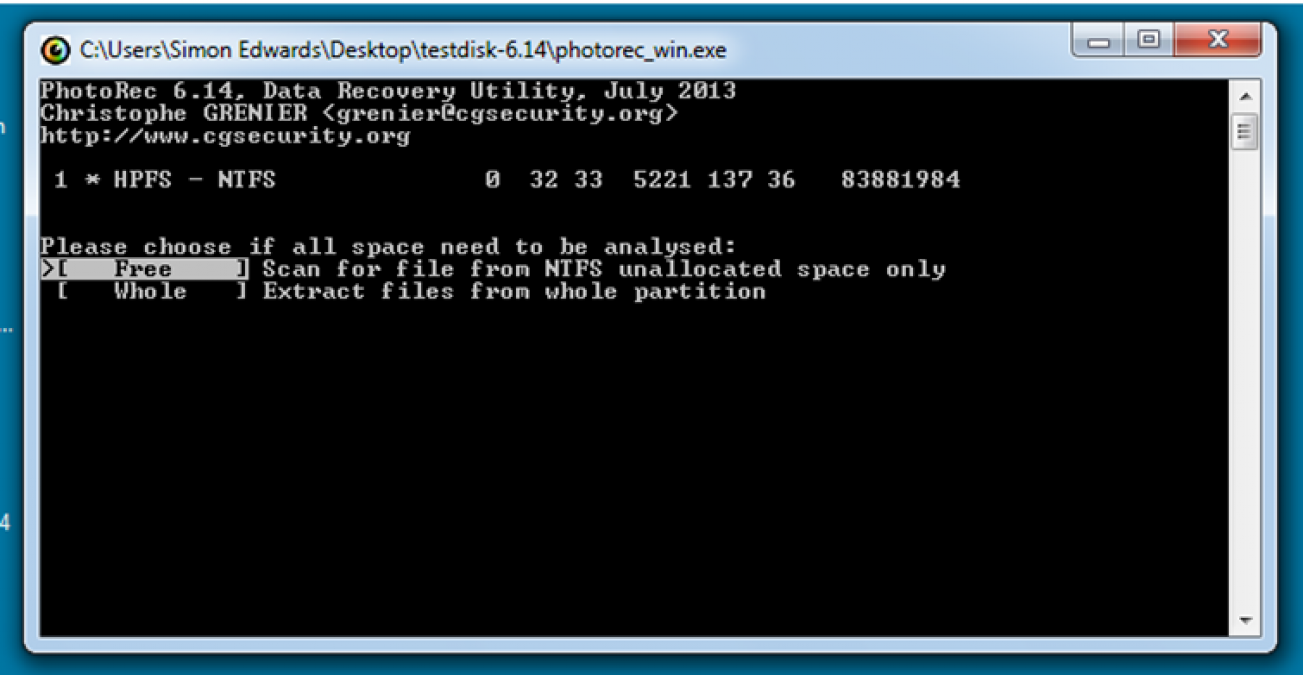
STEP 5
Select Search using the arrow keys and choose the file system that contains the missing files. In our case there is only one choice. Press the Enter key and you’ll be asked if you want to analyse Free or Whole disk space. To recover deleted files, as we wish to, choose the faster Free to begin with. Use the arrow keys to find the recovery folder you created in Step Two. Select it and press ‘c’ to start the analysis. As files are recovered they will appear in the Recovery folder. If you are still missing files try running the ‘Whole’ scan.