To help us provide you with free impartial advice, we may earn a commission if you buy through links on our site. Learn more
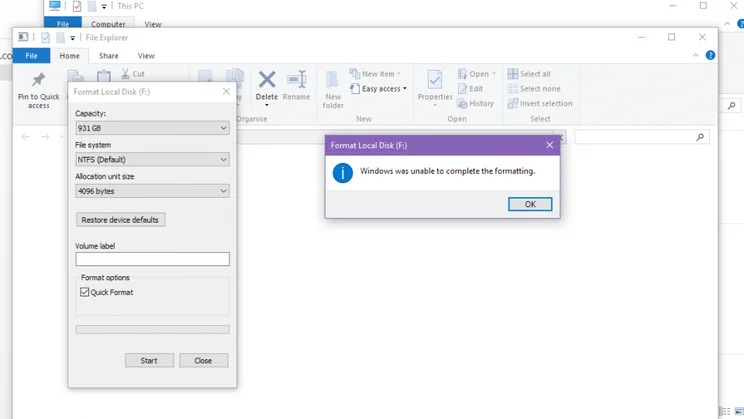
If you’re trying to format a hard disk or memory card and you’ve encountered the “Windows was unable to complete the formatting” error message, your disk might be in the RAW file system structure. This could be because the disk became corrupted or because a previous format went wrong.
The frustrating thing is that a disk in the RAW file system will cause Windows to ask you to format it before you can use it, before giving you the aforementioned message putting you in an endless loop of despair. Fear not, you can salvage your disk through a few steps, rendering it usable again. Of course, formatting it will lose all the data on the disk.
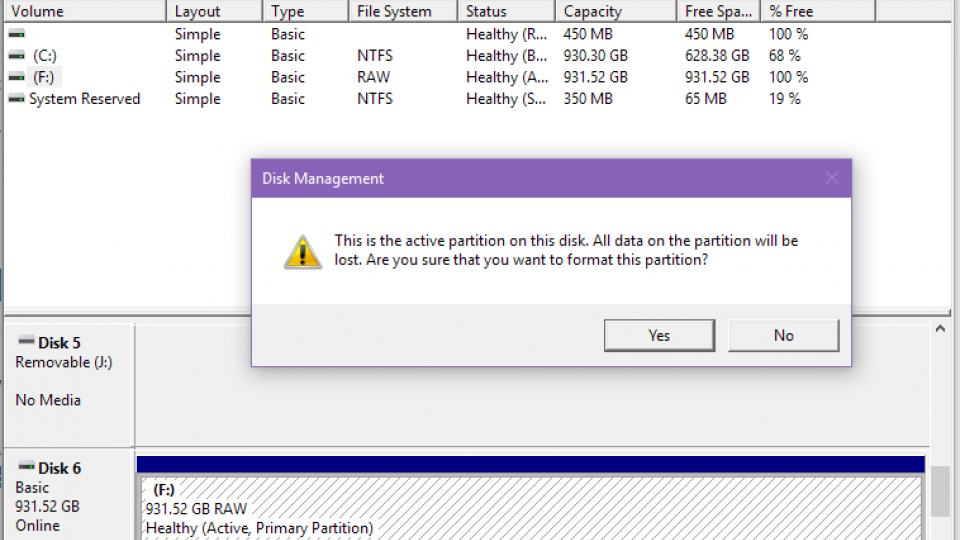
1. Open up Disk Management & Delete the faulty disk
Right-click the Start menu and select ‘Disk Management’. After a few short seconds, you’ll be greeted with all of the disks attached to your system. You’ll see the faulty disk has a File System description as RAW. Right click the faulty disk (making sure you select the correct one) and select ‘Delete Volume’. You’ll get an error message warning you that you’ll lose all the data on the disk. If you’re sure, click ‘Yes’.
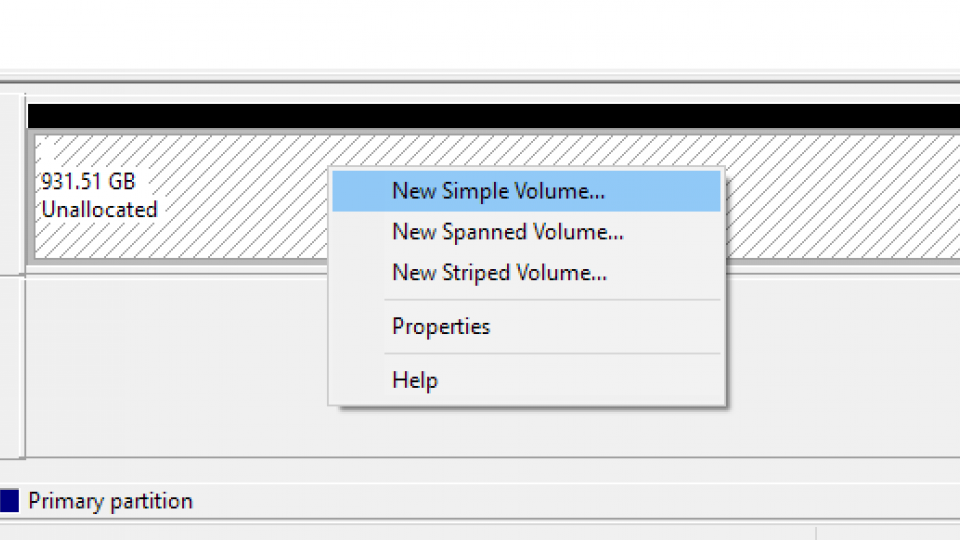
2. Format Simple Volume
The disk will disappear from the top list but appear in the bottom part of Disk Management where it will appear as an unallocated drive, that being storage space that isn’t yet formatted for use by your operating system. Right click the right section (with the striped background) and select ‘New Simple Volume’.
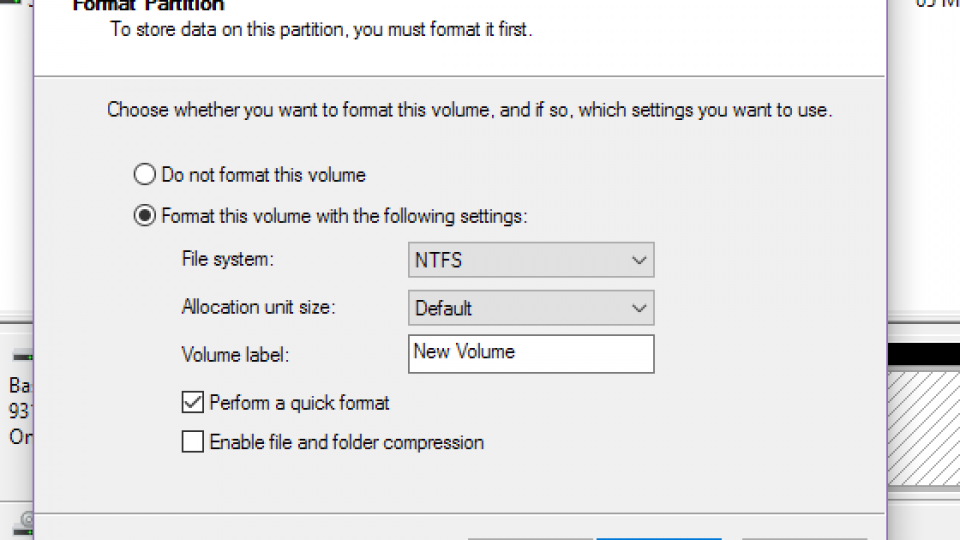
3. Select Volume Label and File System
The next screen will let you assign a drive letter, name as well as select the file system, either NTFS or FAT32. Choose NTFS if you’re going to use it as a system disk or for storage on a PC or laptop (as this allows file sizes over 4GB among other advantages), if it’s a memory card you’ll want to use with other devices (such as cameras) then go with FAT32. Flash drives can go either way, if it’s high capacity then you might want NTFS for bigger files, but FAT32 will ensure compatibility if you ever want to plug into say a TV or video game console.
Hit ‘Next’ and Disk Management will format the disk.
4. Assign a drive letter (again)
If for some reason Windows doesn’t end up assigning a drive letter (as it did while I ran through this tutorial), you’ll find the newly formatted disk doesn’t appear in Windows Explorer or in the top list of Disk Management. You’ll need to assign a drive letter again by right clicking the drive at the bottom list and selecting one. After this your disk should be fully operational.