To help us provide you with free impartial advice, we may earn a commission if you buy through links on our site. Learn more
- How to build your own PC: Getting started
- How to build a PC: Components
- How to build your own PC: Installing the CPU
- How to build your own PC: Installing RAM
- How to build your own PC: Installing the motherboard and power supply
- How to build your own PC: Installing storage and optical drives
- How to build your own PC: Installing Windows


If you’ve never looked inside a computer, building your own PC can be a rather daunting prospect. There are many bits and pieces you need to put together, and plenty of things to consider, but with a bit of research and planning PC building doesn’t need to be as complicated as you might expect.
By building your own PC, you’ll get a greater understanding of how everything works, so you might be less inclined to pick up the phone to an expensive technical support line the next time you run into any problems. What’s more, successfully putting together your first PC and booting it up is one of those satisfying moments no tech-loving person should miss.
READ NEXT: Short on time? These are the best pre-built PCs
Whether you’re after a cutting-edge gaming system, a home theatre PC, or just something to write your emails on, we’ve got you covered. Even if you’ve built a system before, you’ll find handy tips and tricks that might not only save you frustration during your next build, but also help you create a cleaner, more polished PC.
What follows is a step-by-step guide that runs you through the process of putting your system together, so that, by the end, you’ll have a fully-working PC you can be proud of.
How to build your own PC: Getting started
You might be tempted to dive right in and get your hands dirty, but it’s worth taking a few minutes before you start to make sure you have everything you need for a trouble-free build.
No. 2 Phillips/crosshead screwdriver: This is the tool you’ll be using the most, whether you’re securing the motherboard in place or simply tightening up thumbscrews on the side of the PC. Make sure to find a short one you can use in tight spaces, plus a long one that can reach between any components that are already mounted in your case.
Mini screwdrivers: You’ll need at least one of these for the smaller screws used on the mounting systems of CPU coolers and M.2 SSDs.
Cable ties: Get a big bag to keep your wires neatly tucked away. This allows adequate airflow and makes it easier to access components later.
How to build a PC: Components
Processor: The brains of your PC, manufactured by AMD or Intel and powering all its functions. We’ve picked AMD’s eight-core Ryzen 7 1700 chip for our build, which can currently be picked up for roughly £160.
Motherboard: Crucially, your motherboard must match your chosen processor’s socket and have a chipset that supports it. We’re using an MSI X370 ATX motherboard (£170).
Memory: You’ll need DDR4 dual-channel memory kits with two matched modules for the motherboard we mentioned above. Two DDR4 8GB Ballistix Sport LT’s are perfect for our build (£165).
CPU cooler: Your processor may come with one but there will be better models available that are quieter and more efficient. Check it’s compatible with your motherboard’s CPU socket and that you have enough room in your case. For our build, though, we went with AMD’s supplied CPU cooler.
Graphics: For an all-purpose PC, Intel’s integrated graphics will suffice. If you have an AMD CPU, or you want a PC for gaming, you’ll need a graphics card. We’re using an Asus Strix GTX 1070 Ti (£500) for our gaming PC, although you may be able to make do with something less extreme.
Storage: We recommend installing Windows 10 and other commonly used software on a solid state drive (SSD), while using a hard drive to store data, such as large program files. For our build, Toshiba’s 240GB A100 SSD offered the best value (£70). We’ve got it working with a 1TB Toshiba L200 HDD (£43).
Case: Make sure to buy the right size case for your build. We’re using a black NZXT H700i case (£188), which comes with a downloadable software utility that measures fan speeds and temperature levels, dynamically raising and lowering cooling intensity.
Power supply (PSU): A 550W model is fine for a standard PC with a CPU and single graphics card, while a 750W model (or above) allows for a more power-hungry dual-graphics setup. We’re using a 600W Corsair CX600M (£75).
At this early stage, you might be tempted to open up your PC case and begin cramming in every component that’s arrived in the post. Before you do any of that, though, it’s best to install the processor and memory onto the motherboard before you fit it inside the case. Trust me, it’s much less fiddly.
How to build your own PC: Installing the CPU
Before you open your processor’s packaging, be warned that you need to be especially careful with the pins on the bottom of AMD CPUs or in Intel’s CPU sockets. They’re very delicate and you only need to bend a couple of them out of alignment to make your kit effectively unusable. Hold an AMD CPU carefully by the edges, and don’t touch the pins.
READ NEXT: The best CPUs you can buy today
Before handling any computer components, you need to earth yourself to avoid static. Wearing an anti-static wrist strap is the best option and we recommend wearing loose-fitting, static-free clothing (yes to cotton, no to wool or polyester).
With an Intel system, remove the CPU socket protector, push down on the front of the handle on the motherboard’s CPU socket and lift up the handle. Lift the socket cover and check the notches on the side of the processor and socket to line them up. Now lower the CPU into the socket, gently slotting it into place. Close the cover, sliding it under the screw in front of the socket, then push the handle back into place to lock it.
If you’re installing an AMD processor, like we did, the CPU’s correct orientation is revealed by the pin arrangement, as well as a triangle on both the socket and the underside of the CPU. Lift the handle next to the socket to open up the holes for the pins, then gently lower the CPU into the socket. When the processor is firmly in place, push down the handle to secure it.
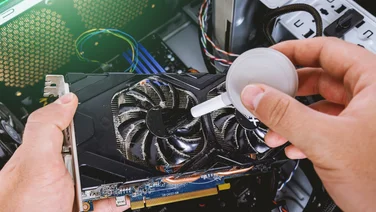
Next, you’ll need to install the cooler. The cooler supplied by AMD with its processor retail kits is relatively straightforward to fit. If the top of the CPU you just installed isn’t covered in thermal paste, you’ll need to apply a small amount before you continue. Ideally you want a thin layer of paste covering the entire top of the chip – the best way to do this is to squeeze a pea-sized blob onto the middle, then when you install the cooler, press down on it until the paste is spread out evenly.
When fitting the AMD cooler, there are two metal brackets on either side which need to be locked into place onto the motherboard. There’s also a plastic lever on one of the brackets, which needs to be lifted up to fit then pushed down to lock the cooler in place. If fitted correctly, you shouldn’t feel any wiggle.
How to build your own PC: Installing RAM
Most motherboards have four memory slots, so make sure your RAM is installed in the correct slots to enable dual-channel mode. Your motherboard manual will tell you which slots to use.
Memory modules have a notch in the bottom edge, so there’s only one correct way that they can fit. Simply flip up the clips on the side of the memory slot, put the module in place and push firmly on the top until the clips on the sides flip back up again and grip the module. Do the same with any other modules.
So, you’ve started your first steps and are hungry for more. Now’s the fun part – you get to open up your new PC case and begin placing all of the core components inside. To do so, you’ll want to remove the left side panel, as this offers the most amount of space to manoeuvre. You’ll also want to make sure to do the following steps in a well-lit room.
How to build your own PC: Installing the motherboard and power supply
Now that your motherboard is fitted with RAM and a CPU, we have to place it inside the PC case. First, you’ll want to identify the rear of the motherboard, and align all of the ports and connections with the backplate of the PC case and fit the motherboard’s rear I/O shield (a simple push in each corner does the trick) and remove any covers from expansion slots you wish to use.
READ NEXT: The best motherboards you can buy right now
Next, you’ll need to put your motherboard into position, using all the available mounting points to secure it. Simply make sure every mounting hole sits on top of a standoff – these standoffs look like screws with another screw-thread in the top, and they’ll be supplied with your case, usually pre-installed.
When the motherboard is tightly in position, with the ports pushed through the I/O shield and a standoff hole clearly visible in every screwhole, fix it into place using the screws provided with your case’s screw kit.
Your case will also come with a bunch of cables for connecting the power and reset buttons, LEDs, audio jacks and USB ports – make sure to get these all hooked up, with the cables tidied up neatly.
How to build your own PC: Installing the power supply
The motherboard draws power from the PSU typically using two connectors: an ATX connector and a secondary connector. Modern motherboards use a 24-pin ATX connection. You can’t really miss it as it’s the largest connection on the power supply.
The ATX connector will only plug in one way as it has a small hook and clasp for securely attaching to the motherboard. Once it’s lined up correctly, attach the connection by applying a little downward force until you feel the clasp engage. Give it a gentle tug afterwards to make sure it’s connected properly.
Modern motherboards also need a secondary power connector from the PSU. This will either be a four-pin or an eight-pin connection, depending on your motherboard – make sure to check what type your PSU has as you might have to buy an adaptor. Much like the 24-pin connector, you’ll need to line up the connector the right way round and apply a little bit of force to properly attach it. A satisfying click will let you know when it’s in.
Now that the motherboard is in place and you’re able to supply power to your PC, it’s time to install the graphics card. That is of course, if you want to – many Intel and AMD CPUs have their own on-board GPU, so this isn’t a requirement if you aren’t after a gaming PC. In that case, feel free to skip this step. Otherwise, read on.
Installing a graphics card is actually one of the simplest steps. You’ll want to locate one of the large PCIe x16 slots on the motherboard, specifically the topmost slot, as this will be the fastest. You may also need to remove optional drive bays or cable-hiding panels to make room.
To fit the graphics card, simply line up the card with the top slot, with the card’s fans pointing downwards towards the bottom of the case. Push firmly and evenly across the card to secure the component on the motherboard – you should hear another nice, satisfying click. You’ll then want to screw the graphics card to the backplate for added stability.
READ NEXT: The best SSDs you can buy
Your graphics card will require separate power from the PSU, using either a six-pin or an eight-pin power connector. All you have to do is connect the two components, and you’re good to go.
How to build your own PC: Installing storage and optical drives
SSDs and hard drives mount in various ways. Some are secured within brackets, while others simply slot into a cage or screw into a mount. Hard drives can get rather hot, so make sure to position them close to your case’s front intake fan, if it has one.
SATA SSDs are best installed on 2.5in mounts behind the motherboard tray or on top of the PSU cover. These mounts usually just require you to screw the SSD’s bottom into the mount with the four included screws and if not, you’ll have to use a drive bay. The same applies to hard drives; the case’s manual should be able to help you with the ideal positioning.
Optical drives (CD, DVD or Blu-ray) are mounted in the front of the case using a 5.25in bay. If you have one, you may need to remove a blanking plate at the front of the case behind the panel covers, then your drive can slide into place and be secured. If possible, remove any drive bay cages you’re not using to help improve the airflow in your case.
Lastly, make sure to mop up some of the other connections you might have missed, hooking up any other parts that need power, such as LED strips, fans, fan controllers and other cooling devices.
Rejoice! Your PC is almost ready to go. Don’t turn it on just yet, though, there are still a few more steps standing in your way. Crucially, it’s time to tidy up all those cables and install Windows.
Now begins the tedious task of threading your PC’s cables through the various routing holes and hiding them as well as you can. Tie them down to secure them using any available holes in the frame and thread your cable tie through the anchor points, pulling it tight around the cables and snipping off the end with scissors. This step is essential if you own a PC case with a glass side panel, as you’ll want your PC to look as fancy as possible when you look inside.
How to build your own PC: Installing Windows
Give your PC a once-over, making sure that all the power cables are properly connected. You can then plug your PC into the mains, plug your monitor into your graphics card, connect your keyboard and mouse, and push the case’s power button. If you’re welcomed by a boot screen – congratulations! Everything has gone according to plan.
Now you’ll want to insert your Windows 10 installation (usually on a disc or memory stick). Some motherboards provide the option to select a boot device on their startup screen – if so, select your DVD drive or USB stick and kick off the Windows installation process; if not, tap the Del key when your PC starts, then find the boot section and set the first boot device to the type you’re using.
In the Windows installation, select your language. You’ll be given the option to install Windows on a specific drive, so make sure to choose your SSD for super-speedy boot times. Your PC will restart when the installation process is complete, so just remove the DVD or USB stick and let the PC boot from the drive with Windows installed.
Once you’re in Windows, install your motherboard’s Ethernet or Wi-Fi driver, get your PC online and download the latest Windows updates. After that, visit your motherboard manufacturer’s website to get the latest Windows drivers – start by installing the Intel chipset driver, then install the other ones. Now is also a good time to install any available software for your motherboard.
Finally, download the latest AMD or Nvidia driver for your graphics card from their official websites. Once that’s installed, change your Desktop resolution to the native resolution of your monitor – right-click the Desktop, select ‘Display settings’ and select the correct resolution. Once that’s all done, you should have a well-built, clean-looking PC that’s ready to go.