To help us provide you with free impartial advice, we may earn a commission if you buy through links on our site. Learn more
Windows’ Remote Desktop Connection is a great way to help a friend with a computer problem, or get the help you need yourself. It’s not so easy, though, if you want to access one of your own computers remotely – perhaps while you’re at work or on holiday. For this you can use TeamViewer: a more powerful and user-friendly remote access app. It’s free for personal use.
STEP 1 – DOWNLOAD THE SOFTWARE
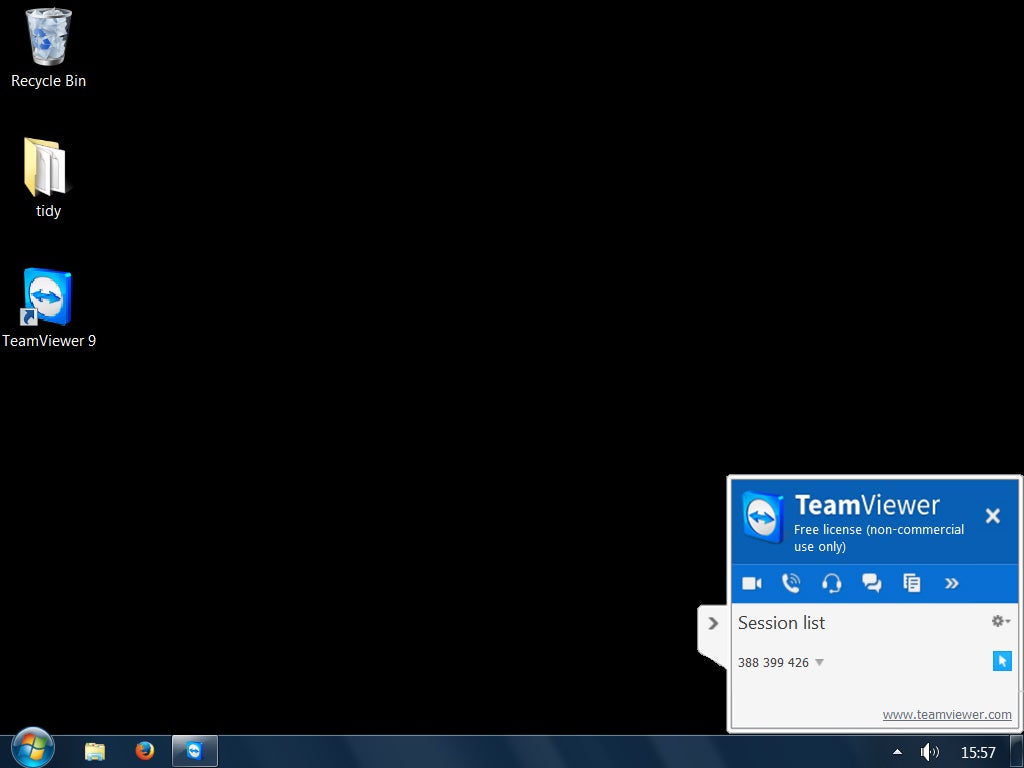
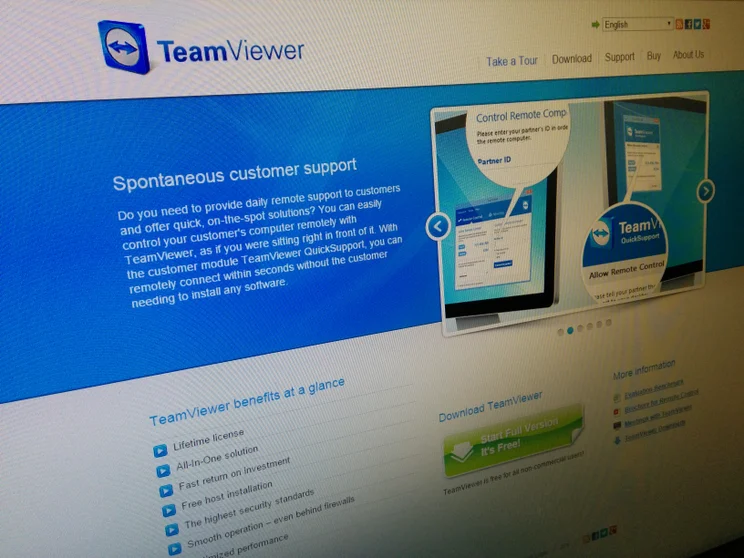
Visit www.teamviewer.com, click the green download button and save the setup file to your PC. When the download has finished, run the file. You could choose a remote access only installation for a PC you’ll only ever connect to (rather than from), but for this workthrough we’ll choose Basic installation. Confirm that you’re using the software only for personal or non-commercial use, then click Accept – finish to begin the installation, providing permission if prompted by Windows. When the installation completes the program will run automatically – click the cross at the top right to dismiss the welcome screen. You’ll see an ID number which remains constant and is unique to the PC you’ve installed TeamViewer on, and a password which changes each time you run the software.

STEP 2 – ACTIVATE YOUR ACCOUNT
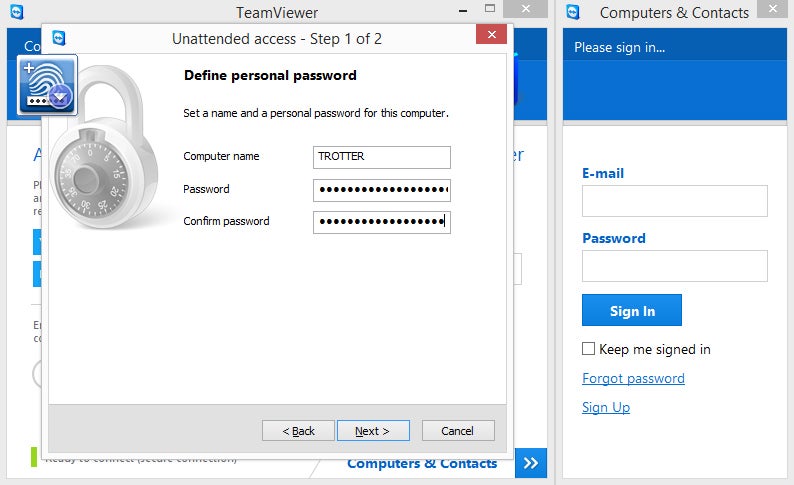
We’ll assume you’ve installed TeamViewer on the computer you’ll wish to access remotely – if not, switch to that computer and repeat step one now. At the base of the first column, click the Personal Password field and TeamViewer will start the Unattended access wizard. Provide a computer name and, for the best security, a password of at least 14 characters, then click Next. It’s easiest to keep track of your PCs if you create a TeamViewer account when prompted. Fill in your name, email and a secure password, then click Next. Click Finish to close the wizard, and check your email to activate your TeamViewer account. Notice that when you close TeamViewer it now stays running to enable remote access – don’t forget to leave the PC switched on too. Repeat steps one and two for any other PCs you want to access remotely, logging into your TeamViewer account during the Unattended access wizard.
STEP 3 – REMOTE ACCESS YOUR PC
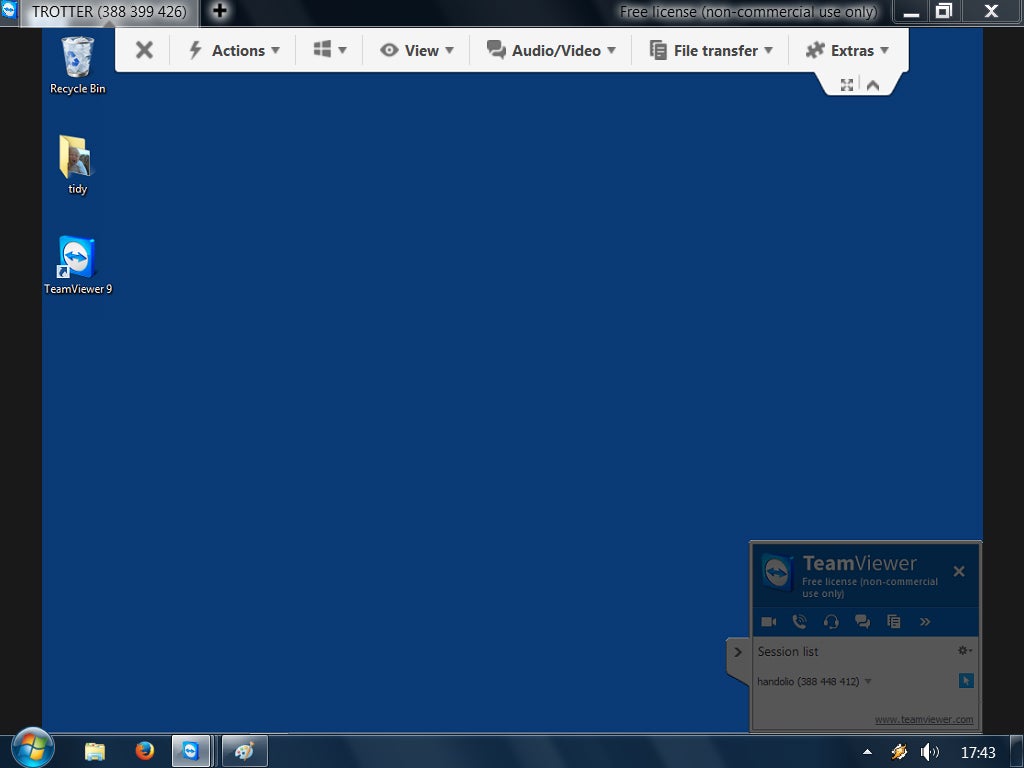
To access a PC, follow step one if necessary to install TeamViewer on the computer you’re using. Sign in to your TeamViewer account to see a list of available PCs. Double-click the one you wish to connect to – there may be a pause while it spins up its hard disks. Within a few seconds you should see the remote computer’s desktop, and you’ll be able to make mouse and keyboard inputs as though you were sat in front of it. By default, key combinations such as Alt+Tab will apply to the PC you’re physically using: if you want to send them to the remote PC, choose Send key combinations from the Actions menu. Note that if you restart the remote PC you’ll be disconnected and will have to reconnect after it’s rebooted. If you shut down the remote PC it will stay shut down, and you won’t be able to reconnect until somebody physically switches it back on.
STEP 4 – TRANSFER FILES
TeamViewer’s menus offer useful shortcuts: the Actions menu lets you quickly send Ctrl+Alt+Del, for example, and set the remote computer to lock its screen after you disconnect. The Windows icon menu includes a helpful shortcut for opening the Charms menu on a remote Windows 8 PC, while the View menu lets you focus on a single window on the remote PC, and the Audio/Video menu lets you toggle any sound coming from the remote PC on or off. Perhaps most useful is the File transfer option on the File transfer menu, which opens a split-window explorer allowing you to drag and drop files or folders between local and remote PCs. To disconnect the session, simply close the remote viewer window.
STEP 5 – CONTROL ANOTHER PC
TeamViewer also lets you view and control another user’s PC – or vice versa – provided both users have TeamViewer running and the remote user provides you with their ID and current password. Similarly, anyone connecting to you will need your ID and password, and you’ll know a session has started from the small session manager window which opens – click the cross to instantly close it and shut down all connections. You can switch roles from controlling a remote PC to being controlled by choosing Switch sides with partner, from the Actions menu. Add regular partners to TeamViewer’s contacts list and you’ll be able to bring them into an existing session using Invite additional participant… from the Extras menu. Finally, if you often use other people’s PCs while travelling, copy the TeamViewer setup program to a USB disk and choose Run only (one time use) when you run it.