To help us provide you with free impartial advice, we may earn a commission if you buy through links on our site. Learn more
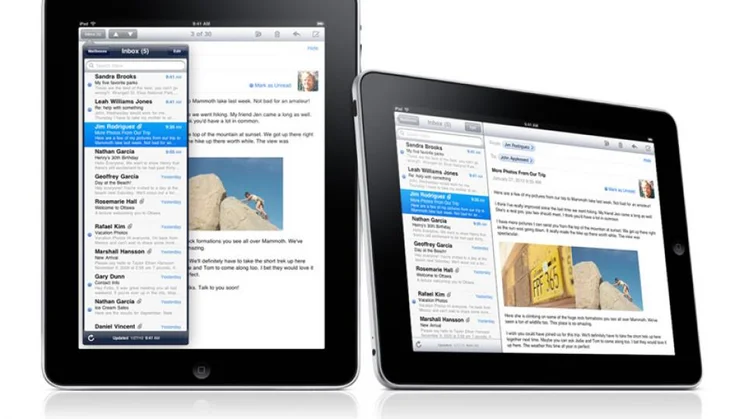
While you get a lot with a free email account, such as those from Gmail or Microsoft, you’re plagued with adverts and you get less choice over your email name. A better way is to register your own domain name and then add an email package to it. This gets you a completely custom email address and lets you expand to add more users or family members, as you want. If you’re running a business, it also looks a lot more professional to have a dedicated email address than it does to be using a free one. Here, we’ll show you what the various options are, how you go about setting them up and what the benefits are over a free service.
Why pay for email?
The big benefit, as we said, is that you get your own custom email address based on the domain that you register, such as david@mydomainname.com. In addition, you can add other email addresses as you need them, with <any name>@youdomainname.com yours to use. It means no more endlessly typing in usernames only to find that they’ve already been taken, as you do with the free services.
Once you pay for your email, you’ll not longer get swamped with adverts as you do with Google and Microsoft accounts. That’s a better use experience overall and makes sending and receiving email a lot less invasive.
Next, if you were using the free email that comes with your ISP, you can’t change provider without losing your account. Once you’ve signed up for your own email address, you can switch ISP as many times as you like, keeping the same email address.
What’s the difference in services?
There are a few different types of email account, depending on what you want to do. With an entry-level account, you’ll get a basic webmail interface, a few gigabytes of storage and the ability to connect mail clients and your mobile devices. Moving up the scale come the more advanced or business accounts. These typically cost a little more and give you the ability to synchronise your calendar and contacts with your online account, too.
At the top end, you’ll get a Microsoft Exchange account. This gives you a much more user-friendly web interface, the option to use full Outlook with your account, plus better calendar sharing and appointment scheduling.
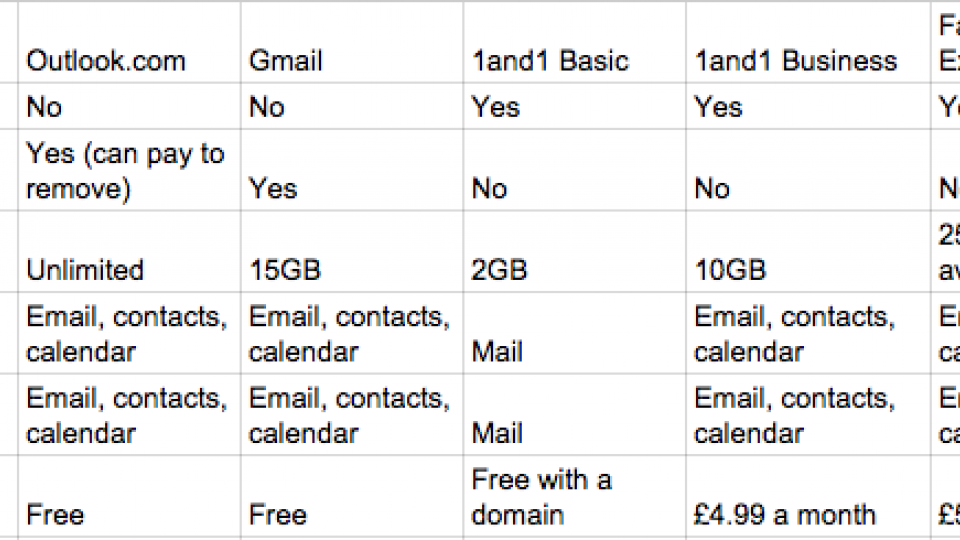
There’s also the option for Google Apps, which is a paid-for version of the free Gmail services. It gets you more storage and no adverts, but we haven’t covered it here, as you have to make some fairly complicated changes to your domain to get it working, it’s relatively expensive and it’s quite hard to configure. It’s really designed for businesses with one administrator to set everything up.
IMAP or POP3
Before we show you how to configure your accounts, there’s one important configuration consideration: should you use IMAP or POP3? When you connect to your account via POP3, the messages are downloaded from the server and, usually, deleted from it. That means that if, for example, you download your email using your laptop, when you connect from your smartphone you won’t get the same messages.
IMAP is the alternative and it leaves messages on the server. More importantly, any changes you make on one device are synchronised to the server. For example, read an email on your laptop and your smartphone will change to show that the message has been viewed; delete an email on one device or via webmail and it’s gone on everything.
IMAP requires more storage space, as you’re not constantly clearing the server, but it’s the much better choice if you’ve got multiple devices that you want to get email on, plus all of your messages are safe in the cloud. Note that Exchange accounts work like IMAP accounts: it’s a slightly different protocol, but the basic configuration is the same.
Registering a domain name
You’ll need your own domain name, such as www.expertreviews.co.uk, to get started with your email account. It’s easiest to register to the domain through the company that will provide the email service, as there’s no additional configuration required. Domain names cost from £2.49 a year, so are pretty cheap to buy.
How to configure a basic email account
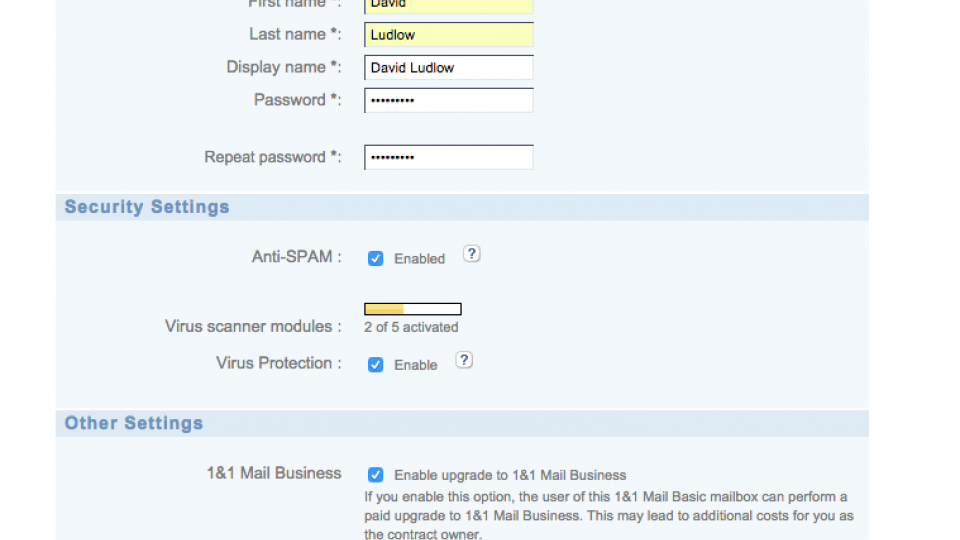
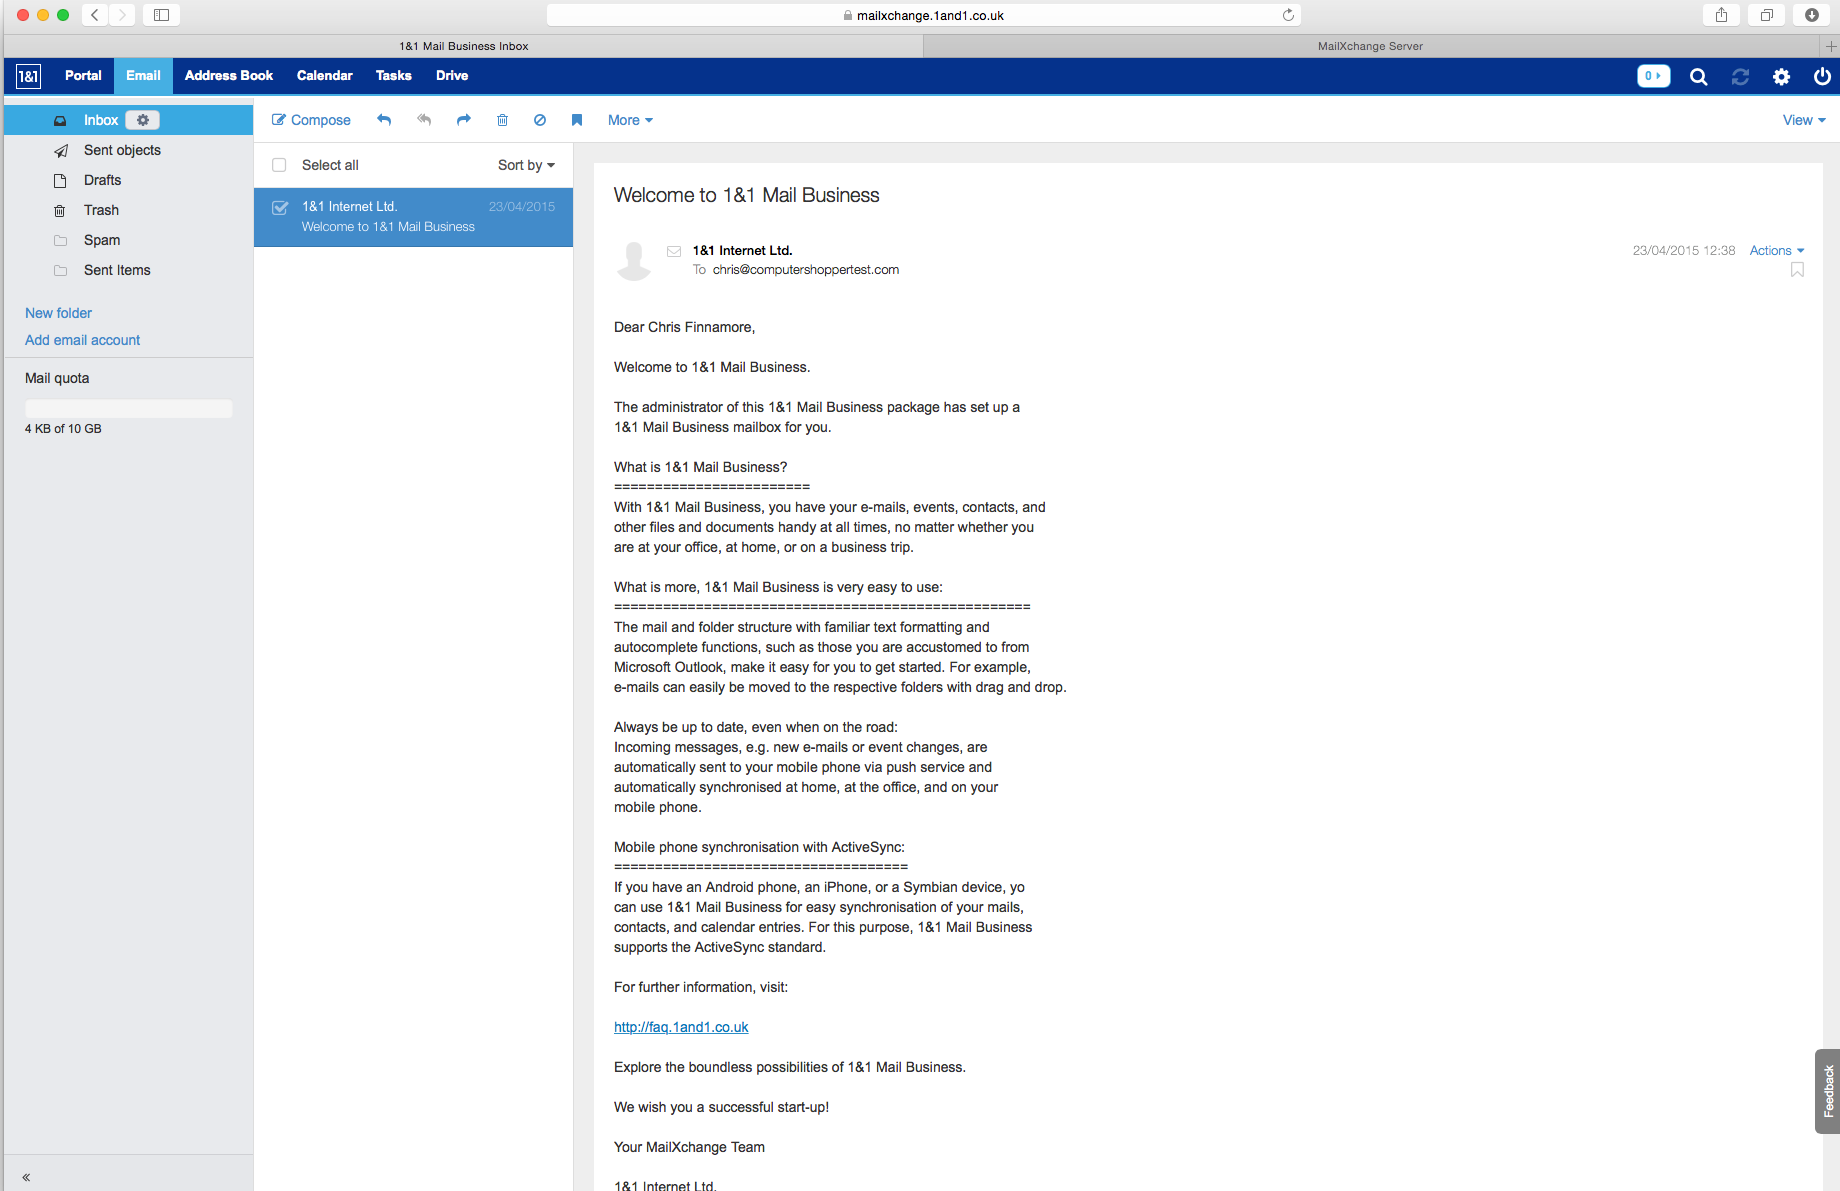
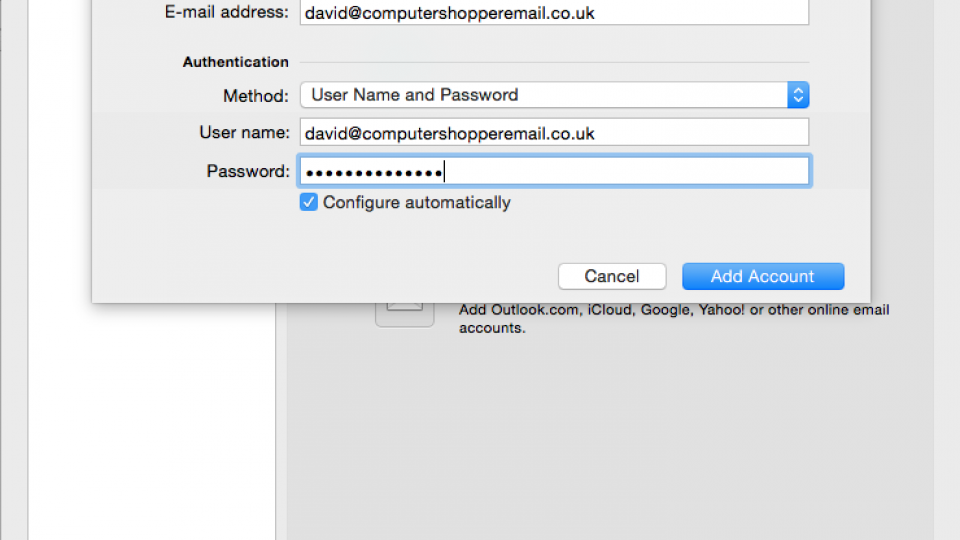
We’re using 1&1’s standard mail hosting for this walkthrough, although configuration steps are similar with other accounts, too. When you log in to your account, you need to click the selection to create an email account. You’ll have a choice between Basic and Business, so select Basic. You’ll first need to enter a name for the email account and then use the drop-drown menu to select the domain name you want it associated with, such as david@expertreviews.co.uk. Next, just fill out the details and enter a password. You can also choose to enable anti-spam and anti-virus to keep your inbox clutter-free, and if the account can be upgraded to a Business account. You may want to leave this option selected so that you can take advantage of the additional Business features at a later date.
Click OK when you’re done and the user will be created. You can now log in with your email and password at webmail.1and1.co.uk. The web interface is a little basic, but you’ll see icons across the top of the screen for email, calendar, contacts, a to-do list and more. Click on Email and you’ll see that the layout closely resembles that of a desktop email application. It’s straightforward to read email and compose new messages from this interface. If you’re only going to use the web interface, then you can use the calendar and contacts section; if you want to use a desktop client, then we don’t recommend this as there’s no way to sync them to your computer. Instead, think of this basic account as one for email only.
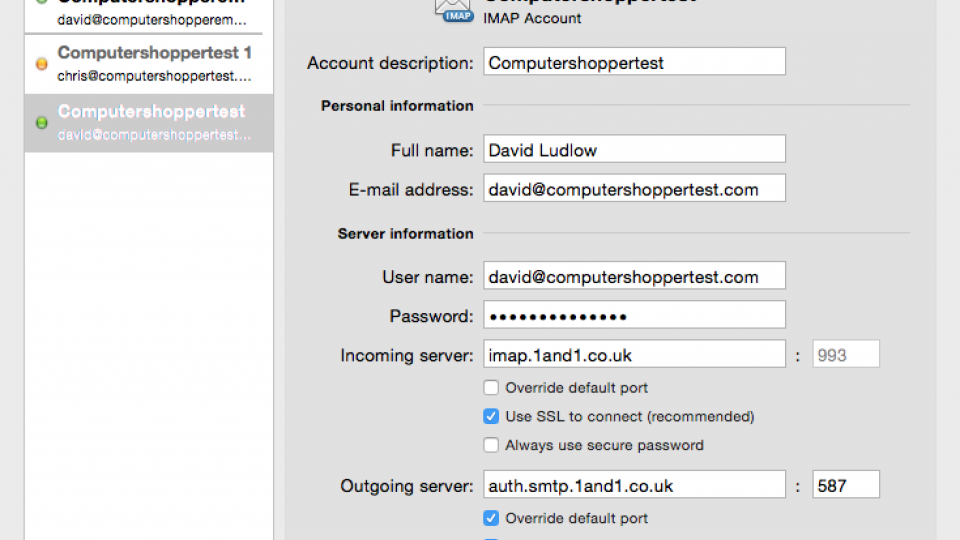
Setting up a desktop client, such as Windows Live Mail is straight forward and easy. You just need to enter a new standard mail account and use the information in the table below. Note that some email clients let you add the account, but only let you adjust the required port number afterwards, so don’t worry if you initially get an error. Your email address and password are required for authentication.
| “>Incoming server | “>Port number | “>Outgoing server | “>Port number | “>Connection type |
|---|---|---|---|---|
| imap.1and1.co.uk | 993 | auth.smtp.1and1.co.uk | 587 | SSL/TLS |
| pop.1and1.co.uk | 995 | auth.smtp.1and1.co.uk | 587 | SSL/TLS |
How to configure an advanced (business) account
If you want a bit more from your email account, including more storage space and the ability to synchronise contacts and calendars, you need to step up to a business account. We’re using 1&d1’s Business account here, although you’ll get similar features from other people.
First, you need to create an account. The procedure is very similar to creating a basic account, as above: select the option to create an account, then choose Business and fill out the form to create your account. Once you’re done you can log into your account via webmail.1&1.co.uk, using the email address and password that you created. This time around, you’ll notice that the web interface is a lot cleaner and more modern than with the basic account.
With Business mail you can use desktop clients, as well as mobile phones. We’ll show you how to configure both. If you’re using a PC and you want to sychronise your calendar as well as your contacts, you have a couple of options. First, if you have Outlook you can download the 1&1 MailXChange connector. Outlook can’t talk to the 1&1 servers directly, but this bit of software does some clever automatic conversion for you. Full instructions can be found on 1&1’s support site.
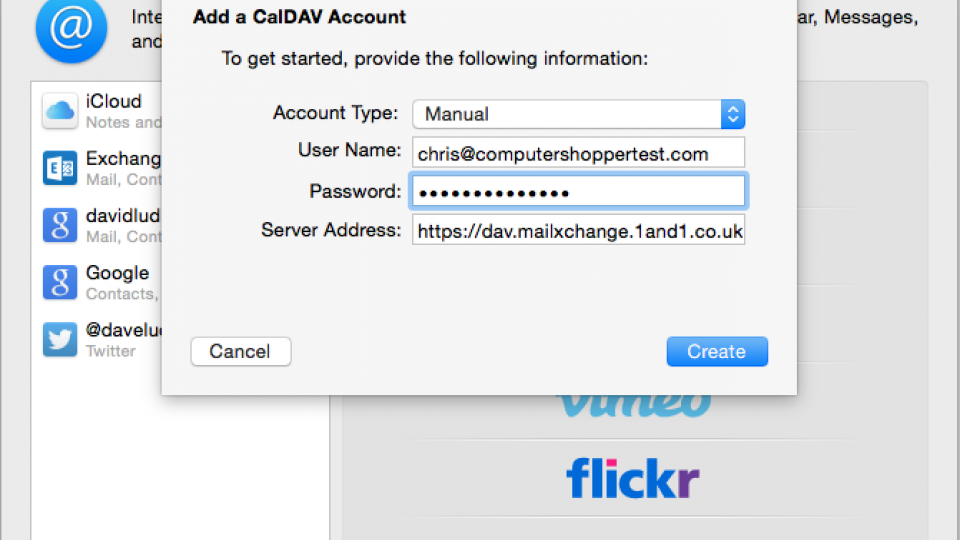
If you don’t have Outlook, then you’ve got an alternative way of connecting using CalDAV and CardDAV to access your contacts and calendar, while email is delivered by IMAP. Macs have CalDAV and CardDAV support built in. Go to System Preferences, Internet Accounts and click the ‘+’ button. Select Add other account and choose Add a CalDAV account. Select Manual in the next dialog box, enter your 1&1 email address and password in the relevant boxes, then enter https://dav.mailxchange.1and1.co.uk as the server address. Repeat the above instructions exactly, except select Add a CardDAV account to synchronise your contacts. Now when you start the Calendar or Contacts apps, you’ll see everything pulled in from your internet account.
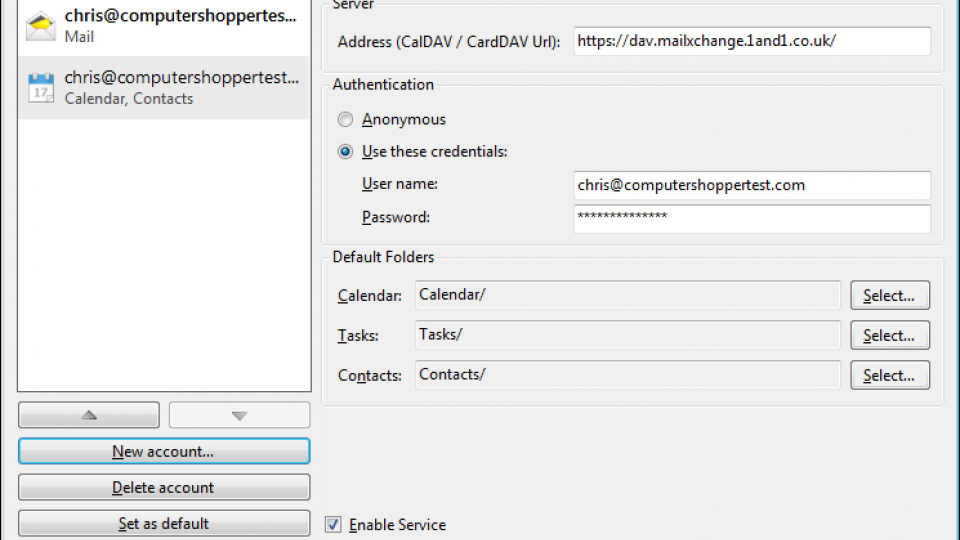
If you’ve got a PC, you need a client that can use CalDAV and CardDAV. The best free one that we’ve found is the free eM Client. Click Tools, Accounts and click Add Account. Select Calendar and choose CalDAV and click next. Enter the account address as https://dav.mailxchange.1and1.co.uk, the username as your 1&1 email address and your password. Click Next to confirm and your calendard account will be added. Contacts are added automatically, too.
As the Business Account supports ActiveSync, getting a mobile device working is easy. In Android or iOS, you just have to add a new account to the phone, choosing Exchange as the type. Follow the wizard through, entering your 1&1 email address and password as normal, but you need to use s.mailxchange.1&1.co.uk for the server address. Once complete, your phone will pull in your email address, calendard and contacts automatically.
How to configure and use an Exchange account
We’ve used Fasthosts’ Exchange service for this guide, although the configuration will be similar for other hosting companies’ Exchanger services. Once you’ve logged in you’ll need to click the link to create an email account, then you should choose Exchange 2013. You’ll then be able to choose how many email accounts you want to create (it gets cheaper, per account, the more you create), and if you want to download the latest version of Outlook (an additional £1.49 a month). Outlook’s not required, as the web interface does everything, but it’s a good option if you want the best desktop support. Choose how you want to pay (monthly or yearly) and then click Continue when you’re ready to go. You’ll need to select a domain name that you own, or buy one before continuing.
Once you’ve got your domain name, you can add a mailbox to your account. Click Email, Manage Email Packages and then click the Email button next to your domain name. Click the Create Mailbox button and fill out the form. You’ll now have your Exchange email account ready to go.
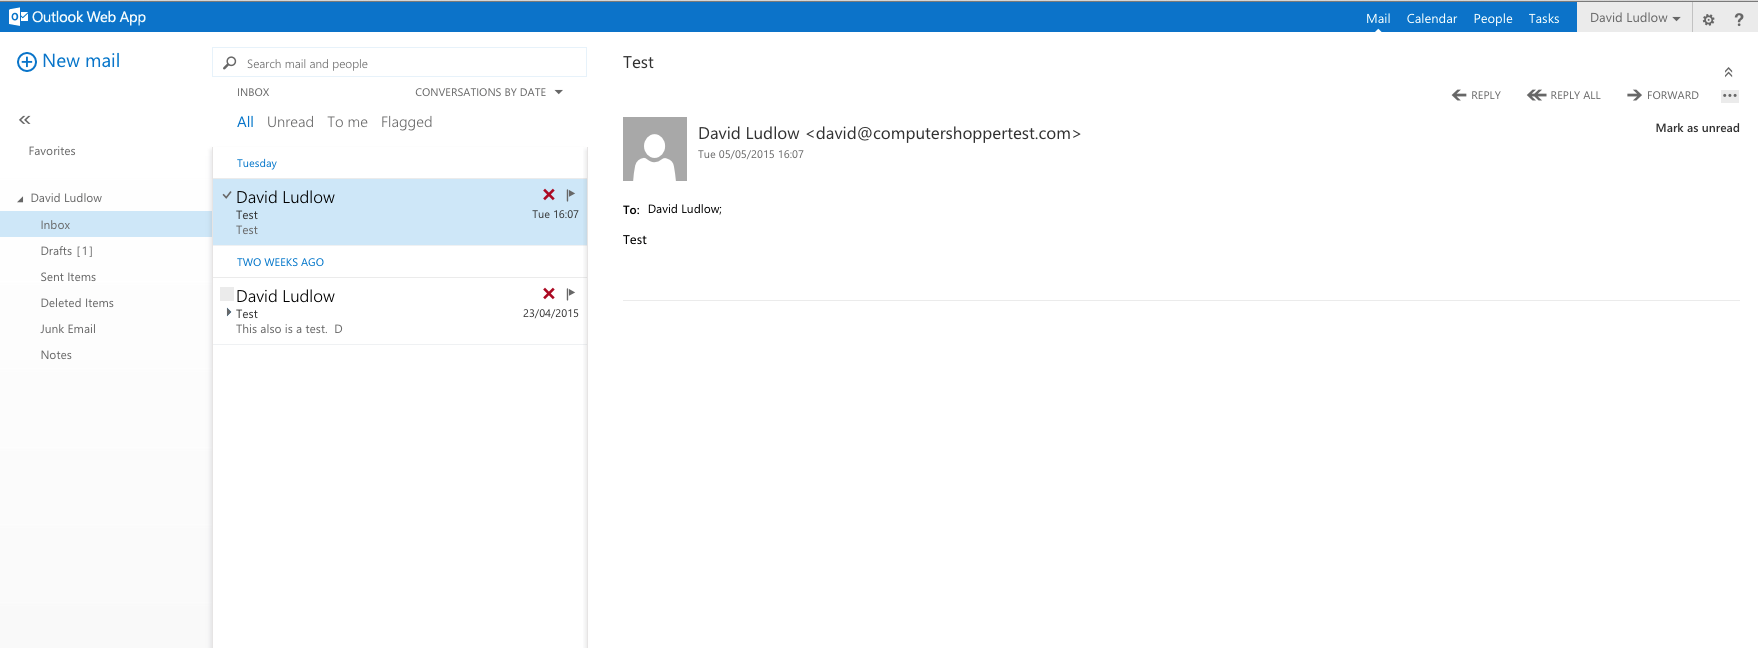
To access your account via the web, you just point your browser at https://1.exchange2013.livemail.co.uk/owa and log in with your username and password. Once you’re in you’ll see a web interface that apes the desktop version of Outlook. There are separate tabs for your Calendar and Contacts (People). Cleverly, any other email accounts you’ve added to your domain are automatically appear in the Global Address List. If you invite them to a meeting or want to send them an email, their addresses will be auto-completed.
If you’d rather use a desktop client, then you need one that supports Exchange. For PC’s eM Client is a good choice; if you’ve got a Mac you can use the built-in Mail or get Outlook. Taking Outlook as our example, you need to add a new account and select Exchange. Next, enter your email address, your username (your email address) and your password. Click Add account and Outlook will go away, find the all of the correct server settings and automatically configure itself. You can now email, get all of your calendars and manage your contacts through your desktop client.
If you want to add your email account to your smartphone, Android and iOS devices both support Exchange auto-configuration, which means that you just need to add an Exchange account, enter your email address and password, and everything will be pulled in automatically. Now, everything you do on one device (desktop, web or mobile) will be synchronised between all of your devices.


