To help us provide you with free impartial advice, we may earn a commission if you buy through links on our site. Learn more

Windows 10 is a brilliant operating system that introduces lots of new features. While most of them are really good, some just tweak the way that old features worked, which can be really annoying. If you’ve got used to working one way in Windows and don’t like some of the new-fangled tricks, here’s how to change them and to enable the hidden GodMode, which gives you access to every tweakable feature in one place.
Turn on GodMode
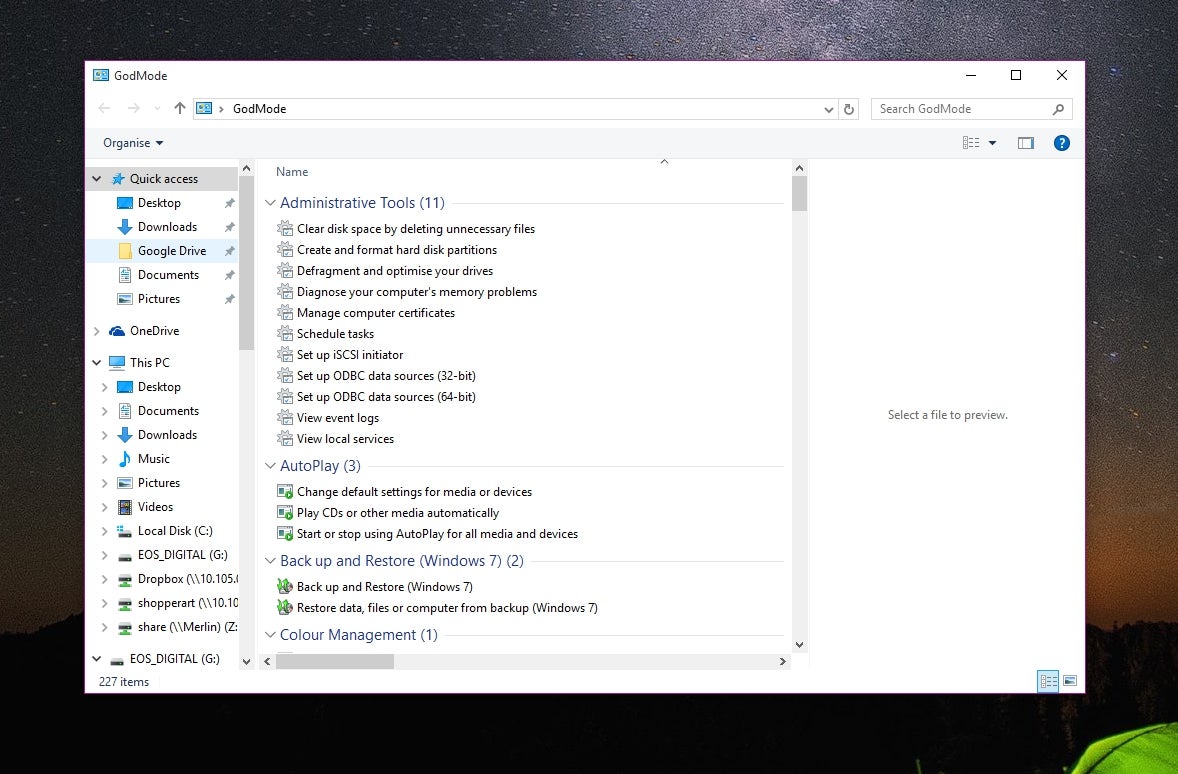
Digging through the Control Panel settings can be a laborious job. That’s where Windows 10’s ‘GodMode’ can come in handy. This was in fact introduced in Windows 7 but we were pleased to see it remains with the latest version of Windows. GodMode puts all of Control Panel’s settings in one long list, making it much easier to navigate. First, right-click on your desktop and select New > Folder. Now name the folder ‘GodMode.{ED7BA470-8E54-465E-825C-99712043E01C}’ (without the quotation marks). After you click out of the textbox, the folder will magically change to a Control Panel shortcut named God Mode. You can actually change the God Mode text above to anything you want, but GodMode seems an apt description. Double click the icon and you’ll be presented with the GodMode list of infinite power. All of the settings are organised under the corresponding header, such as ‘Sound’ and ‘Programs and Features’.
Disable Windows Snap Assist
Windows Snap made its debut all the way back in Windows 7, providing a quick and easy way to resize windows and arrange your screen when you had multiple windows open. All you need to do is click and drag a window to the side or corners of the screen and it will lock in and automatically resize.
With Windows 10, Microsoft has taken this a step further with Snap Assist. Now when you drag a window to the edge of a screen (or use Windows + an arrow key) so that it covers half of your screen, you’ll get thumbnails of other open applications to snap to the other side. This is great if you have a high resolution monitor and want to have lots of windows open all at once. Not everyone likes Snap Assist recommending what to use for the other side of the screen, though, so fortunately it’s easy to disable.
First open up the Settings application by searching for it in and select the System option. Now select the ‘Multitasking’ option in the list on the left. You can now disable the toggle for ‘When I snap a window, show what I can snap next to it’, to turn off the Snap Assist feature. With the other two toggles you can also turn off Snap altogether or stop it from adjusting the size of windows.

Background scrolling
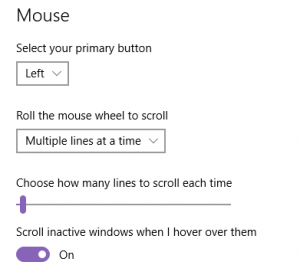
With Windows 10, you no longer have to ‘focus’ on a window by clicking it in order to scroll. By default, hovering your mouse over a window is enough to be able to start scrolling using your mouse wheel or touchpad gestures. This is great if you have multiple windows or monitors and need to work in one window while scrolling the other. A new option under the Mouse menu (Settings > Devices > Mouse & touchpad) called ‘Scroll inactive windows when I hover over them’ can turn this off.


