To help us provide you with free impartial advice, we may earn a commission if you buy through links on our site. Learn more
If you recently installed Windows 10, or – as some people have found – you woke up one day and it had already installed itself, then you’re probably blissfully unaware that the previous version of the operating system (OS) is still lingering in the background. That’s right, when you upgraded, your old version of Windows didn’t just disappear into thin air. Oh no, it’s still there in the back of your system going by the name of ‘windows.old’ and taking up valuable disk space.
This is because Microsoft isn’t quite as controlling as some other big tech companies, and instead of forcing you to update your hardware and never look back, it keeps a hold of the important files that made up your previous OS in the C:/ drive in case you don’t take a shine to Windows 10 and decide to revert back to your previous version.
Now we’re all most happy with Windows 10 here at Expert Reviews; and if you’re 100 percent certain that you’ll never want to venture back to the ghost of Windows past, and positive that you’re more than ready to give Windows 10 your all, then it’s time to hit that Disk Clean-up button.
And here’s how you do it properly, in four easy steps.
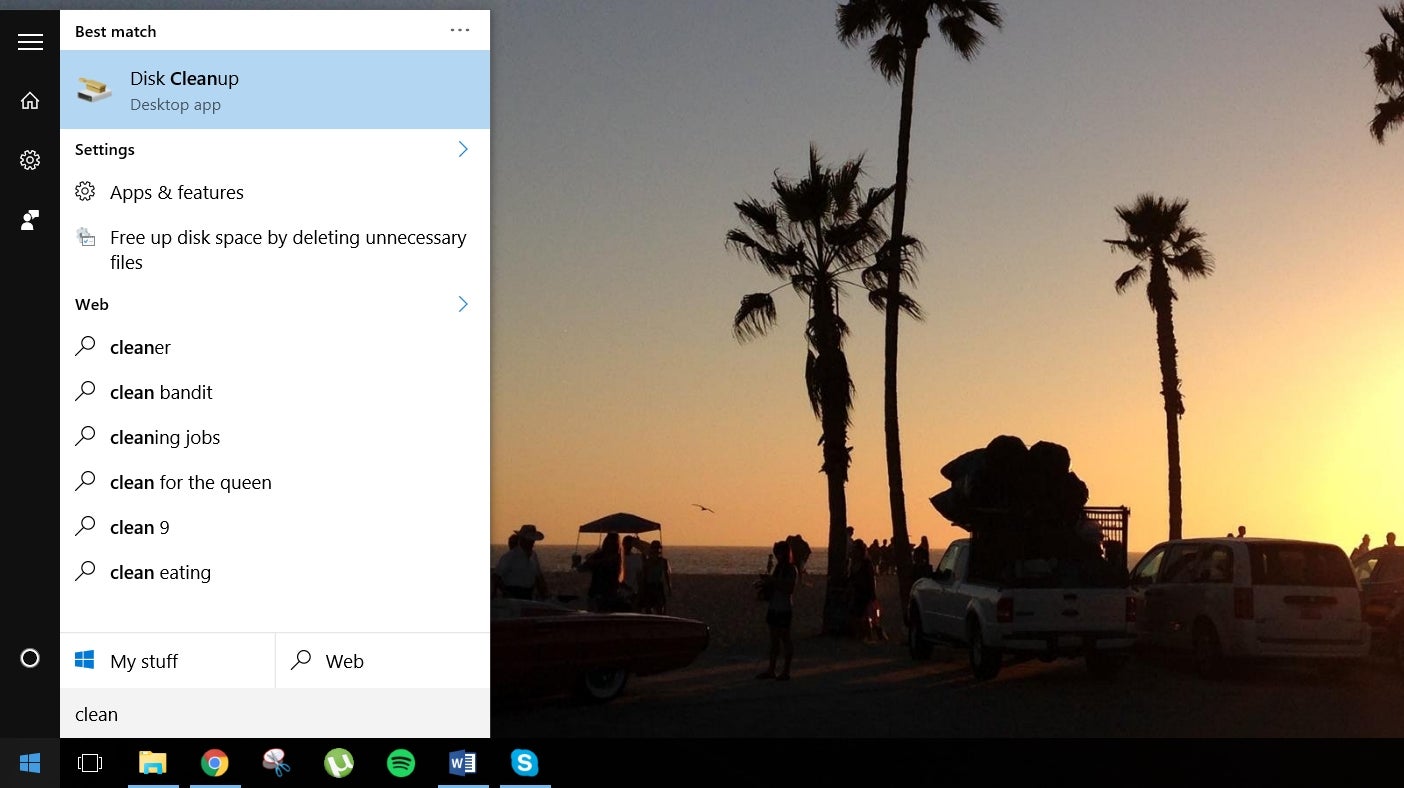
Step 1
Hit the Windows Start button and start typing “cleanup” to automatically search your system. A ‘Disk Cleanup’ app should appear before your eyes in the search criteria field. Click on this to open the app.
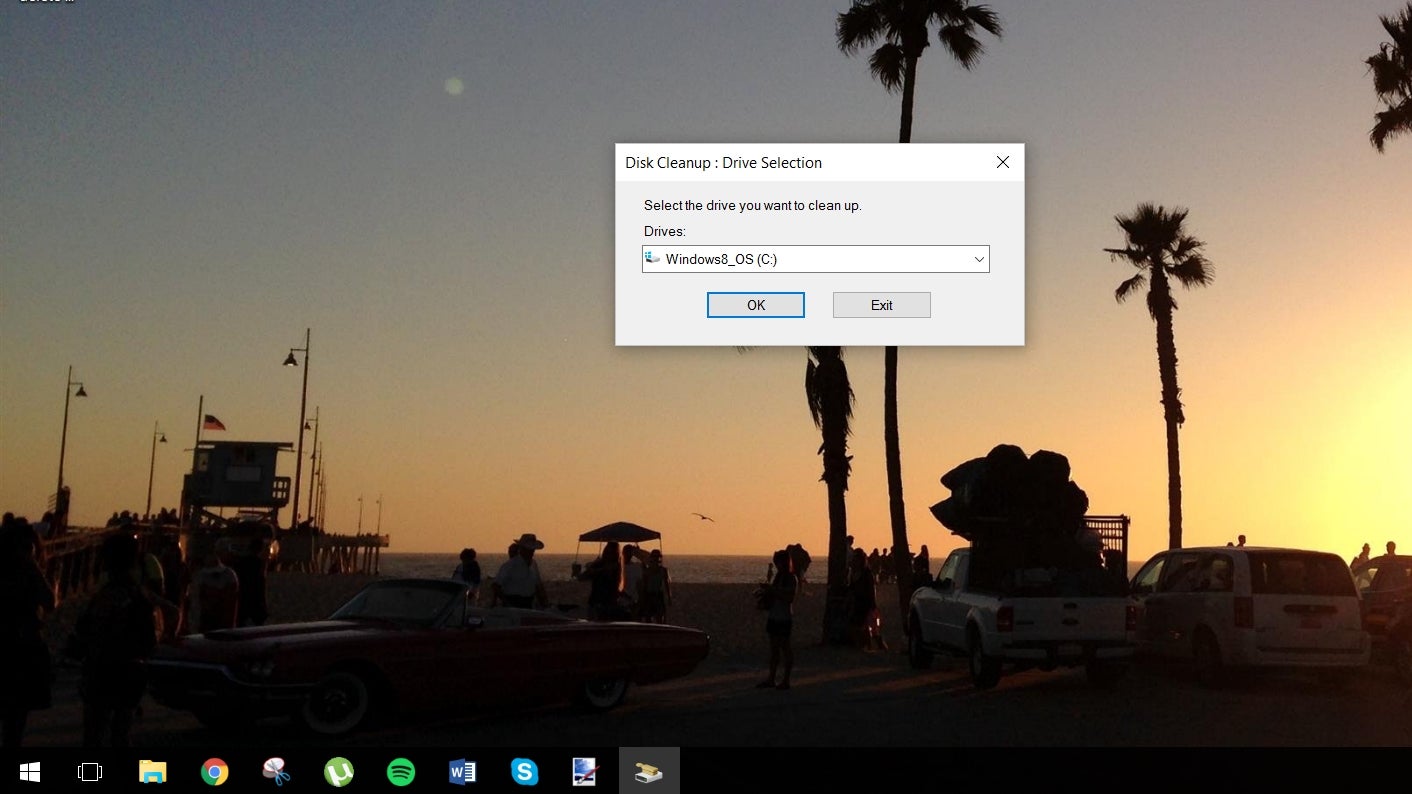
Step 2
A drive selection box will pop up. Select the drive your OS is installed on, the default drive should show first, this is usually C:/ drive. Once you’re confident this is your main drive where your OS is installed, select OK.
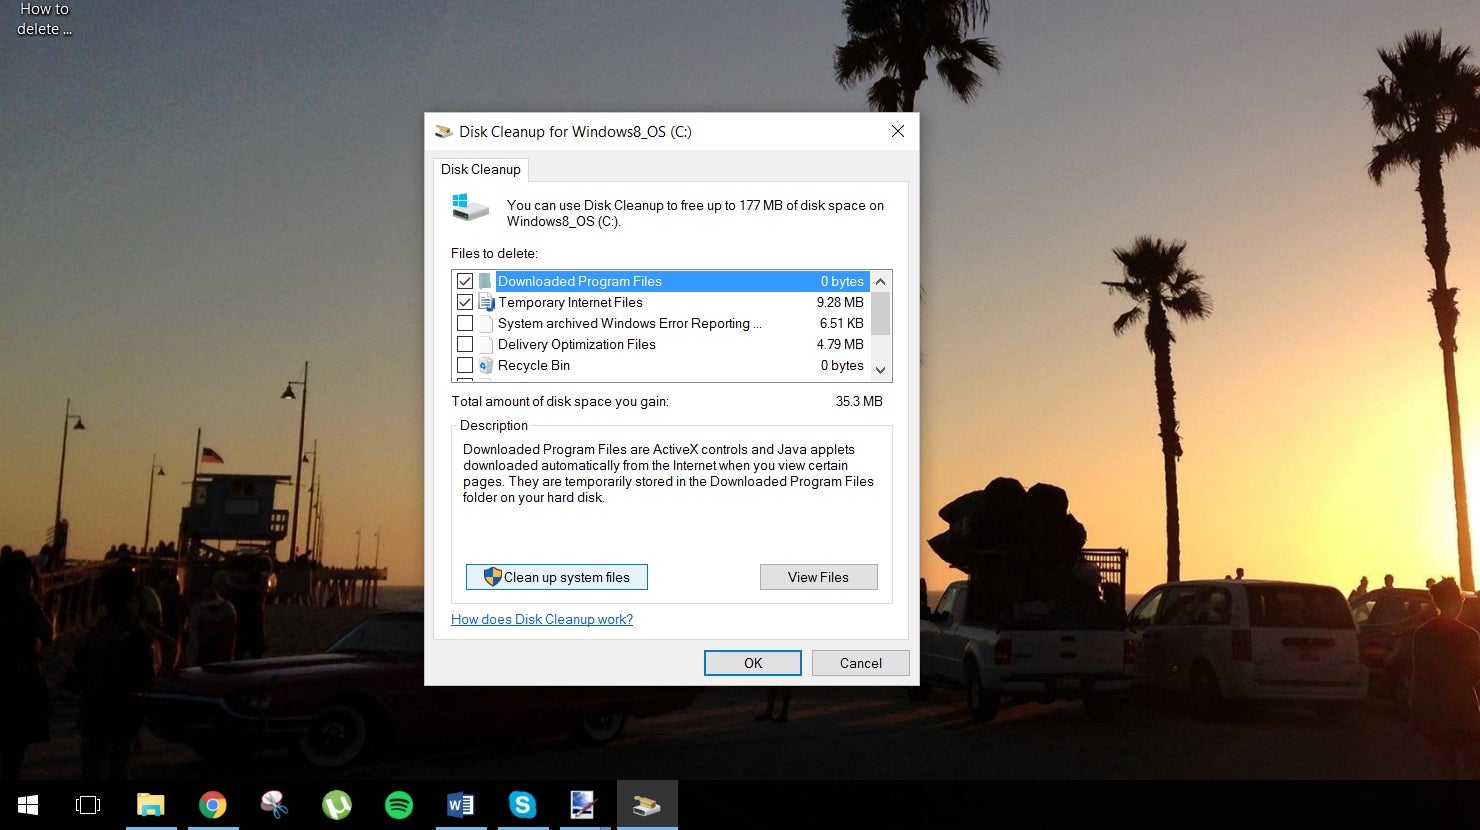
Step 3
Windows will scan your system for a few moments, then a box will pop up. Now, two things could happen at this point. A. you could be presented with a list of files to delete right away, one of which is “Previous Windows Installation(s)”, or if that option is not visible, you will need to select the “Clean up system files” option on the bottom left.
Step 4
Windows will do some more calculations and give you another a very similar looking box, this time with the option to delete ‘previous windows installation(s). You might have to scroll down to find it, but it should be taking up a sizeable bit of drive space, in our case, almost 5GB. Tick this option and click OK.
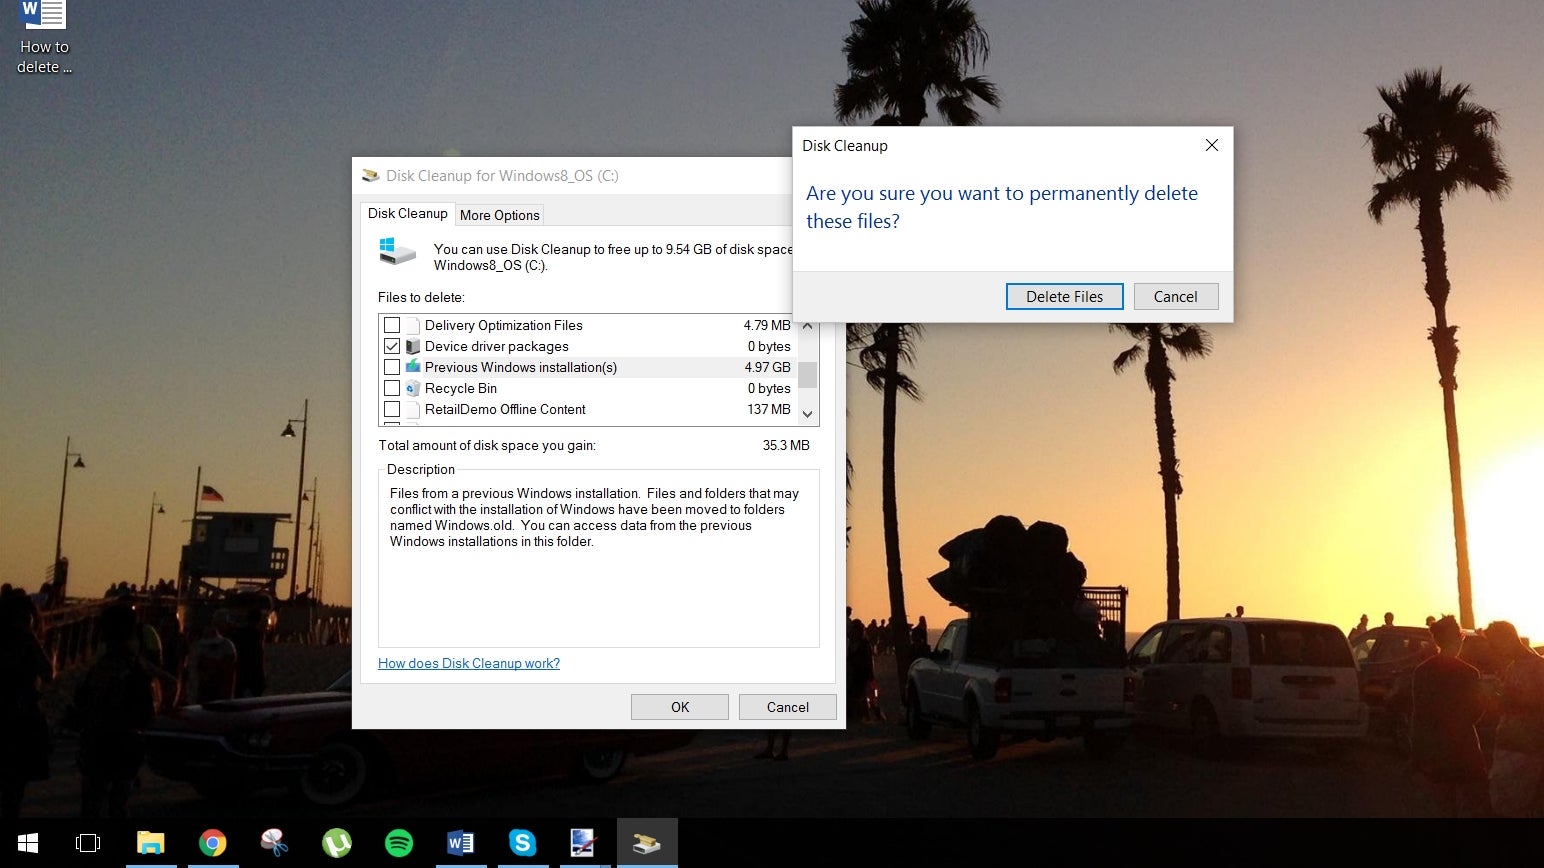
In the separate message box that appears asking if you’re certain you want to send this, click Delete Files, and you’re done.
Note that the windows.old folder gets deleted a month after your performed your upgrade anyway, so you don’t have to do anything. But if you’re desperate for your hard drive space back right now, this is the simplest way to do it.


