To help us provide you with free impartial advice, we may earn a commission if you buy through links on our site. Learn more
Microsoft’s latest operating system is slick, quick and a massive improvement on Windows 8.1’s often clumsy user interface. However, due to a combination of its new smart search, cloud-based and targetted advertising features, plus some mildly hysterical headlines, Windows 10 has a reputation for taking undue interest in your personal information and activities.
We’ll show you how to control what Windows 10 sends to Microsoft, improve your privacy and bust some of the more improbable myths about what Windows is getting up to.
Start as you mean to continue
When you first install Windows 10, don’t just skip straight through the wizard using default settings. While you can change everything later, it’s easiest to select the most secure options from the very beginning. We wouldn’t recommend reinstalling Windows 10 just to go through this process, but with many of us now working largely in the cloud, a regular install of the operating system is a largely hassle-free way to freshen up your PC.
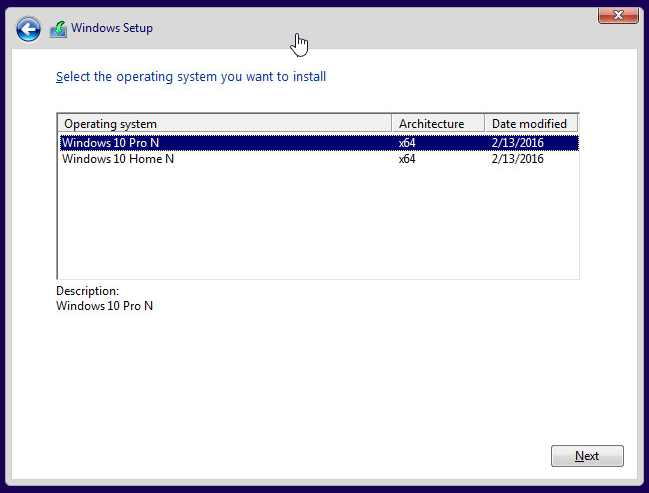
If you’re upgrading from Windows 7 or 8 Ultimate or Professional, you can choose between installing either Windows 10 Home or Pro. If you’ve got the choice, we strongly recommend opting for Pro, as it gives you a few extra tools to take full control of your operating system. If you’ve already installed Windows 10 Home but used an Ultimate or Pro key, then you can upgrade to Pro later for free.
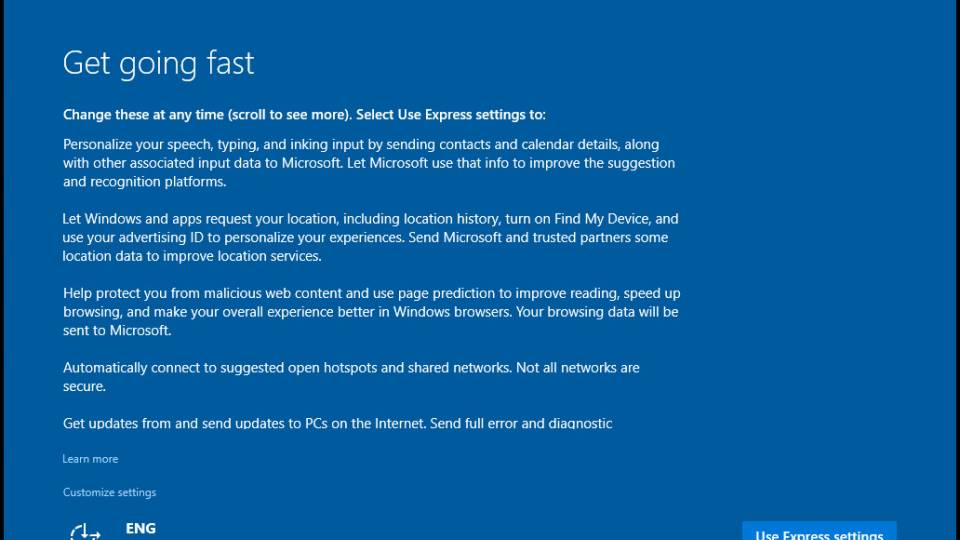
When you’re given the option, don’t use Express settings. Instead, click the much smaller Customize settings link at the lower left of the screen, see the screen below. It’s almost like Microsoft doesn’t want you to fiddle with all those settings.
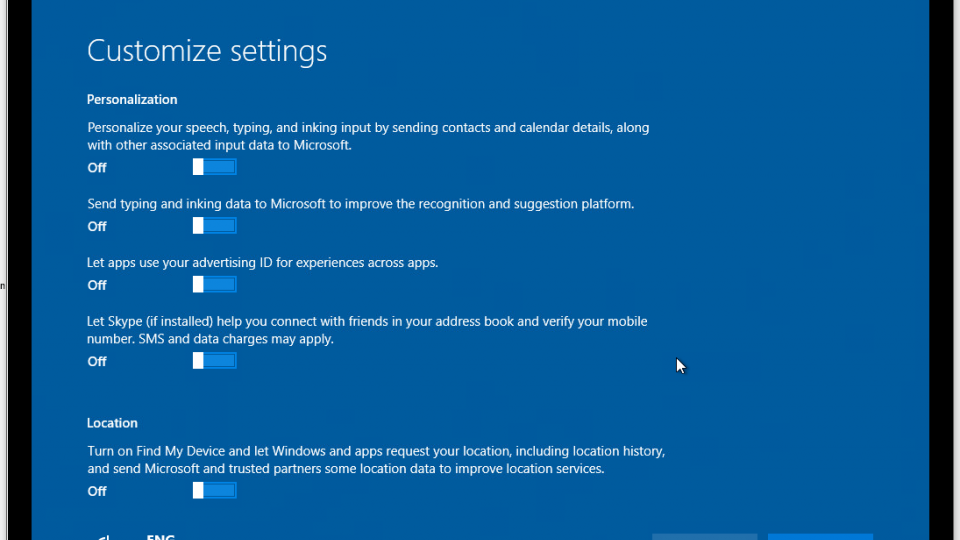
Microsoft is very clear about what the different personalisation and identification settings do, which is to be applauded. They’re all set to On by default but if your keen on your privacy then that’s not going to work for you. To restrict Windows’ ability to send back data about you or detect your location, set all of these switches to Off, as show below.
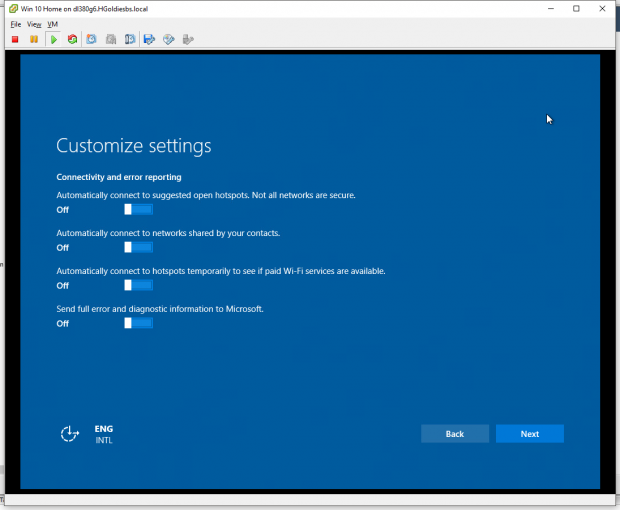
The next set of options covers sharing and automatically connecting to wireless networks. We suggest turning these off. To further restrict Windows’ ability to send back any information about yourself and your PC, you can also turn off full error reporting, but be aware that this also means that Windows’ ability to check for potential solutions to bugs and errors will be limited.
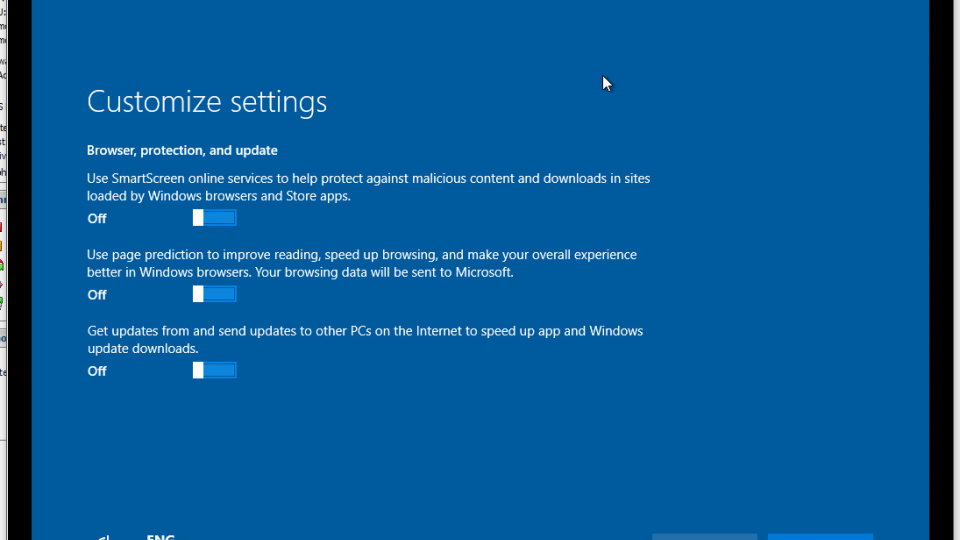
Page prediction sends browsing data back to Microsoft and the ‘send updates to other PCs’ option can use internet bandwidth without your permission, so you’ll probably want to disable both of these settings. We recommend leaving SmartScreen enabled, as it provides useful protection against malware in Windows Store apps, although it does this by sending the URLs you visit back to Microsoft to be checked against a threat list. While useful, it does send URLs back to Microsoft, so if you value privacy over security, you can turn it off.
With that done, you can move on with the installation procedure. The installer will encourage you to create or sign in to a Microsoft account. This links your computer to an online identity and tracks the system’s ‘digital entitlement’ to a copy of the operating system, which is particularly useful if you’re upgrading from an older version of Windows and ever want to reinstall Windows 10 on your PC.
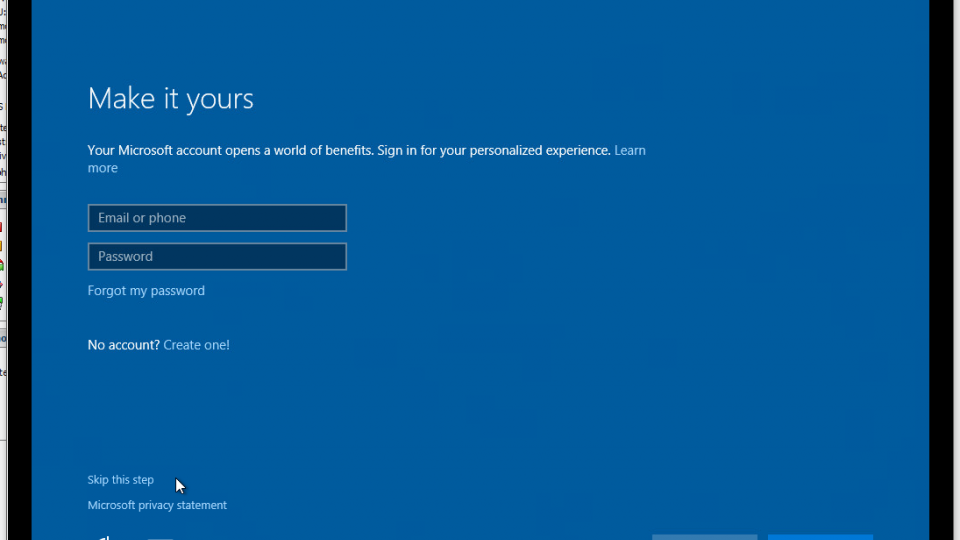
Depending on your privacy requirements, you may either want to create a dedicated email address and Microsoft account for your system, with no other links to your online or offline identity, or opt out of using an account entirely. The latter option is also useful if you need to set up a generic installation for someone else. On the Make it yours screen, select Skip this step at the bottom right.
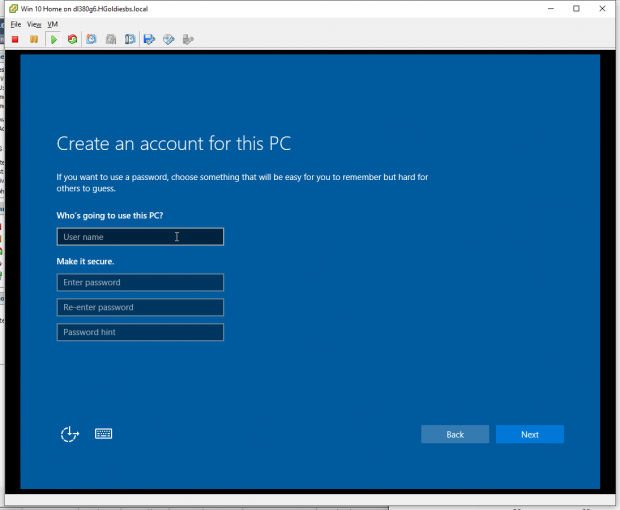
You’ll be prompted to create a local user and password. If you choose to use a password, make sure you remember it, as online password retrieval isn’t an option if you don’t associate an email address. You can always connect a Microsoft account to your PC later via the Windows Store.
If you ever want to re-enable any of the settings we turned off during installation you can do that by going to Settings in the Start Menu and then selecting Privacy.
Controlling Cortana
With installation complete, there are still a few more settings to tweak if you want Microsoft to respect your privacy. Cortana, enabled by default, is Microsoft’s personal digital assistant/smart search agent. While the Cortana process is an integral part of Windows 10 and cannot be removed, you can disable Cortana’s digital assistant and reporting features, which require that data about your computer use be sent back to Microsoft in order to work and retrieve the information you want.
This means that you won’t be able to configure Cortana to listen for voice commands, but if you want maximum privacy, it’s safe to assume that you don’t want your PC listening in anyway. Disabling Cortana also means that some of Windows’ integrated search features won’t be quite as quick or effective as they are with the assistant.
Microsoft currently asks you to opt in to use Cortana. We won’t be doing that, but there are few more steps you’ll want to take to fully disable the service.
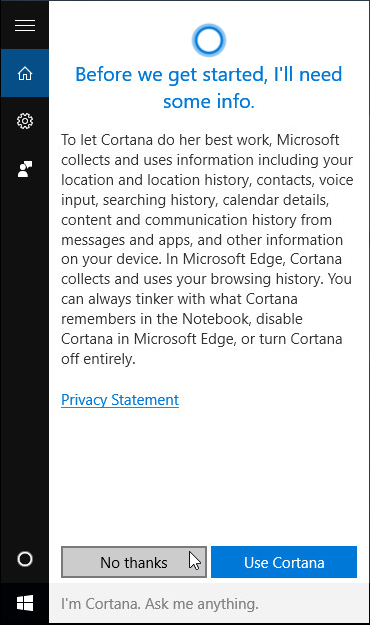
Open Cortana by clicking into the search bar, then select the gear icon to access its settings. If you’re having trouble finding the feature, just type ‘Cortana’ into Windows’ search bar and click on Cortana & System search settings in the results pane.
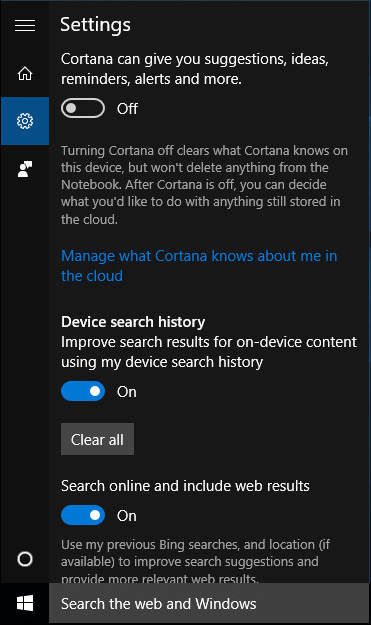
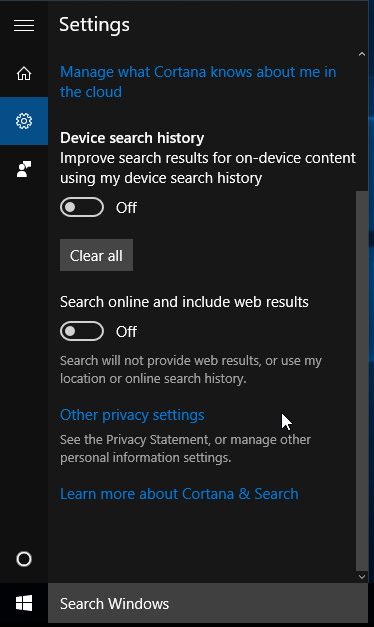
You can disable and, if necessary, clear your computer’s search history. You can also entirely disable web search results if you only want to be able to search your local PC from the Windows search bar.
Cortana also puts in an appearance in some of Windows 10’s other privacy settings, in the Speech, Inking & Typing section. You can get to these via the Other Privacy Settings link in Cortana’s settings or via the Settings option in the Start Menu. If you see a button marked Stop getting to know me, click this to disable the Cortana’s data collection service, which analyses some of what you type to improve the assistant’s ability to understand you. To re-enable it, click Get to know me.
Cortana integrates with Microsoft Bing in the same way that Google Now integrates with Google, so if you were using Cortana features such as voice search alongside a registered Microsoft account, you may need to sign in to manually delete recorded searches from your account’s online storage.
Further privacy
We’ve completed the most important steps towards making Windows 10 respect your privacy, but there are a few more settings scattered around.
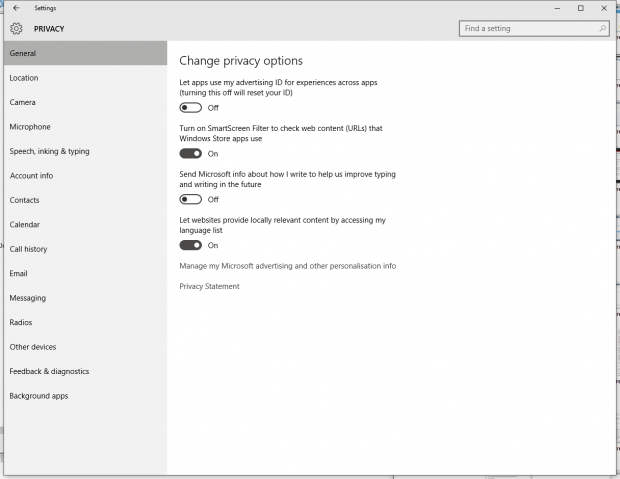
As well as giving you access to the settings choices you made during installation, there are lots of other options here, allowing you to grant granular permissions to specific Windows Store apps that want to use information or features such as location detection or your microphone.
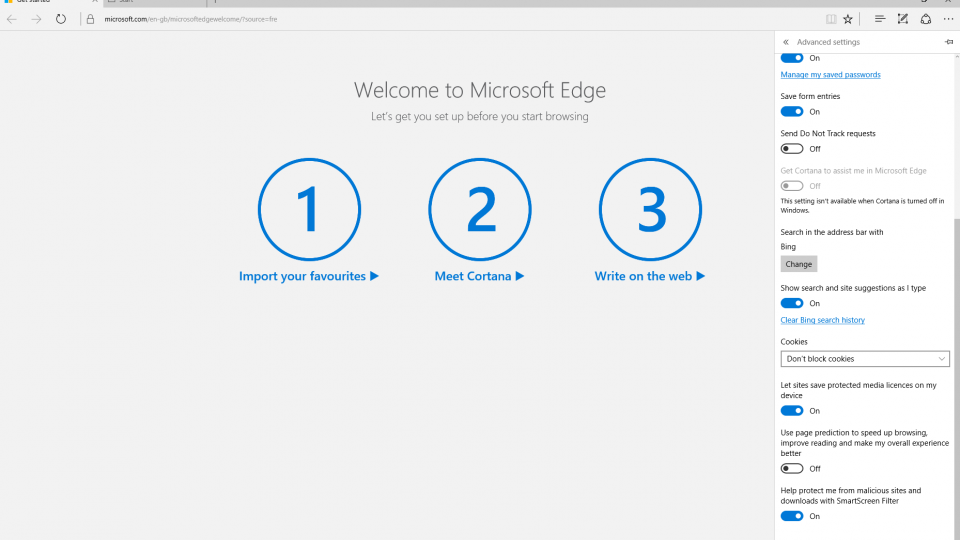
Not everyone uses Microsoft’s default browser, but Edge’s settings are closely linked to your system privacy settings. To access them, open the browser, click on the triple-dot icon at the top right to open its options menu and select Settings. From there, scroll down and click on View advanced settings.
Edge isn’t notably less privacy-conscious than most of its rivals, such as Chrome or Firefox, but you can tweak its settings to make it more secure, for example by disabling search and site suggestions, enabling its Do Not Track setting, which stops come websites from collecting your browsing data, and making sure that Cortana really is switched off.
There’s also an option in Edge’s settings to disable SmartScreen real-time malicious site detection, which sends URLs back to Microsoft to see if they’re on its malware blacklist. You’ll be more protected while you browse if you leave this switched on, though.
A professional advantage
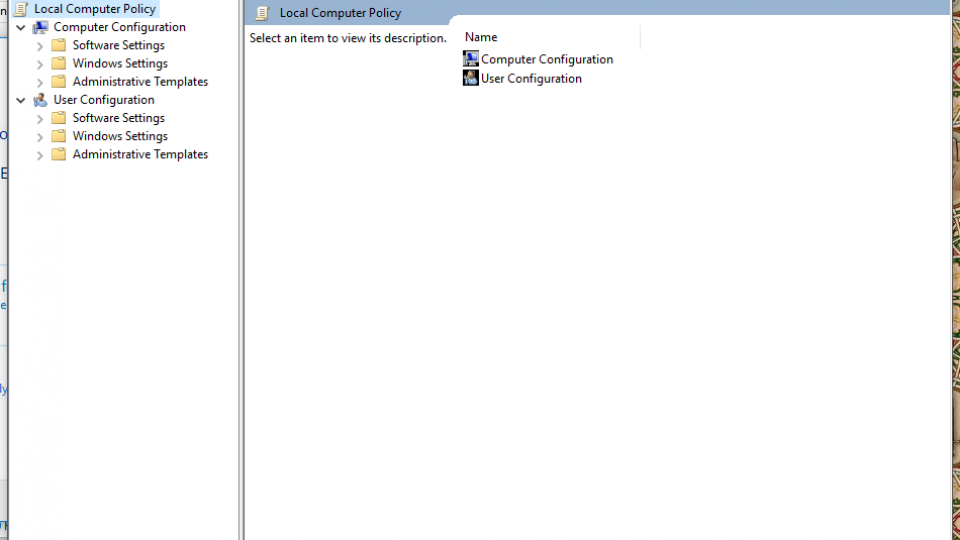
If you’re lucky enough to have Windows 10 Pro, you get even more control over how your operating system behaves, thanks to the Group Policy Editor – the same tool that allows system administrators to roll out shared settings across a corporate network.
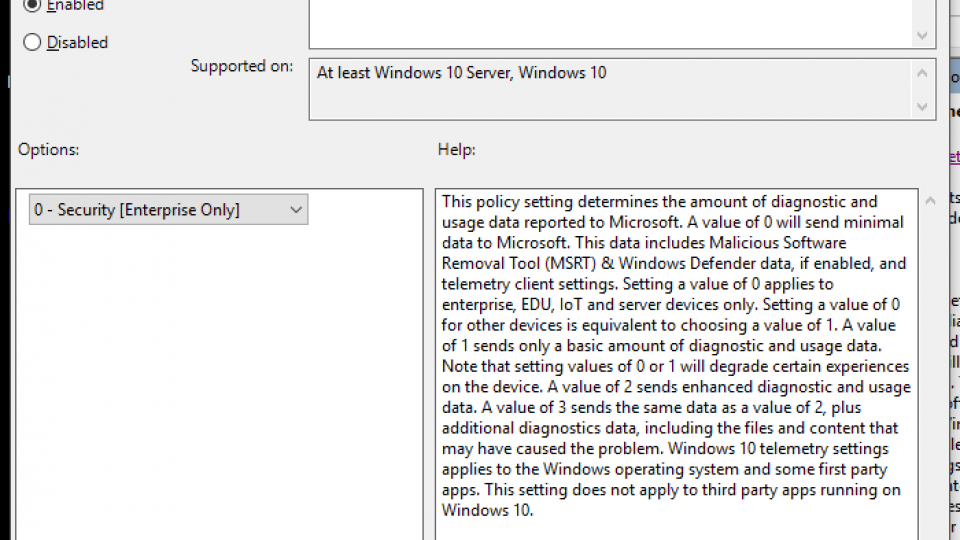
To open the group policy editor, press the Windows key to open a search box, type gpedit.msc and press enter. The option you want to disable is Microsoft’s enhanced telemetry collection, which you can find in Computer Configuration > Administrative Templates > Windows Components > Data Collection and Preview Builds > Allow Telemetry. Click Edit Policy Setting and set the option to Enabled. You can then set Telemetry to 0 – Security, which sends only minimal, absolutely required data back to Microsoft.
Surf safely
While this guide will help you apply the most secure and privacy-conscious settings to Windows 10, privacy doesn’t start or end with your operating system. When you sign into search engine accounts for personalised results, use social media or log in to your Xbox account to get games from the Windows Store, you’re associating your behaviour, location and activities with your online presence.
Doing so is key to the way most of us use the internet, and the companies that hold our data usually go to great lengths to preserve their customers’ privacy against everyone from hackers to national governments. After all, customers and the data they generate are a valuable resource to Google, Microsoft and Facebook.
If you want to take further steps to ensure your privacy online, you can look into using a VPN with SSH tunnelling to conceal your internet traffic, secure messaging services such as Signal, encrypted email, tools to disable online advert tracking and anonymous search engines such as DuckDuckGo. However, it’s important to remember that when it comes to loss of privacy and identity theft, it’s often the information we’re happy to give away freely that’s most easily exploited.


