To help us provide you with free impartial advice, we may earn a commission if you buy through links on our site. Learn more
The shift from desktop software to mobile apps has caught some software publishers on the hop, but Adobe has embraced the change. Photoshop Mix is its latest effort, and is available for free for the iPad, iPhone and iPod touch. It’s not as feature-packed as Photoshop touch (£6.99 for the iPad, £2.99 for the iPhone) but there’s a surprising amount it can do even with its small collection of features.
Creative Cloud
Creative Cloud is the name of Adobe’s subscription service for its desktop applications, but it’s also the name of its cloud storage service. Customers on paid subscriptions get 20GB of online storage, but it’s free to sign up to an Adobe ID and receive 2GB of free storage. This is a requirement for using Photoshop Mix. The app can transfer images to and from the iOS device’s Camera Roll, but saving to Creative Cloud has various advantages. It provides an offline backup, and makes it easy to transfer files to a desktop computer. It also means projects can be saved in PSD format, retaining access to separate layers and masks if you want to carry on editing in Photoshop Elements or another desktop editor. Transfers work the other way too, so files can be uploaded from a desktop computer to the cloud and downloaded into Photoshop Mix.
With the app installed, tap the + button to load an image to edit from the available sources: the iOS device’s local storage and camera, Creative Cloud, Lightroom (via Creative Cloud), Facebook and Dropbox. Existing projects can be saved to Creative Cloud as a PSD file using the Save to Photoshop option. Tapping the Creative Cloud icon below a project file in the browser backs up that project, complete with project settings.
Shaping up
The first task for most photo-editing jobs is to crop and straighten the image. As we’ll explain below, there are some situations where you might want to hold off doing this until later, but we’ll cover it now because it’s so easy.
In fact, it’s arguably a little too easy in Photoshop Mix. When no editing tool is selected, dragging the canvas to move, pinching it to zoom or twisting to rotate performs an edit rather than just changing your view of the canvas. Thankfully, this and many other edits are non-destructive, so cropped pixels are merely hidden rather than removed. However, if you want to overlay two copies of the same image (for reasons we’ll explain below) it’s best not to crop just yet.
Moving, resizing and rotating when no tool is selected only adjusts the one layer. To perform a conventional crop that affects both layers, tap the Crop button. Edits can still be made by dragging the canvas itself, but here it’s also possible to drag corners and edges to adjust the size and shape of the canvas. Various preset aspect ratios are available by tapping the thumbnails at the bottom.
Colour correction
Tapping the Adjust button reveals Photoshop Mix’s colour-correction controls. The Auto Fix button calibrates colours automatically, but it’s easy to fine-tune these settings or to process colours manually. Adjustments are made by selecting a control and then swiping the image left and right.
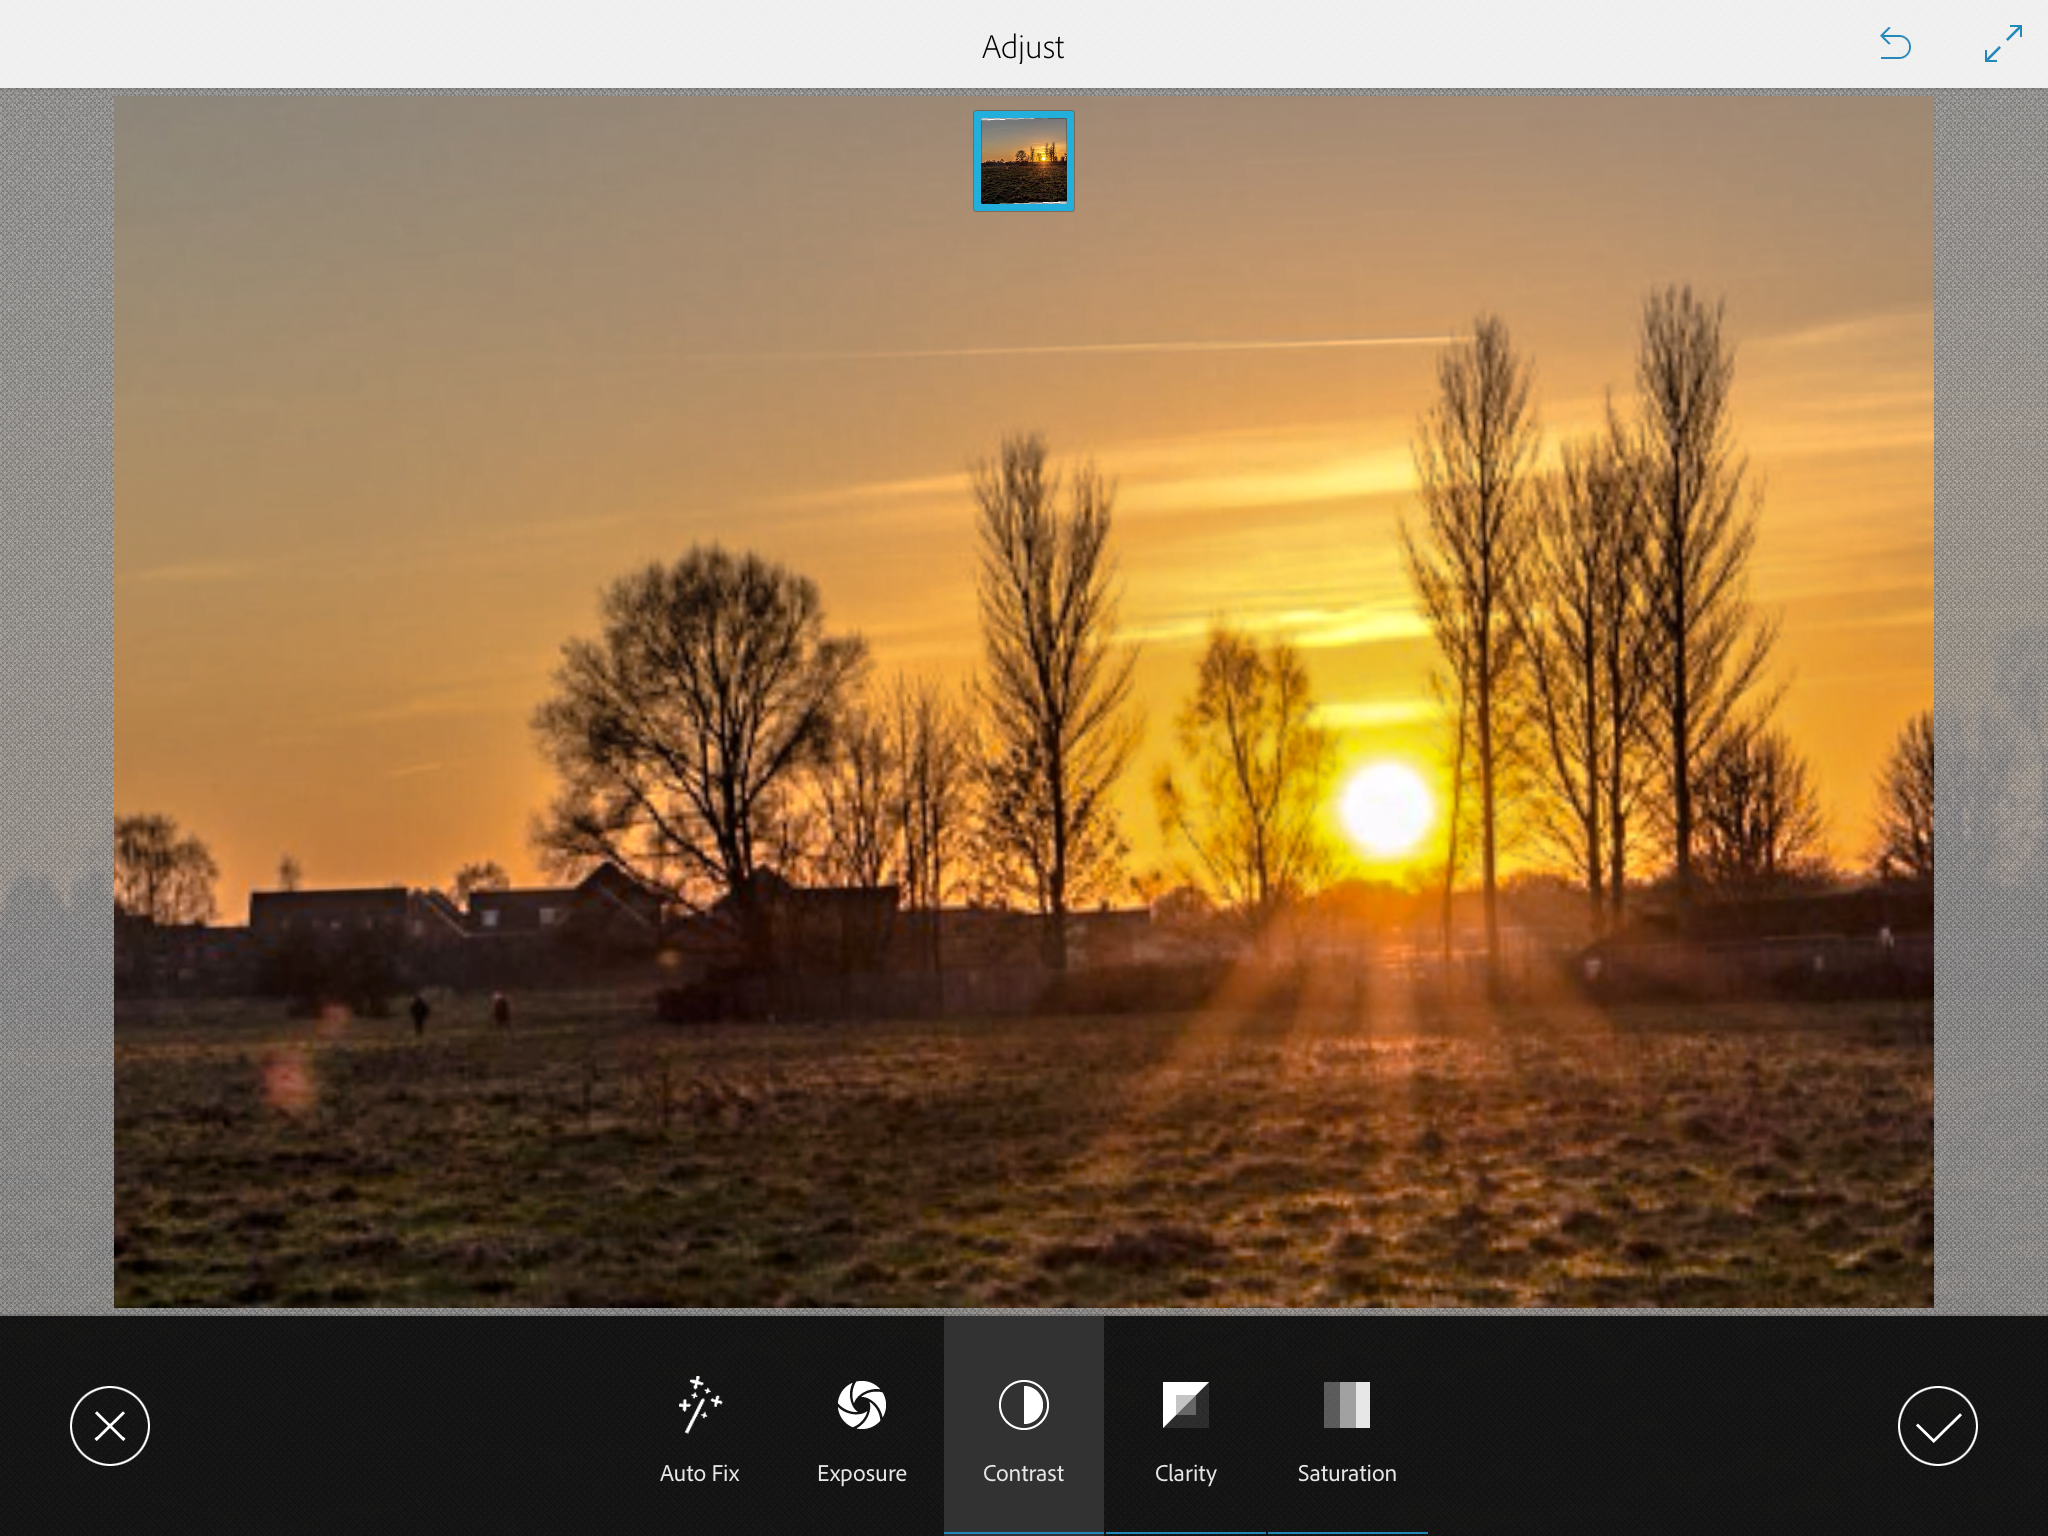
^ Lowering the Contrast and boosting the Clarity controls brings out details in the shadows and highlights while still maintaining punchy contrast
Exposure, Contrast and Saturation don’t need any explanation, but the Clarity control is more unusual. This boosts the contrast compared to nearby pixels, placing the effect somewhere between contrast and sharpening. It’s useful for bringing out details, but without the risk of obliterating shadows and highlights as the Contrast control is prone to doing. Boosting the Clarity can make faces look a bit craggy, but it often works a treat for landscapes.
It’s a bit frustrating that Photoshop Mix lacks a gamma control for adjusting the brightness of mid-tones. However, reducing the Contrast and boosting the Clarity does an excellent job of revealing details that are getting lost in the darkest and brightest parts of the image.
Get the Looks
Photoshop Mix’s Looks are one-click creative effects along the lines of Instagram filters. Some are quite dramatic, such as the high-contrast, grainy colours of Twilight or the washed out sepia tones of Vintage. Others, such as Natural, Brighten and Landscape, are designed to flatter colours without making images look obviously processed.
These filters become more interesting when they’re applied to a limited area of the frame, and this is something at which Photoshop Mix excels. Simply swipe a finger across the image while auditioning filters, and the selected filter will only be applied to the area you’ve selected. Doing so will also reveal controls for modifying the selected area.
There’s a choice of Basic or Smart area selection, with the latter automatically following the contours of shapes in an image. In most instances this gives the best results, but sometimes Smart selection can misinterpret shapes in a photo. In that case, switch to Basic mode, adjust the brush size, zoom in with a two-finger push and define the area you want manually. Switching between Add and Subtract modes is useful for fine-tuning a selection.
Enabling Refine Edges softens the edges of the selection to avoid harsh borders, but does so in an intelligent way so that crisp edges remain sharp and softer or complex edges such as hair and foliage are handled appropriately. It’s nearly always worth having this enabled. Feather Edges applies a blanket softening to the edges of the selection, and can be useful for applying subtle colour tweaks.
Finally there’s the Invert button, which flips the selection. This is useful for when it’s quicker to define the areas of the image that you don’t want to be processed rather than the areas you do. For example, a common trick is to have the main subject in full colour and convert the background to black and white. You can achieve this by selecting the Portrait filter, selecting the main subject and then tapping Invert.
^Applying the Portrait Looks filter to the background helps our subjects stand out
The filters applied in the Looks section will interact with any colour correction applied in the Adjust section, so you may find that you need to return to the Adjust controls. This is where Photoshop Mix’s non-destructive approach comes into its own. Because neither sets of effects have been applied permanently to the image, you can adjust or remove them at any time. It also means you can fine-tune their settings without having to apply the filters over and over again, which would degrade image quality.
^ A combination of Adjust and Looks settings on two layers has let us apply different colour correction settings to the foreground, horizon, boat and sails in this image
Be selective
Photoshop Mix supports two layers for combining two different photos. It also means you can import two copies of the same photo and process each one separately. With the help of the Cut Out tool to remove parts of the upper layer, this means you can apply two sets of colour correction settings and two independent Looks to different parts of the image.
Tap the square with a + symbol at the top of the screen to load an image into the upper layer. This is the job that we referred to earlier that it’s best to do before cropping the image, or else the two layers won’t align correctly. If for any reason you want to swap the order of layers – perhaps to see what’s on the lower one momentarily – just drag one layer over the other.
The Cut Out tool is the same as the selection tools built into the Looks filters, except for an additional Auto button. Tapping this prompts the app to hazard a guess at what the main subject of the photo is. In some cases this might provide a useful shortcut, but if there are lots of errors it might be easier to tap Undo and make the selection manually with the Smart or Basic brush. Cut Out is yet another non-destructive tool, so the pixels you can’t see are hidden rather than deleted. That means you can return this tool at any time to adjust the selection.
The Cut Out tool can also be used to combine two different photos, of course. Achieving photorealistic results isn’t easy, as it depends on the lighting and perspective of the two images being compatible with each other. We managed to get away with it with our duck dropped into a lake (see below) because both photos were taken in overcast conditions and there wasn’t much in the way of perspective reference points in either photo. It was still a bit of an effort matching the colour of the ripples around the duck, which we wanted to keep, with the reflection of the pink clouds. Applying the Warm Looks filter and masking it so it only applied to the water and not the duck did the job.1 Applying a Brighten filter to the foreground and trees helps those areas stand out…2 and feathering the edges of those areas blends the filtered and other parts of the image3 In comes our duck to add some interest to the foreground4 We’ve adjusted colours and cut it out, including the ripples that surround it…5 …and then feathered this selection too
6 Finally, a Warm filter is applied to the ripples to match the pink of the reflected clouds. The duck has been masked out of this filter so it doesn’t become pink too
Server-powered edits
Photoshop Mix’s other tools, located under the More Edits button, are only available when the iOS device is online. They involve uploading image data to the cloud for analysis on Adobe’s servers. It’s an odd approach, but it does the job without too much delay. If these features don’t work, double-check that you’re successfully logged in with an Adobe ID account. Initially we found that the app hung at zero per cent progress, but re-entering our Adobe ID username and password resolved the problem.
The Upright tool is similar to the one in Adobe Lightroom. It identifies straight lines in photos and skews the image so those lines are parallel to the edges of the photo. This often improves the appearance of buildings, removing the sense of perspective that makes them appear to taper towards the top. It can help improve the composition of all sorts of other photos, too.
^ The Upright tool identifies straight lines and skews the image to make them parallel to the edges of the canvas
Shake Reduction is a feature that was recently introduced to Photoshop CC, so it’s a bit of a surprise to find it in a free app. Essentially it’s a form of digital sharpening, but it analyses images to try to identify the exact shape by which pixels are blurred due to camera shake. The app offers three processing results to choose from. In our tests none of them looked particularly convincing, but it’s an interesting tool to experiment with.
Content-Aware Fill is probably the most useful of the three online tools. If there’s something that – or someone who – you’d prefer not to be in a photo, select this tool, paint over the unwanted subjects and tap Fill. The app then clones from other parts of the image to cover up the offending item. It works best for backgrounds with a random texture such as grass and trees. Regular structures such as buildings can make the cloned area much easier to spot. There’s a lot of intelligence built into this tool, though, and the results are often highly convincing. We like photos to have a strong, simple composition, and getting rid of minor distractions can go a long way towards achieving this.
^ Use Content-Aware Fill to tidy up messy parts of photos
Mixed results?
It’s early days for Photoshop Mix, and there are plenty more things we’d like to see included, such as white balance and gamma adjustment, support for more than two layers, and possibly the ability to match colours in different layers automatically. It’s also frustrating that the Undo function is only available while making adjustments to a particular tool, and when moving from one tool to another. It’s an excellent start for this app, however, and we’re looking forward to seeing how it develops.


