To help us provide you with free impartial advice, we may earn a commission if you buy through links on our site. Learn more


The iPad is a great tool for editing photos and videos thanks to its large screen, high resolution and brilliant touch interface. It’s so good that you may even want to edit photos and videos that you took on a different device, such as your iPhone or DSLR camera. It’s abilities like this that mean tablets, such as the iPad Air and iPad Mini with Retina Display, are brilliant creative devices.
The one sticking point is that iPad apps can only use videos and photos that appear in the Photos app, in the Camera Roll; any videos that appear in the Videos app are inaccessible. Of course, photos and videos you’ve shot on your iPad appear there automatically (see our iPad tips and tricks for shooting better video guide), so it’s just external footage that you have to worry about.
Fortunately, Apple makes it easy to put photos and videos into the camera roll, with a variety of methods open to you. We’ll take you through all of the options. Remember that any videos you want to put on your iPad have to be in the correct format to play. You can read our guide on how to convert videos for iPad and iPhone for more information.
AIRDROP FROM AN iPHONE OR iPAD
One of the easiest ways to transfer photos and videos is to use AirDrop to send them from your iPhone or another iPad. This method is much more useful for video files, as photos are automatically shared and synchronised using iCloud; however, it’s also an easy method for a friend to share photos with you.
Using AirDrop gives you an extra degree of flexibility, too. You may find that you want to shoot certain scenes using your iPhone 5S, as it has a superb Slo-mo mode, which the iPad range currently doesn’t have. AirDrop uses a combination of Bluetooth (to discover nearby devices) and Wi-Fi (to transfer files at high speed), making it both quick and extremely reliable.
To use AirDrop, you need to turn on Wi-Fi and Bluetooth on both devices. Bring up Control Centre by swiping up from the bottom of the screen and make sure both are enabled. Next, you need to have AirDrop turned on, on both devices.
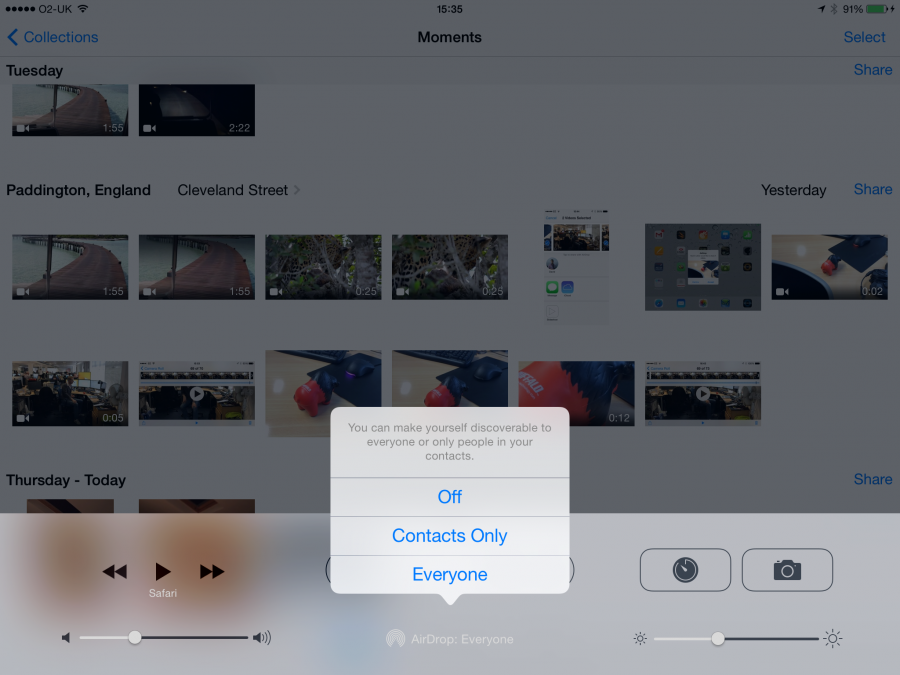
There are two options: Everyone and Contacts Only. Everyone means that your device is discoverable to anyone; Contacts Only means that only your contact can see you. The latter option means that your iPhone or iPad has to have one of the sender’s iCloud addresses in their Contacts, and that device has to be connected to iCloud. Finally, both devices need to have their screens turned on.
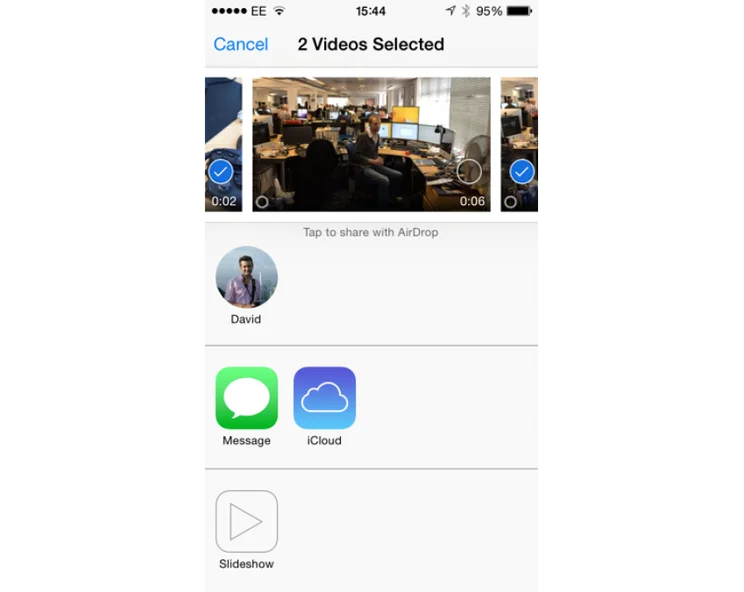
To share photos and videos, go to the sending device. Open Photos, tap the video or photo that you want to share and click the Share button at the bottom left. You can now use the top bar of thumbnails to select multiple videos and photos.
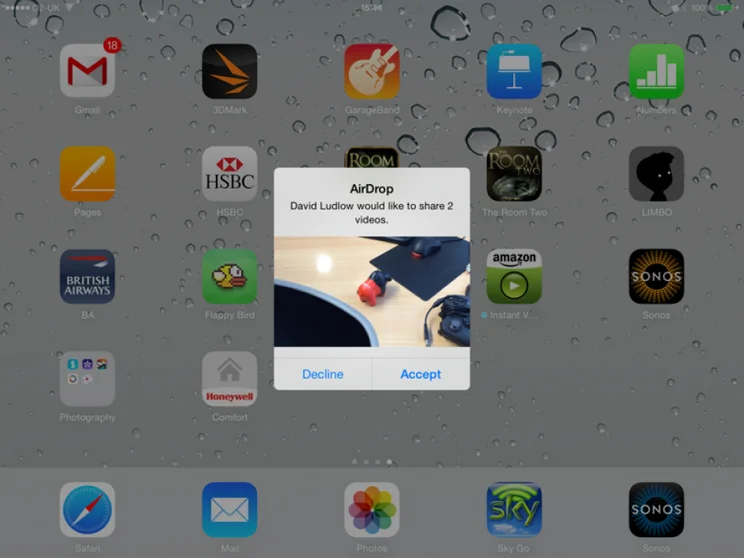
An AirDrop section is visible and nearby devices will appear in this within a few seconds; if your iPad doesn’t appear after a bit, trying setting its AirDrop setting to Everyone instead. If you’ve got the right contact information your iPad will appear as your name with your profile picture (if set); if you don’t, your iPad will appear as it’s name, such as ‘David Ludlow’s iPad Air’.
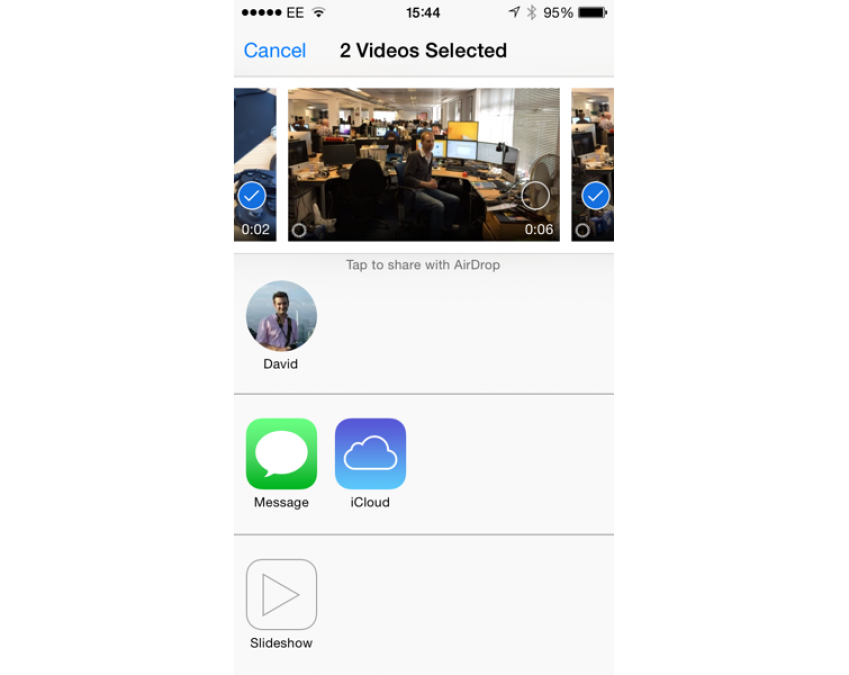
Tap the name of your iPad and your videos and photos will be prepared to be sent. On your iPad look out for the incoming pop-up box and tap Accept to allow the incoming files. These will now be transferred and you’ll get a message when the transfer is complete. All of the new files are now available in the Camera Roll.

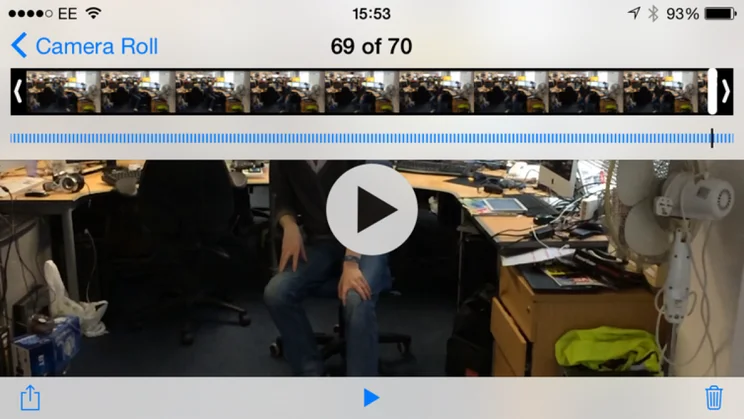
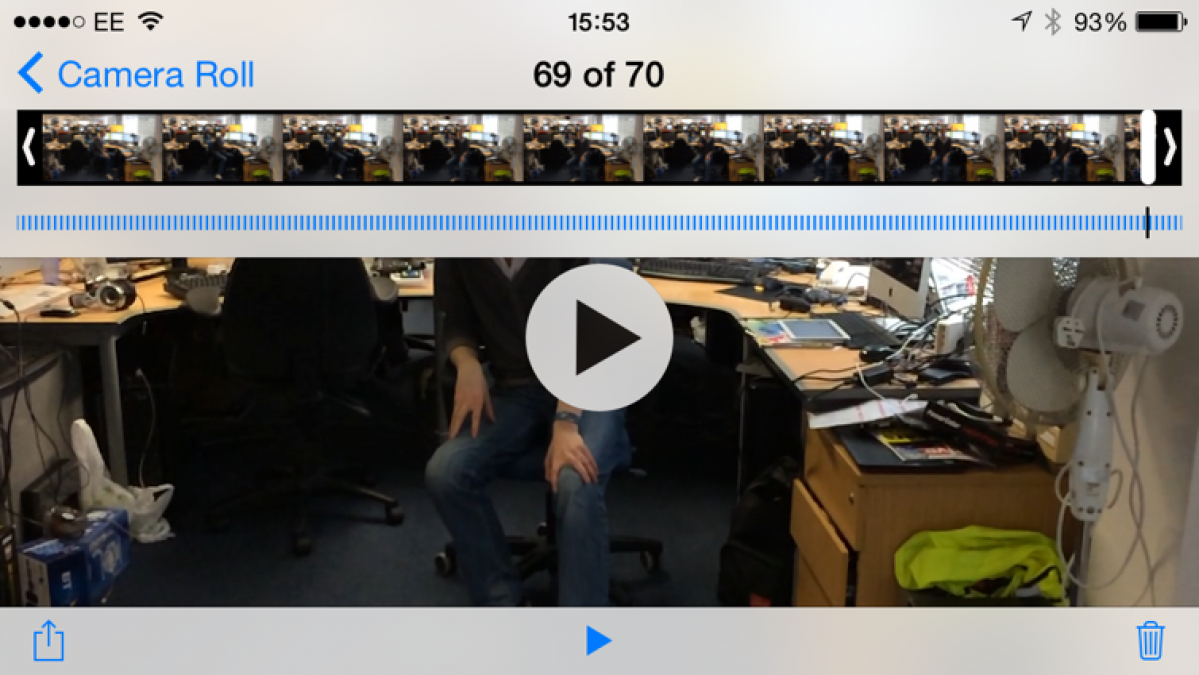
One note of warning: iPhone 5S videos shot in Slo Mo are transferred with the set slow-motion points. If you want the flexibility to edit and change these on your iPad using iMovie, you need to edit the video before you transfer it. Open up Photos and tap the Slo Mo movie. In the film bar that appears at the top of the screen close up the slow-motion section, so it doesn’t exist. Your entire film is now at 120fps and you can transfer it to your iPad.
MAC iCLOUD
Apple’s iCloud is a brilliant way to transfer photos to your iPad and other devices. This only works for photos, as videos shared in iCloud remain in the cloud and aren’t stored locally on the devices that they synchronise to.
It’s easiest to configure with a Mac, but PC users can do something similar by following the instructions below. On your Mac start iPhoto, right-click under Albums and select New Album. Enter a name for this. Next, drag photos that you want to share into the Album, either from your existing iPhoto photos or from your computer’s hard disk. When all of the photos have imported, click Add To at the bottom of iPhoto and select iCloud, then click New Photo Stream.
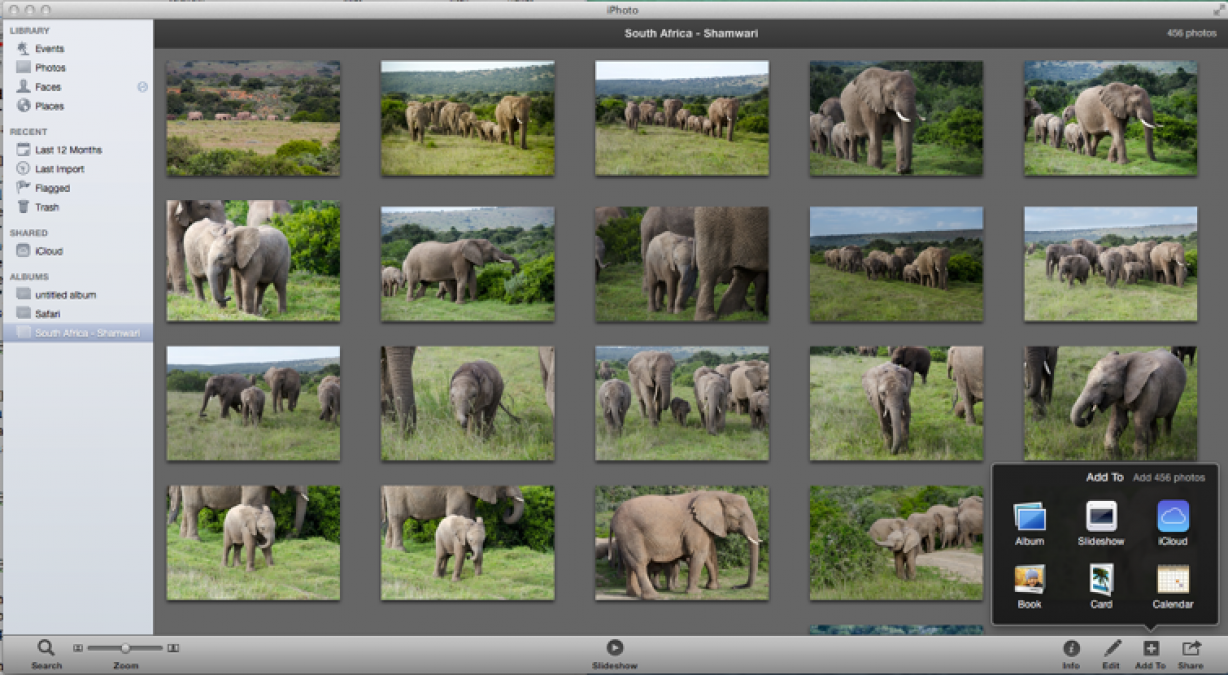
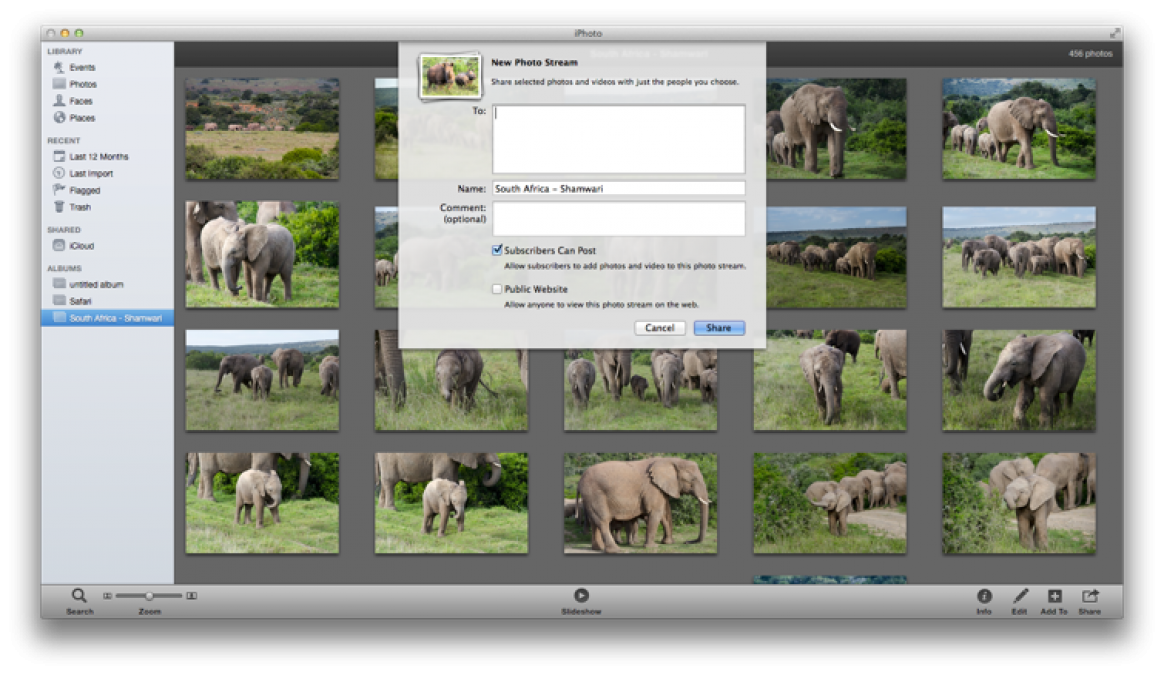
In the new Dialog box that appears, give your new Stream a name and add any comments that you want. You can also choose to share the Stream with specific people and to make the images visible through a website; you don’t need either option for our purposes, so just click Share. All of the images in the Shared iCloud Photo stream will now appear on your iPad, iPhone and other devices connected to your account and you can use them in projects as you like.
PC iCLOUD
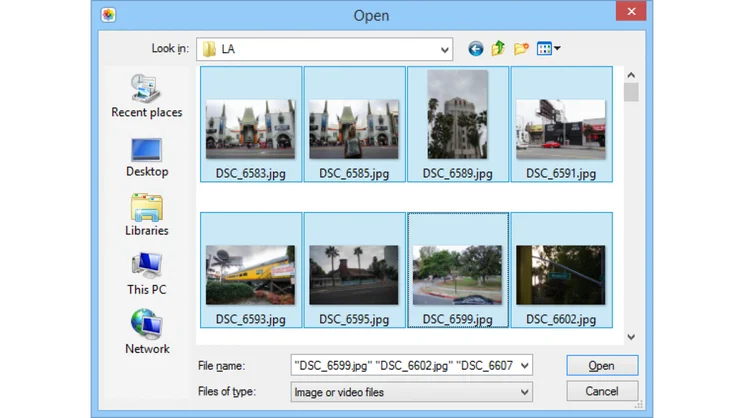
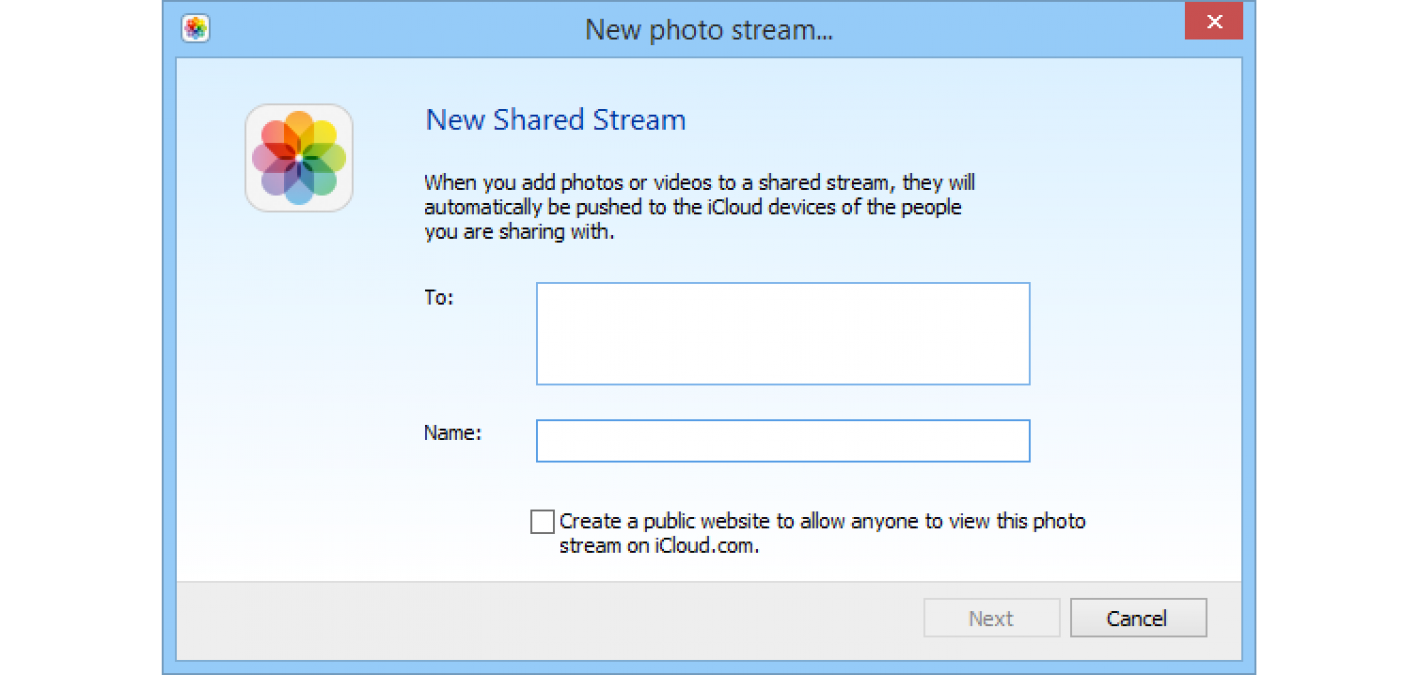
Although the PC doesn’t have iPhoto, it does have an iCloud client for it. When installed, you can access your photos through Windows Explorer: just click iCloud in the left-hand panel. Right-click and select New Photo Stream. Enter a name for the Stream and click next (you can also share the stream with specific people and create a public web link). Click Next and click Choose photos or videos in the next dialog box. Browse to the photos you want to share, select them all and click OK. Your photos will be uploaded to iCloud and will appear ready for use on your iPad.
MAC iTUNES
If you don’t want to use your iCloud storage space for photos or want to add videos to your iPad, you need to use iTunes. Again, the easiest option is to use a Mac, as it has more options, but you can do a similar job on a PC, as explained in the next section below.
Start iCloud and create a new Album, as in the Mac iCloud instructions above. This time, add any videos that you want to share by dragging them in from your computer’s hard disk in Finder.
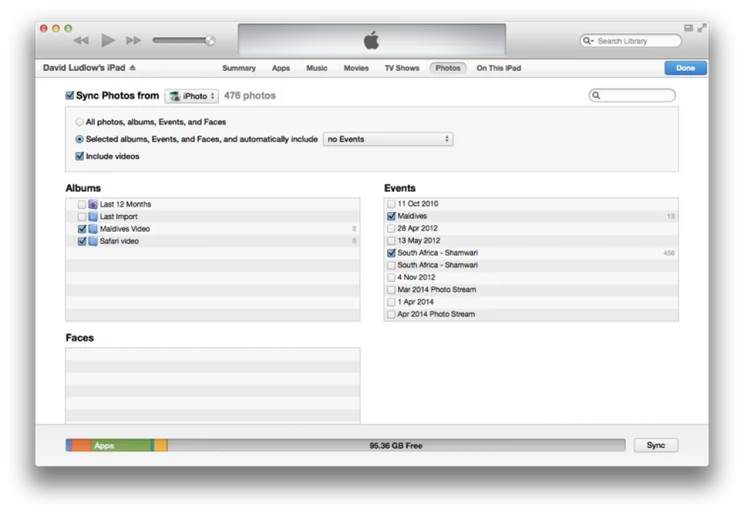
Next, connect your iPad and start iTunes. Note that you can only do this on one computer, so if you’ve already synced your iPad with a different computer you’ll get a warning telling you that all previously copied photos and videos will be deleted (videos and photos taken on the iPad or shared through iCloud are left untouched).
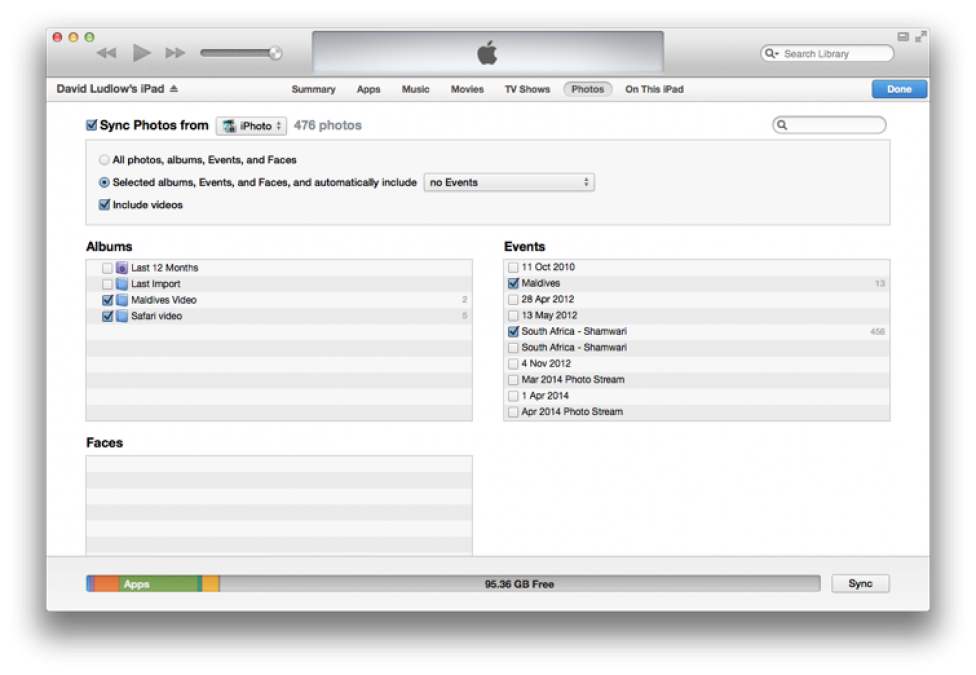
Click iPad in iTunes to get the settings up for your tablet, and click the Photos tab. Select Sync Photos from, and then choose iPhoto from the drop-down menu. Click Selected albums, Events, and Faces, and tick Include videos. You can now select the Albums, Events and Faces from your iPhoto account. Click Sync when done and all of the photos and videos will be copied to your iPad, ready for use in any app.
If you prefer, you can select a specific folder from your Mac’s hard disk, rather than using iPhoto, but this gives you less control over what’s imported.
PC iTUNES
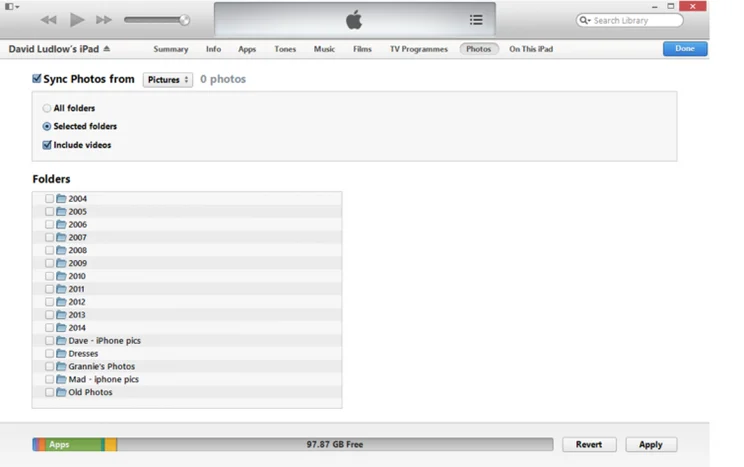
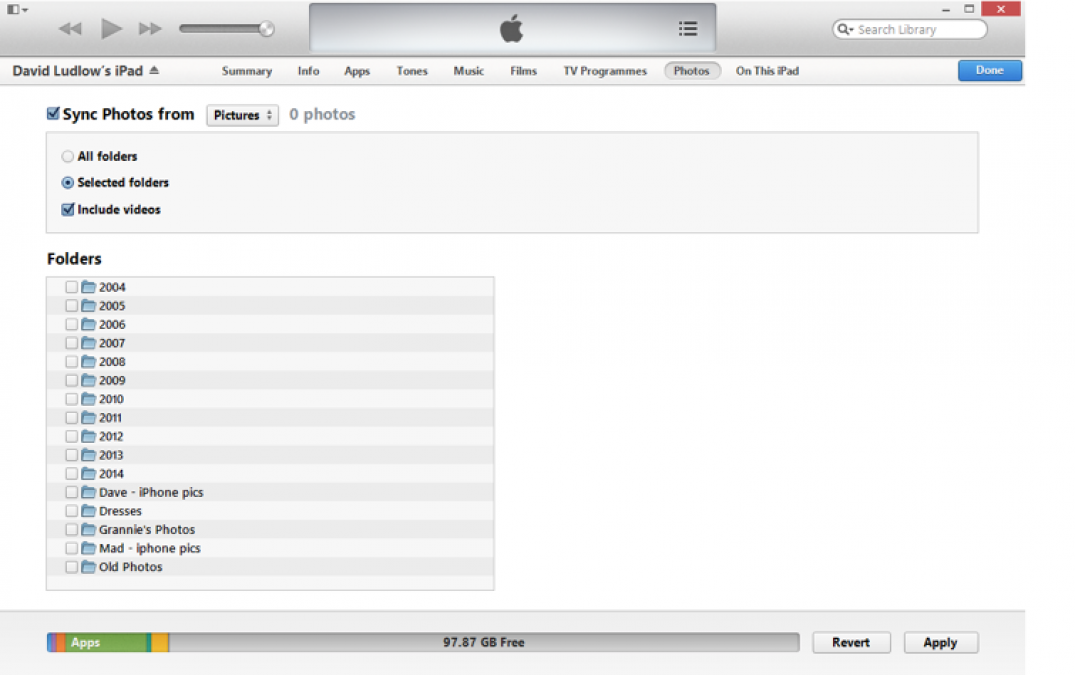
As the PC doesn’t have iPhoto, you’re limited to synchronising your iPad with a folder. Copy all of the photos and videos that you want to share to one folder. Connect your iPad to your PC and start iTunes. Click iPad to open up its settings, then click Photo and select Sync Photos from, and then use the drop-down menu to select a Photo (the default is the Pictures folder, but you can select any one you want). Again, you can only synchronise the iPad with one computer, so you may get a warning message.
Next, click selected folders and select Include videos. Select the folders that you want to include, then click Apply. Your photos and videos will be synchronised with your iPad.
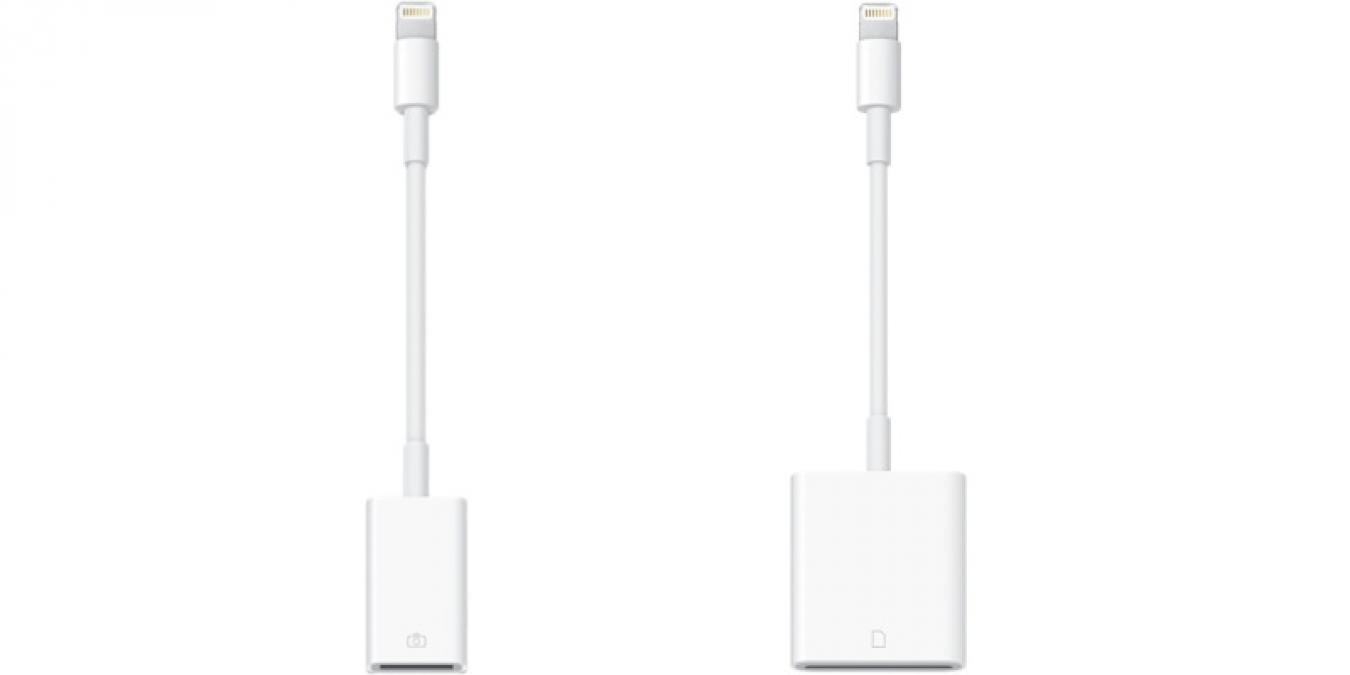
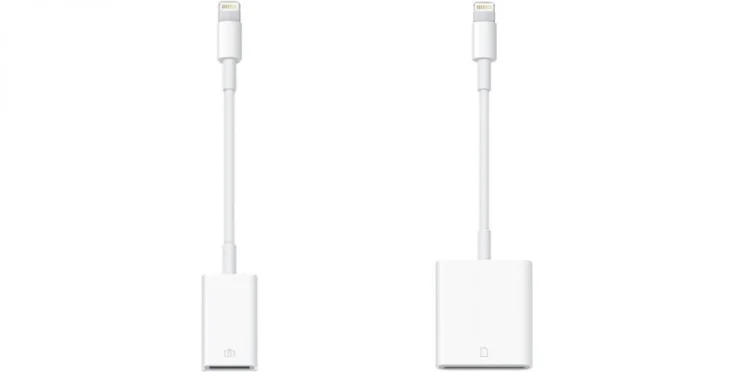
GO DIRECT WITH LIGHTNING TO USB AND SD CARD
The final way to import videos and photos is to use either the Lightning to SD Card Camera Reader or Lightning to USB Camera Adaptor (both £25).
The first one lets you plug an SD card into your iPad; the second lets you connect your camera directly. Both work in the same way, though, opening up Photos so that you can choose which images and videos to import. JPEG and RAW photos and H.264 video are all supported.