To help us provide you with free impartial advice, we may earn a commission if you buy through links on our site. Learn more
Triggertrap
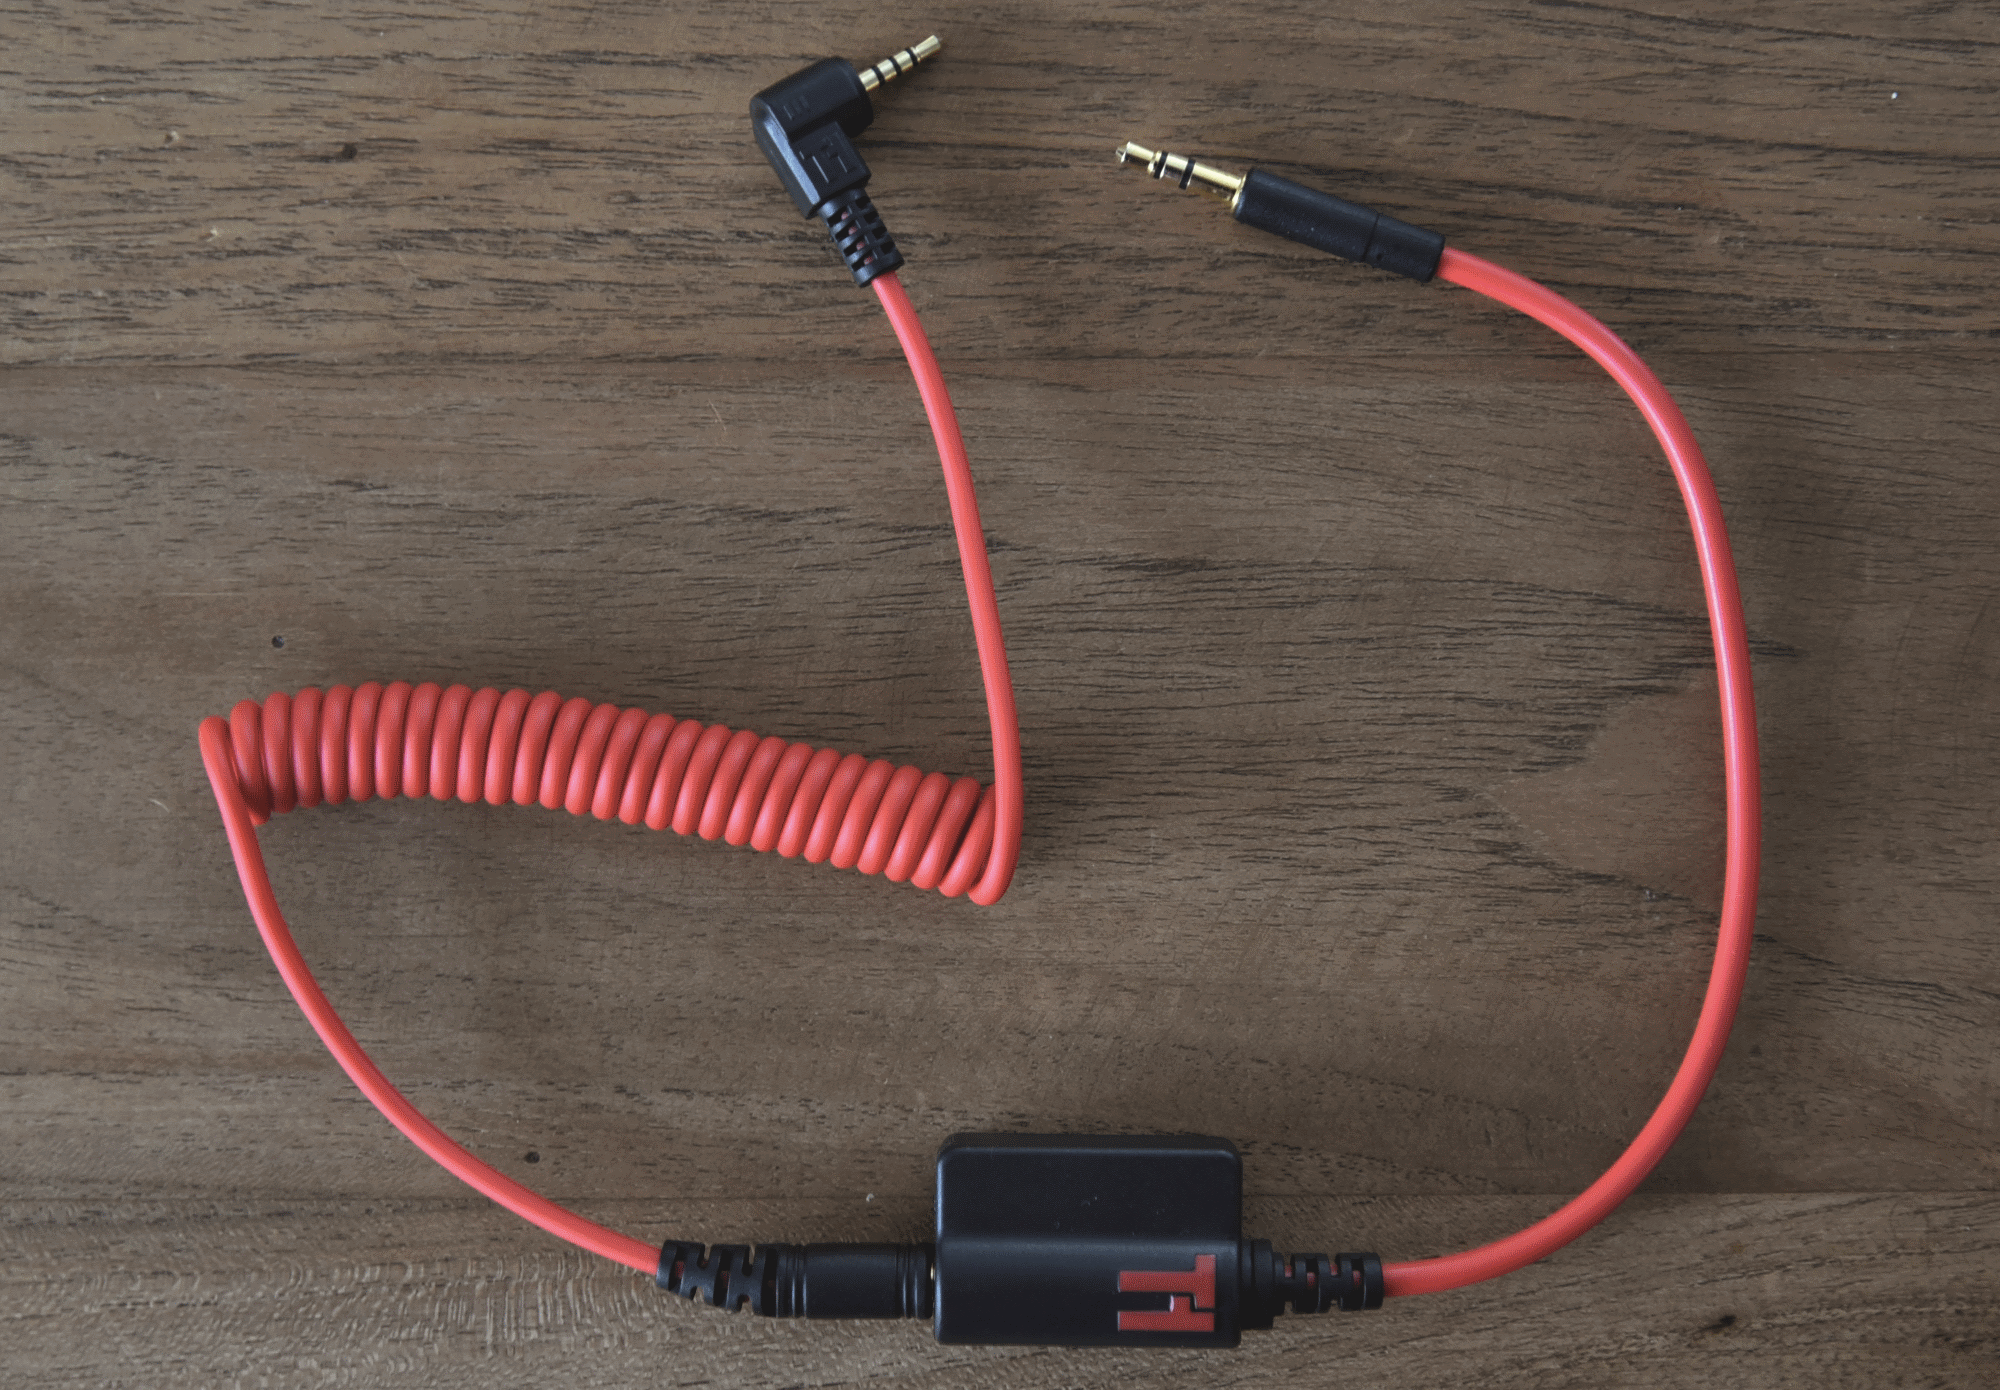
Triggertrap Mobile is £23 from triggertrap.com. The companion app is available free for iOS and Android. The kit includes a dongle that plugs into the smartphone or tablet, and a detachable cable designed for specific camera models. Additional cables are available for £7.
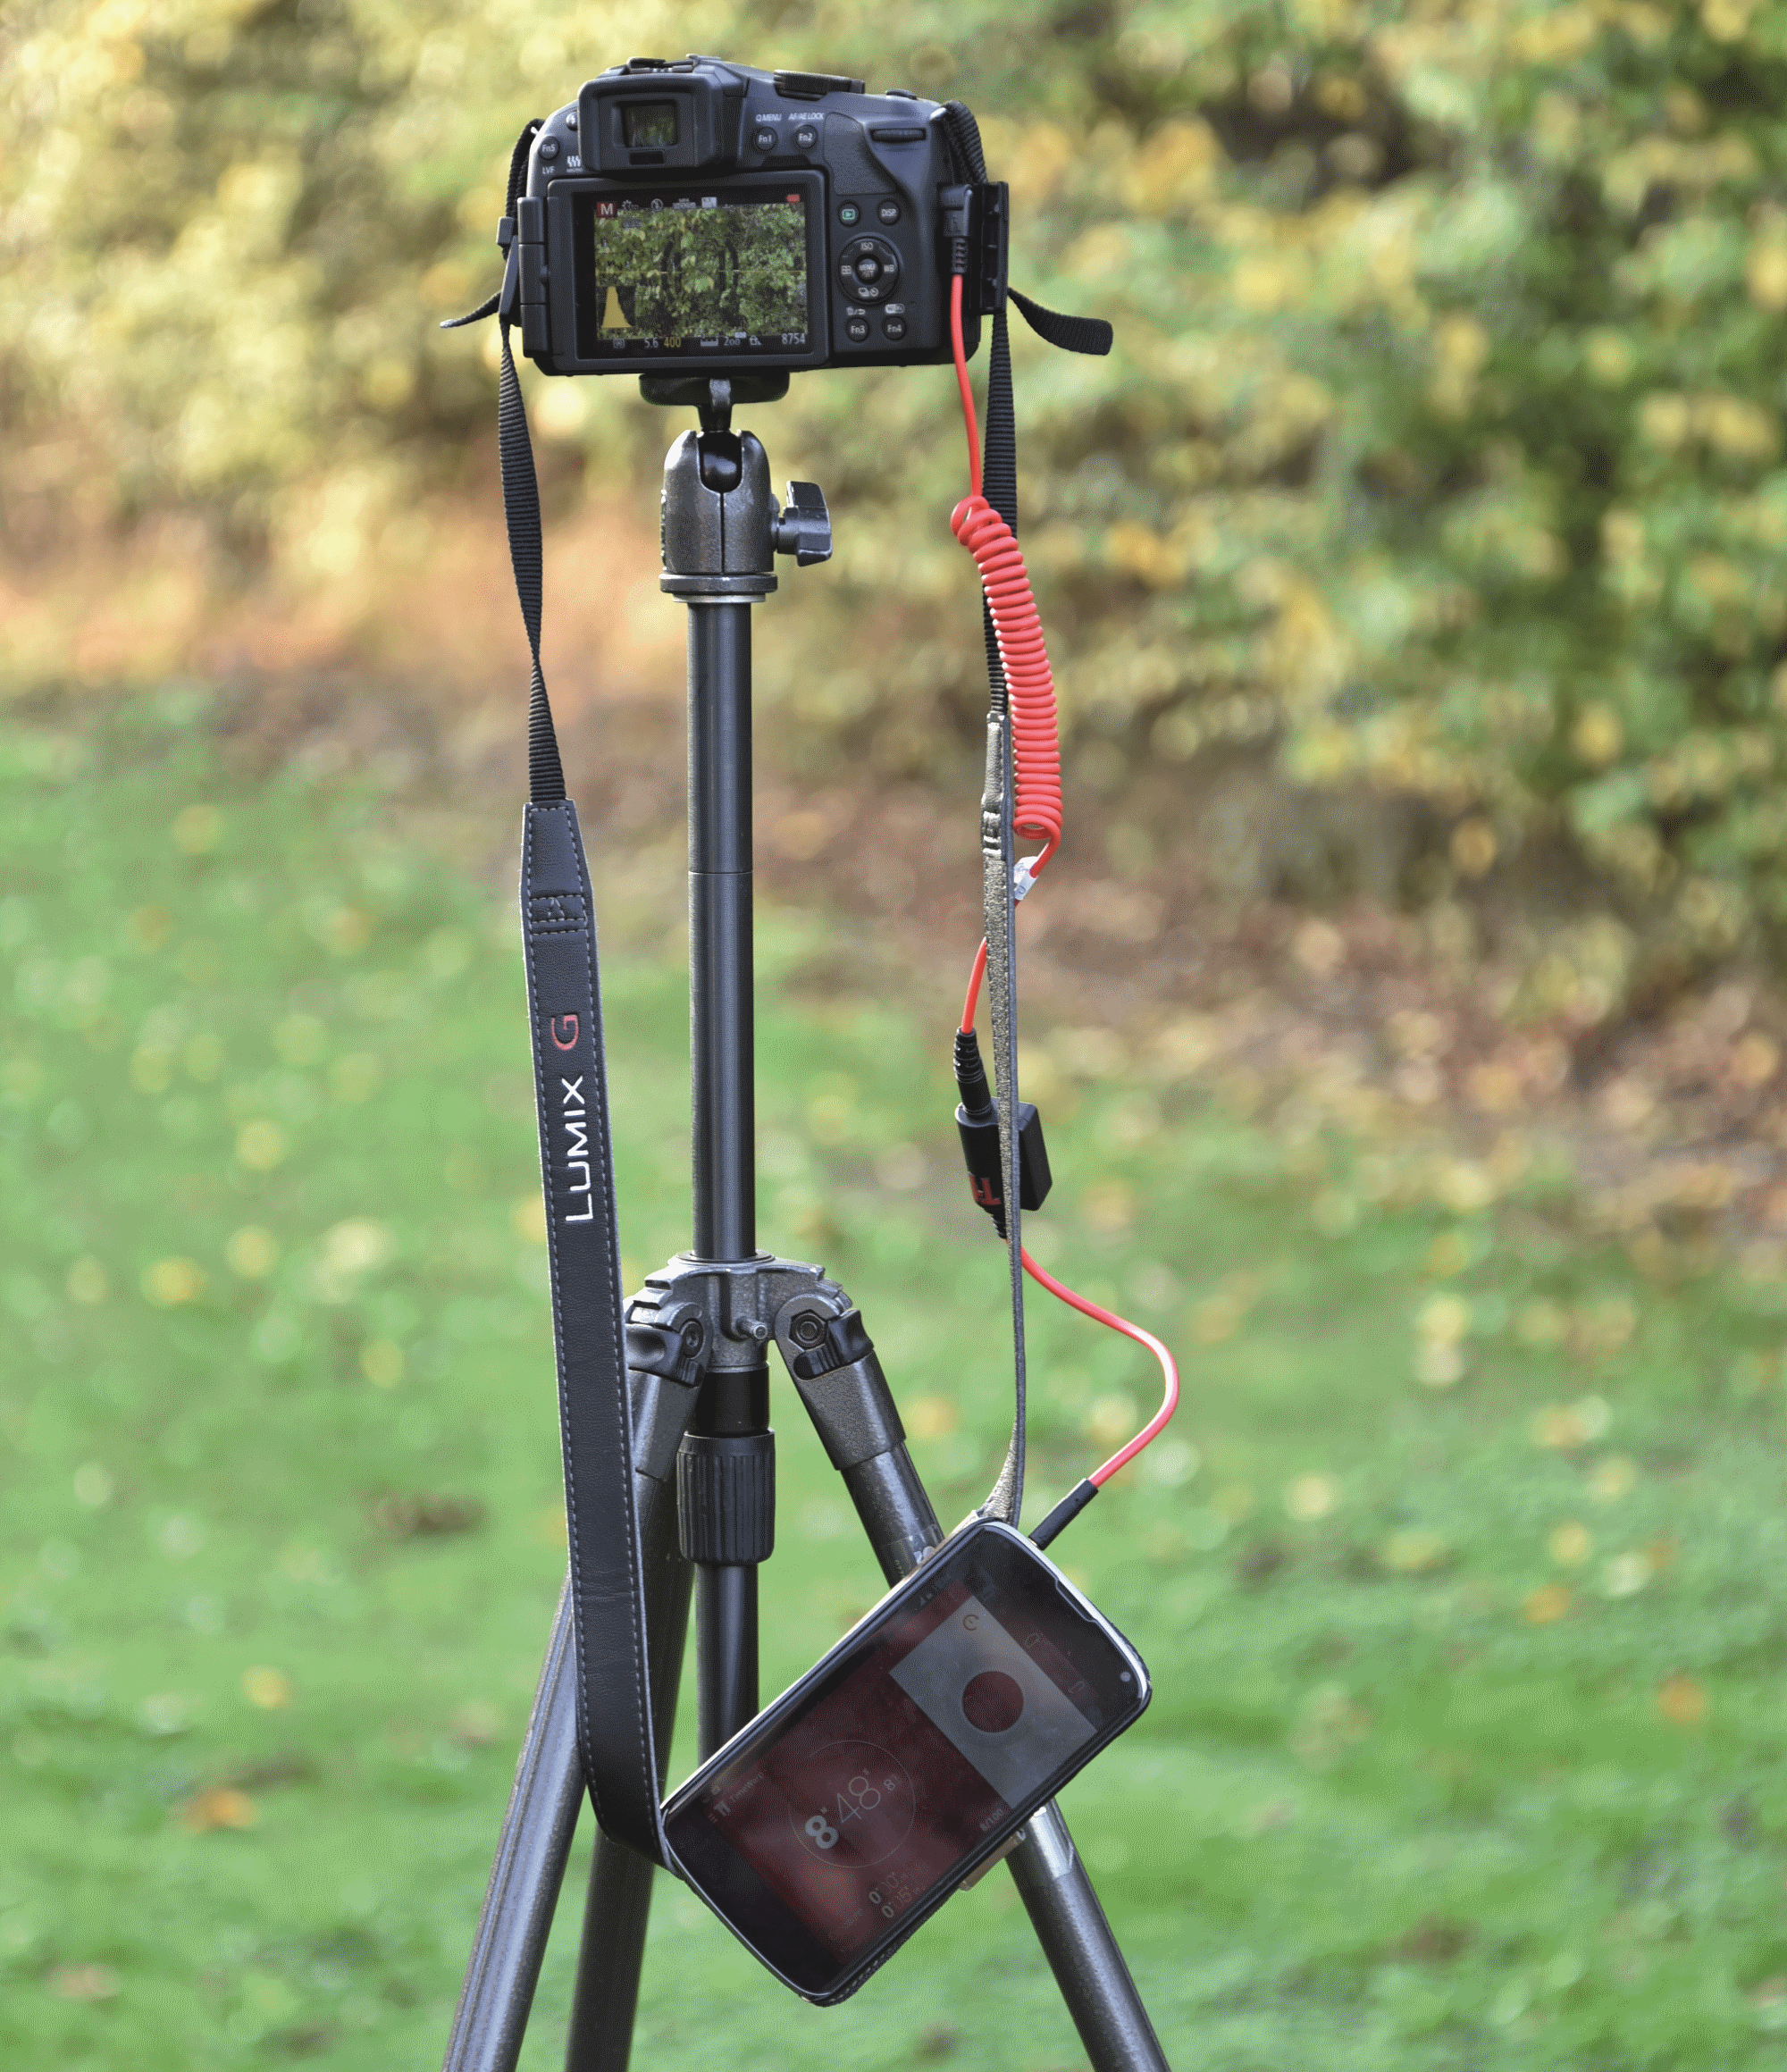
Triggertrap is most likely to be used with the camera mounted on a tripod. The cable isn’t particularly long, though, so you might need to think about how to support the smartphone. Triggertrap Phonetrap, £15, is a cradle that sits in the camera’s accessory shoe. Another option is an iKlip Mini, which is around £21 and is designed to attach a smartphone to a microphone stand. We made do by slinging our phone’s wallet-style case around the camera’s neck strap – not the most elegant solution but it did the job.
The Triggertrap app has a dizzying list of shooting modes. The simplest takes a photo when you press the big red button on the app. There’s also a simple self-timer mode, albeit with the option to set the time interval from milliseconds to hours.
The next three modes are for cameras that support bulb mode, where the shutter stays open for as long as the trigger signal is received. You can press and hold the app’s button to set the shutter speed manually, or tap to open and again to close. A third option is to specify the shutter speed in the app. This is useful for very long exposures beyond the usual 30 or 60 second limit imposed by the camera, but where you want to control the exposure level carefully – perhaps for night-time photography or when using an ND filter to blur out moving subjects.
On the subject of ND filters, at the bottom of the list of shooting modes is an ND calculator. Enter the ND filter strength and the base shutter speed (the shutter speed you would use without the filter) and the app tells you what shutter speed to use to get the same exposure with the filter fitted. There’s also a Solar Calculator that gives the sunrise and sunset times for your current location.
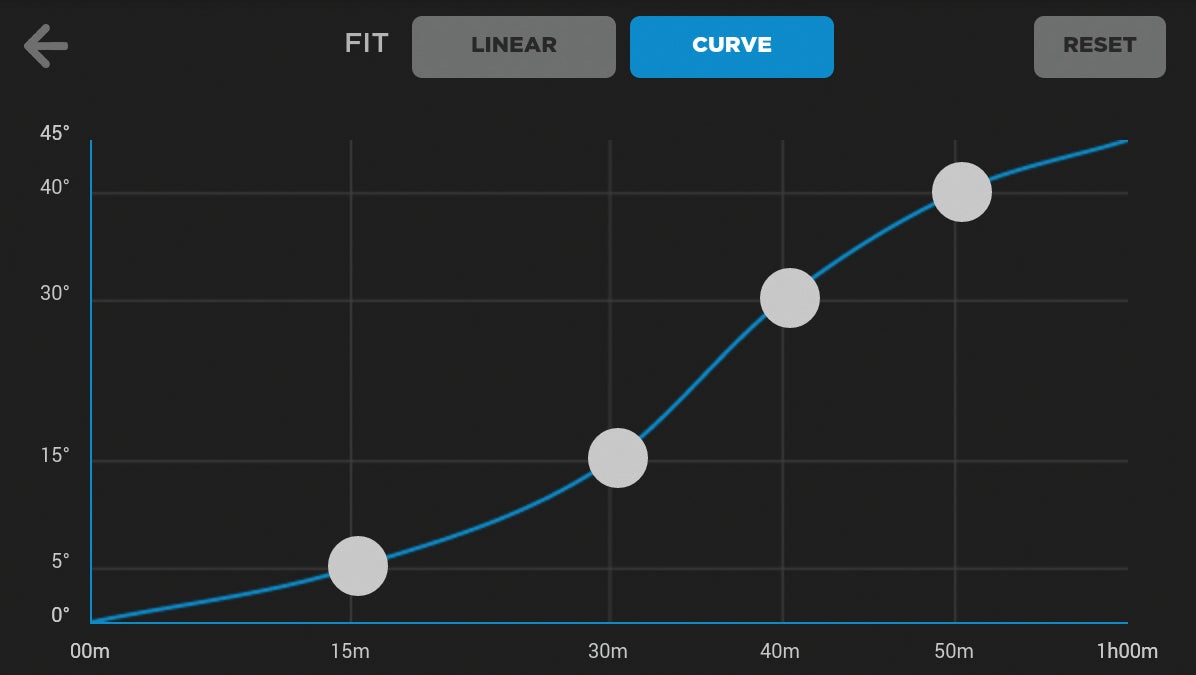
The app’s Timelapse section includes five modes. Timelapse is the simplest, whereby you simply set the interval between shots. In TimeWarp mode, you set the total duration and number of shots, and draw a curve to create a varying frequency of shots. This creates a time-lapse sequence that gets faster and slower over time. A steeper incline in the curve means fewer photos will be captured, so time will speed up when playing back as a video with a fixed frame rate.
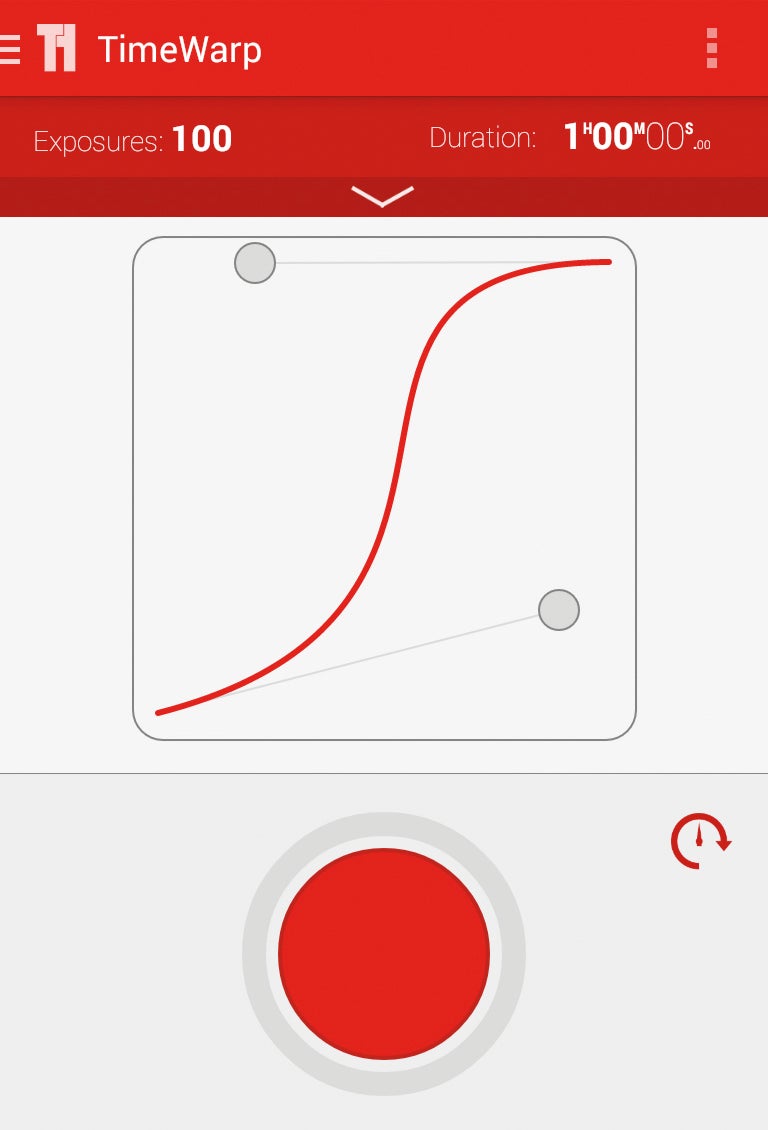
^ TriggerTrap’s TimeWarp mode varies the frequency of shots in a time-lapse sequence
DistanceLap uses the smartphone’s built-in GPS to capture a photo every set number of metres. That’s ideal for time-lapse sequences taken from a moving vehicle where you want the animation to progress at a constant speed, regardless of whether the vehicle had to start and stop.
Star Trail mode uses the bulb mode to create a sequence of exposures lasting minutes or even hours. It’s also possible to specify the gap between exposures. It’s worth keeping a close eye on your kit when using this feature for all types of time-lapse where a long exposure is used. Some cameras are ready to take another photo pretty quickly, but others take a long time to apply noise reduction and save the file after capturing a long exposure.
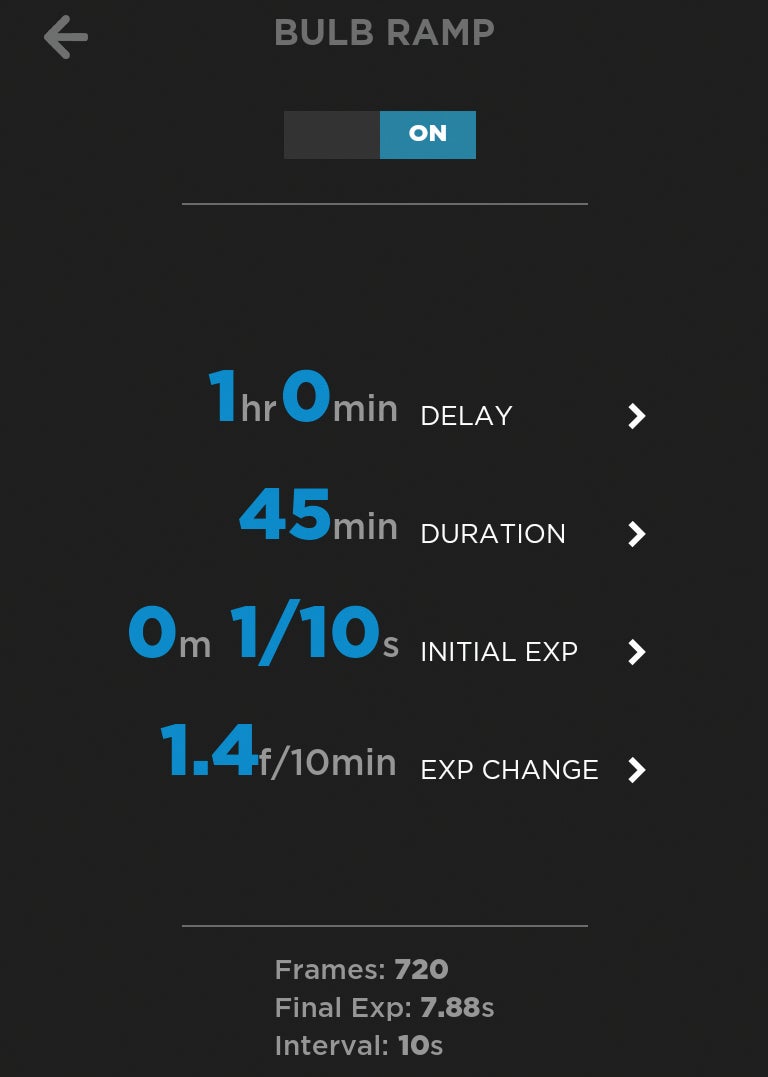
Bramping mode is short for bulb ramping. With the camera set to bulb mode, it’s possible to vary the shutter speed throughout the duration of the time-lapse. You enter the interval, number of exposures and start and end shutter speeds. This makes it possible to capture time-lapses with a varying exposure – perfect for sunsets and sunrises. The fastest shutter speed available is 1/15s, but even that might be too fast for the camera to respond to accurately in bulb mode. It’s best to do some test runs and monitor the results before going out and using the feature properly.
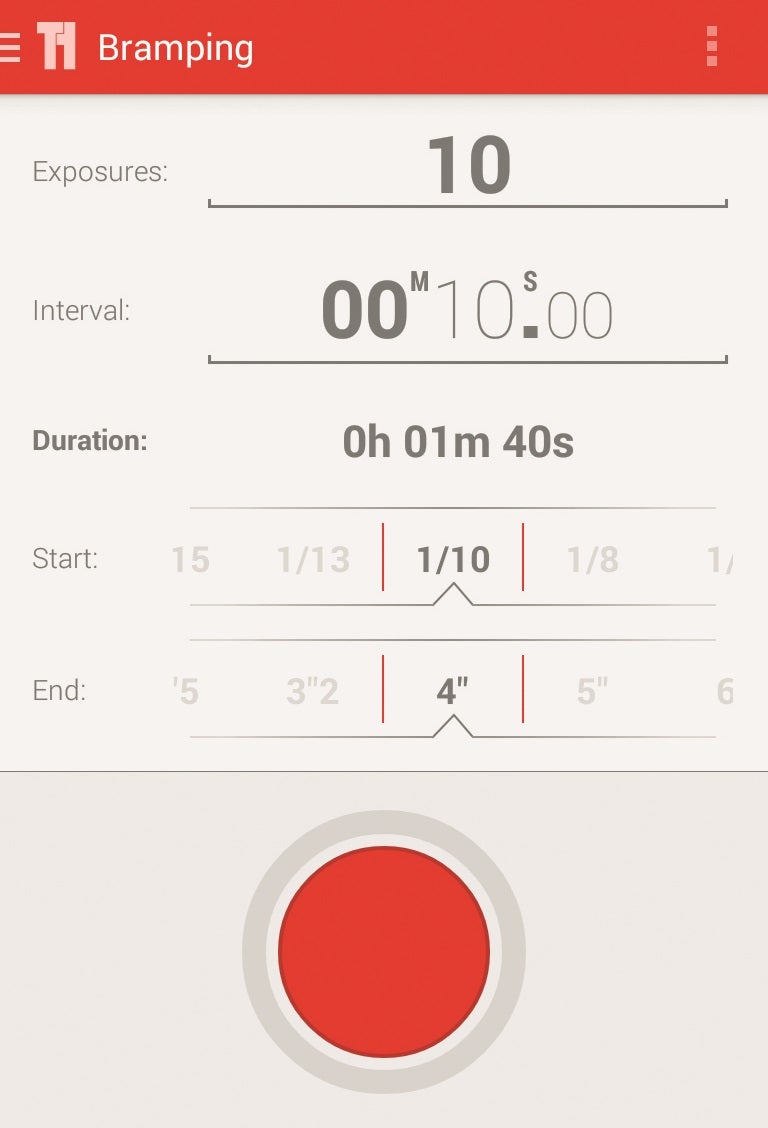
^ TriggerTrap’s Bramping mode uses the cameras’ bulb mode to vary the shutter speed
Another limitation is that the Triggertrap app increases the shutter speed in a linear fashion. For example, if you ask it to capture ten frames with shutter speeds varying from one to ten seconds, the shutter speeds used will be one, two, three seconds and so on up to ten. However, our eyes perceive light exponentially, so ideally the exposure should increase by a multiplier value rather than a fixed amount between each frame. For example, shutter speeds of 1/2s, 1s, 2s, 4s, 8s and so on would double the exposure each time and give a similar perceived difference from one to the next.
The list of modes doesn’t end there. Long Exposure HDR mode provides a bracketing feature, taking anything from three to 19 frames at varying shutter speeds. Then there’s HDR Timelapse, which uses bracketing and time-lapse functions at the same time.
Sound Sensor mode uses the smartphone’s microphone to trigger the camera when sound passes a set threshold. It’s fun being able to trigger a photo simply by clapping, and could be the perfect way to capture group portraits without having to grapple with Wi-Fi remote triggers or self-timer functions. It might even prove to be effective for capturing fleeting but noisy subjects.
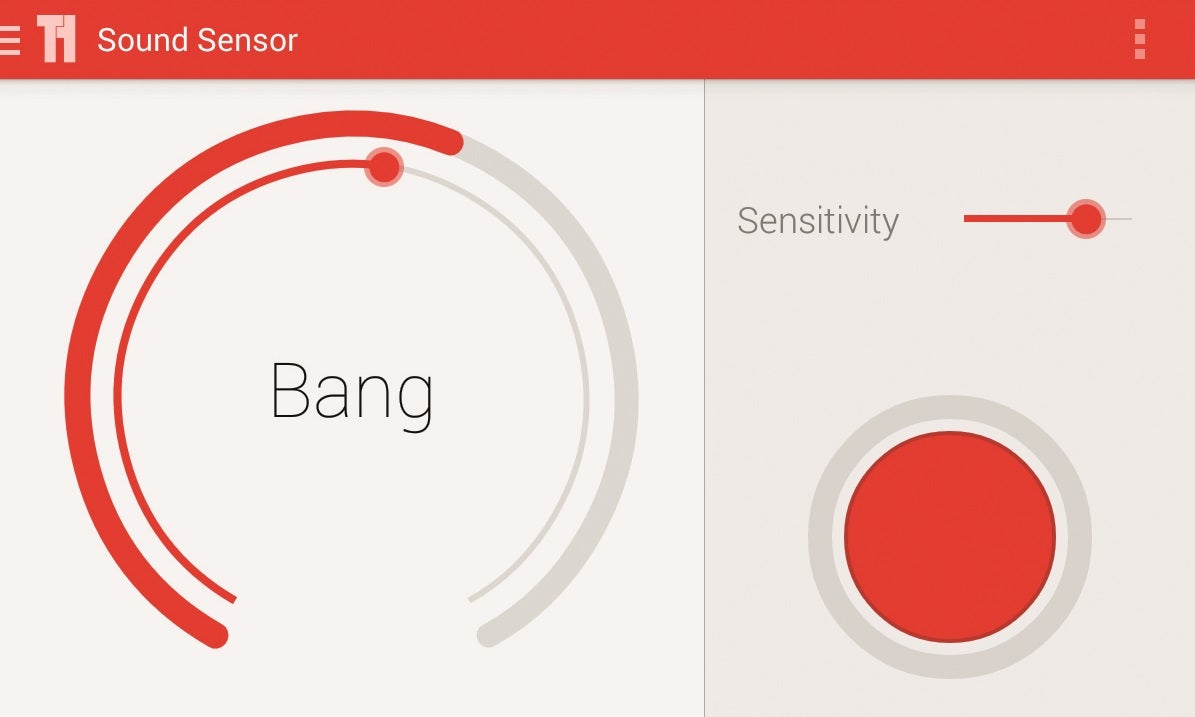
However, there’s some latency to the app’s response. We measured a quarter of a second with the Android app and a tenth of a second for the iOS app. That’s too slow for the split-second accuracy that you’d need for photos of popping balloons, arrows through apples and other high-speed photography techniques.
The iOS (but not the Android) app also includes a mode where photos are triggered from the iOS device’s vibration sensor, plus two modes that use the camera to detect motion or a specified number of faces. The motion sensor is probably the most practical of the three, but we struggled to set the threshold in low light – the algorithm doesn’t appear to differentiate between movement and the fizz of image noise.
Overall, though, Triggertrap Mobile is a superb product that’s cheap to buy and is likely to keep on improving as the app is developed.
Michron
Michron from Alpine Labs is $60 (about £37) from alpinelaboratories.com. It’s currently shipped from the USA and so will be subject to VAT, customs fees and a customs handling charge – we’ve been told the total comes to £60 plus shipping costs. The unit should be available directly from a UK warehouse by mid-January 2015.
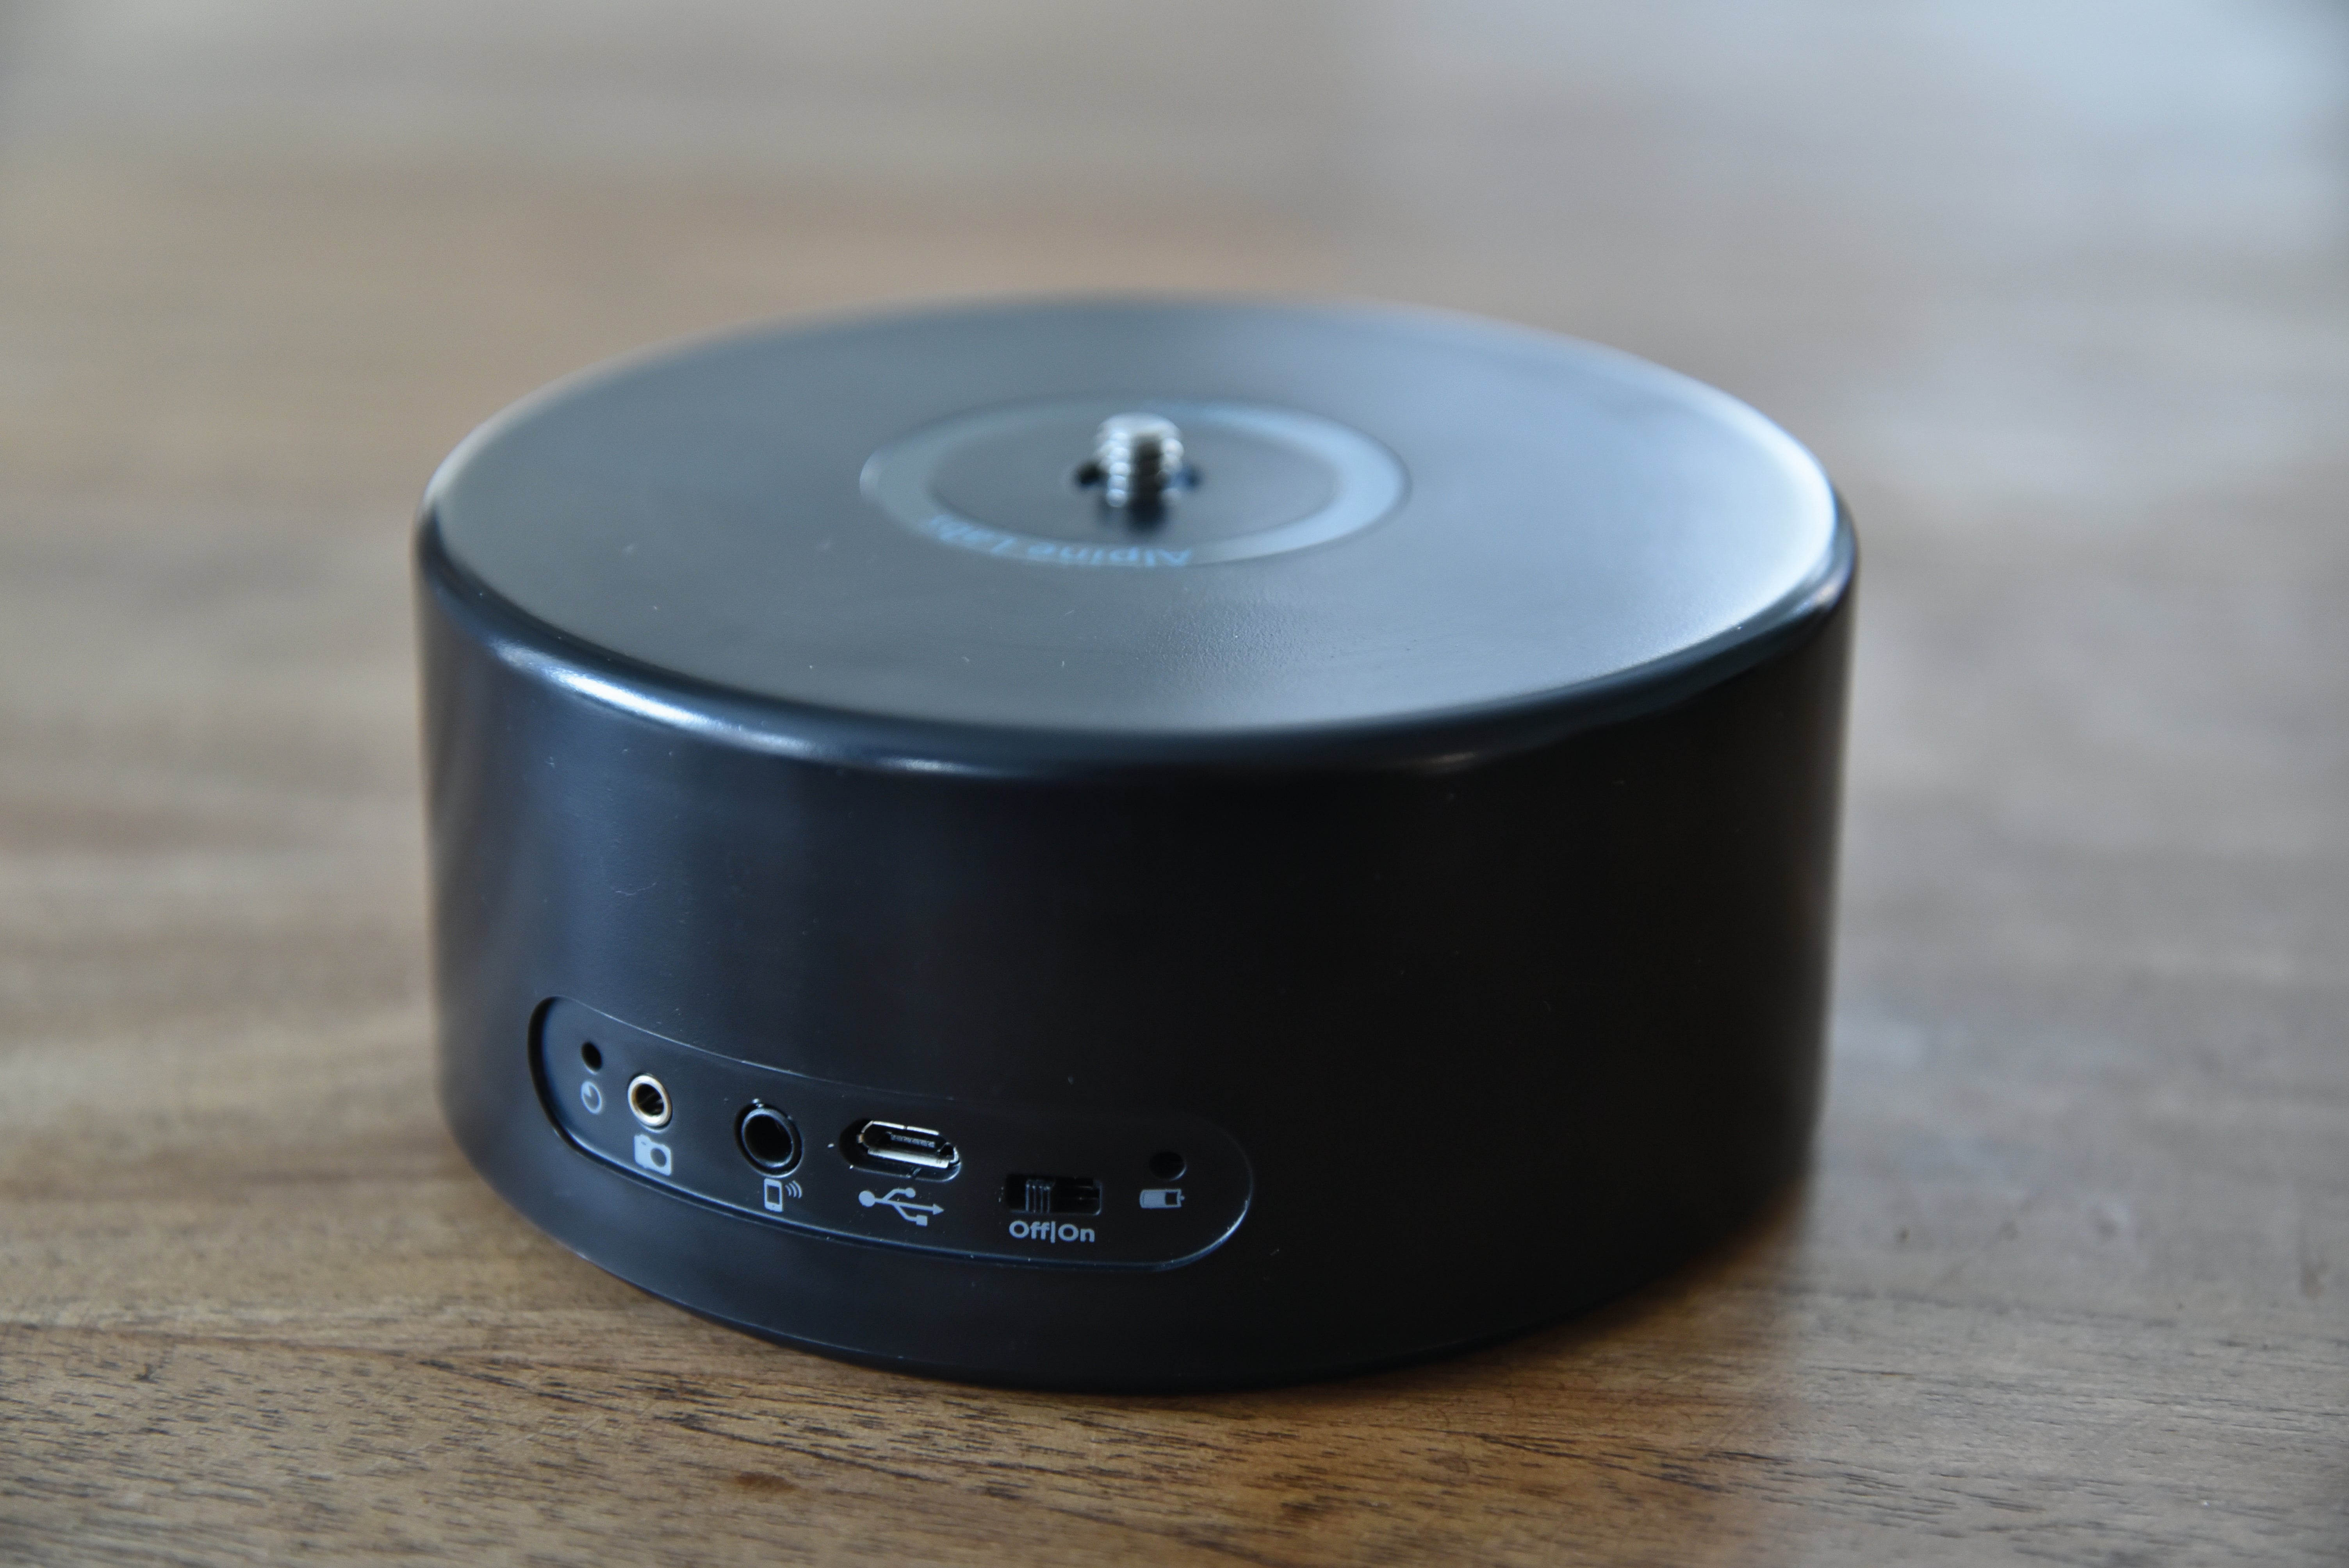
Michron is similar to Triggertrap Mobile in that it’s app-controlled and attaches to a smartphone or tablet’s headphone socket. There are cables available for 13 camera brands, and a comprehensive list of supported models. It differs from Triggertrap in that, once it has been programmed using an Android or iOS device, that device can be disconnected. The Michron will then sit in the camera’s accessory shoe to control it. The unit runs off a replaceable CR2032 watch battery that lasts for 2,000 hours.
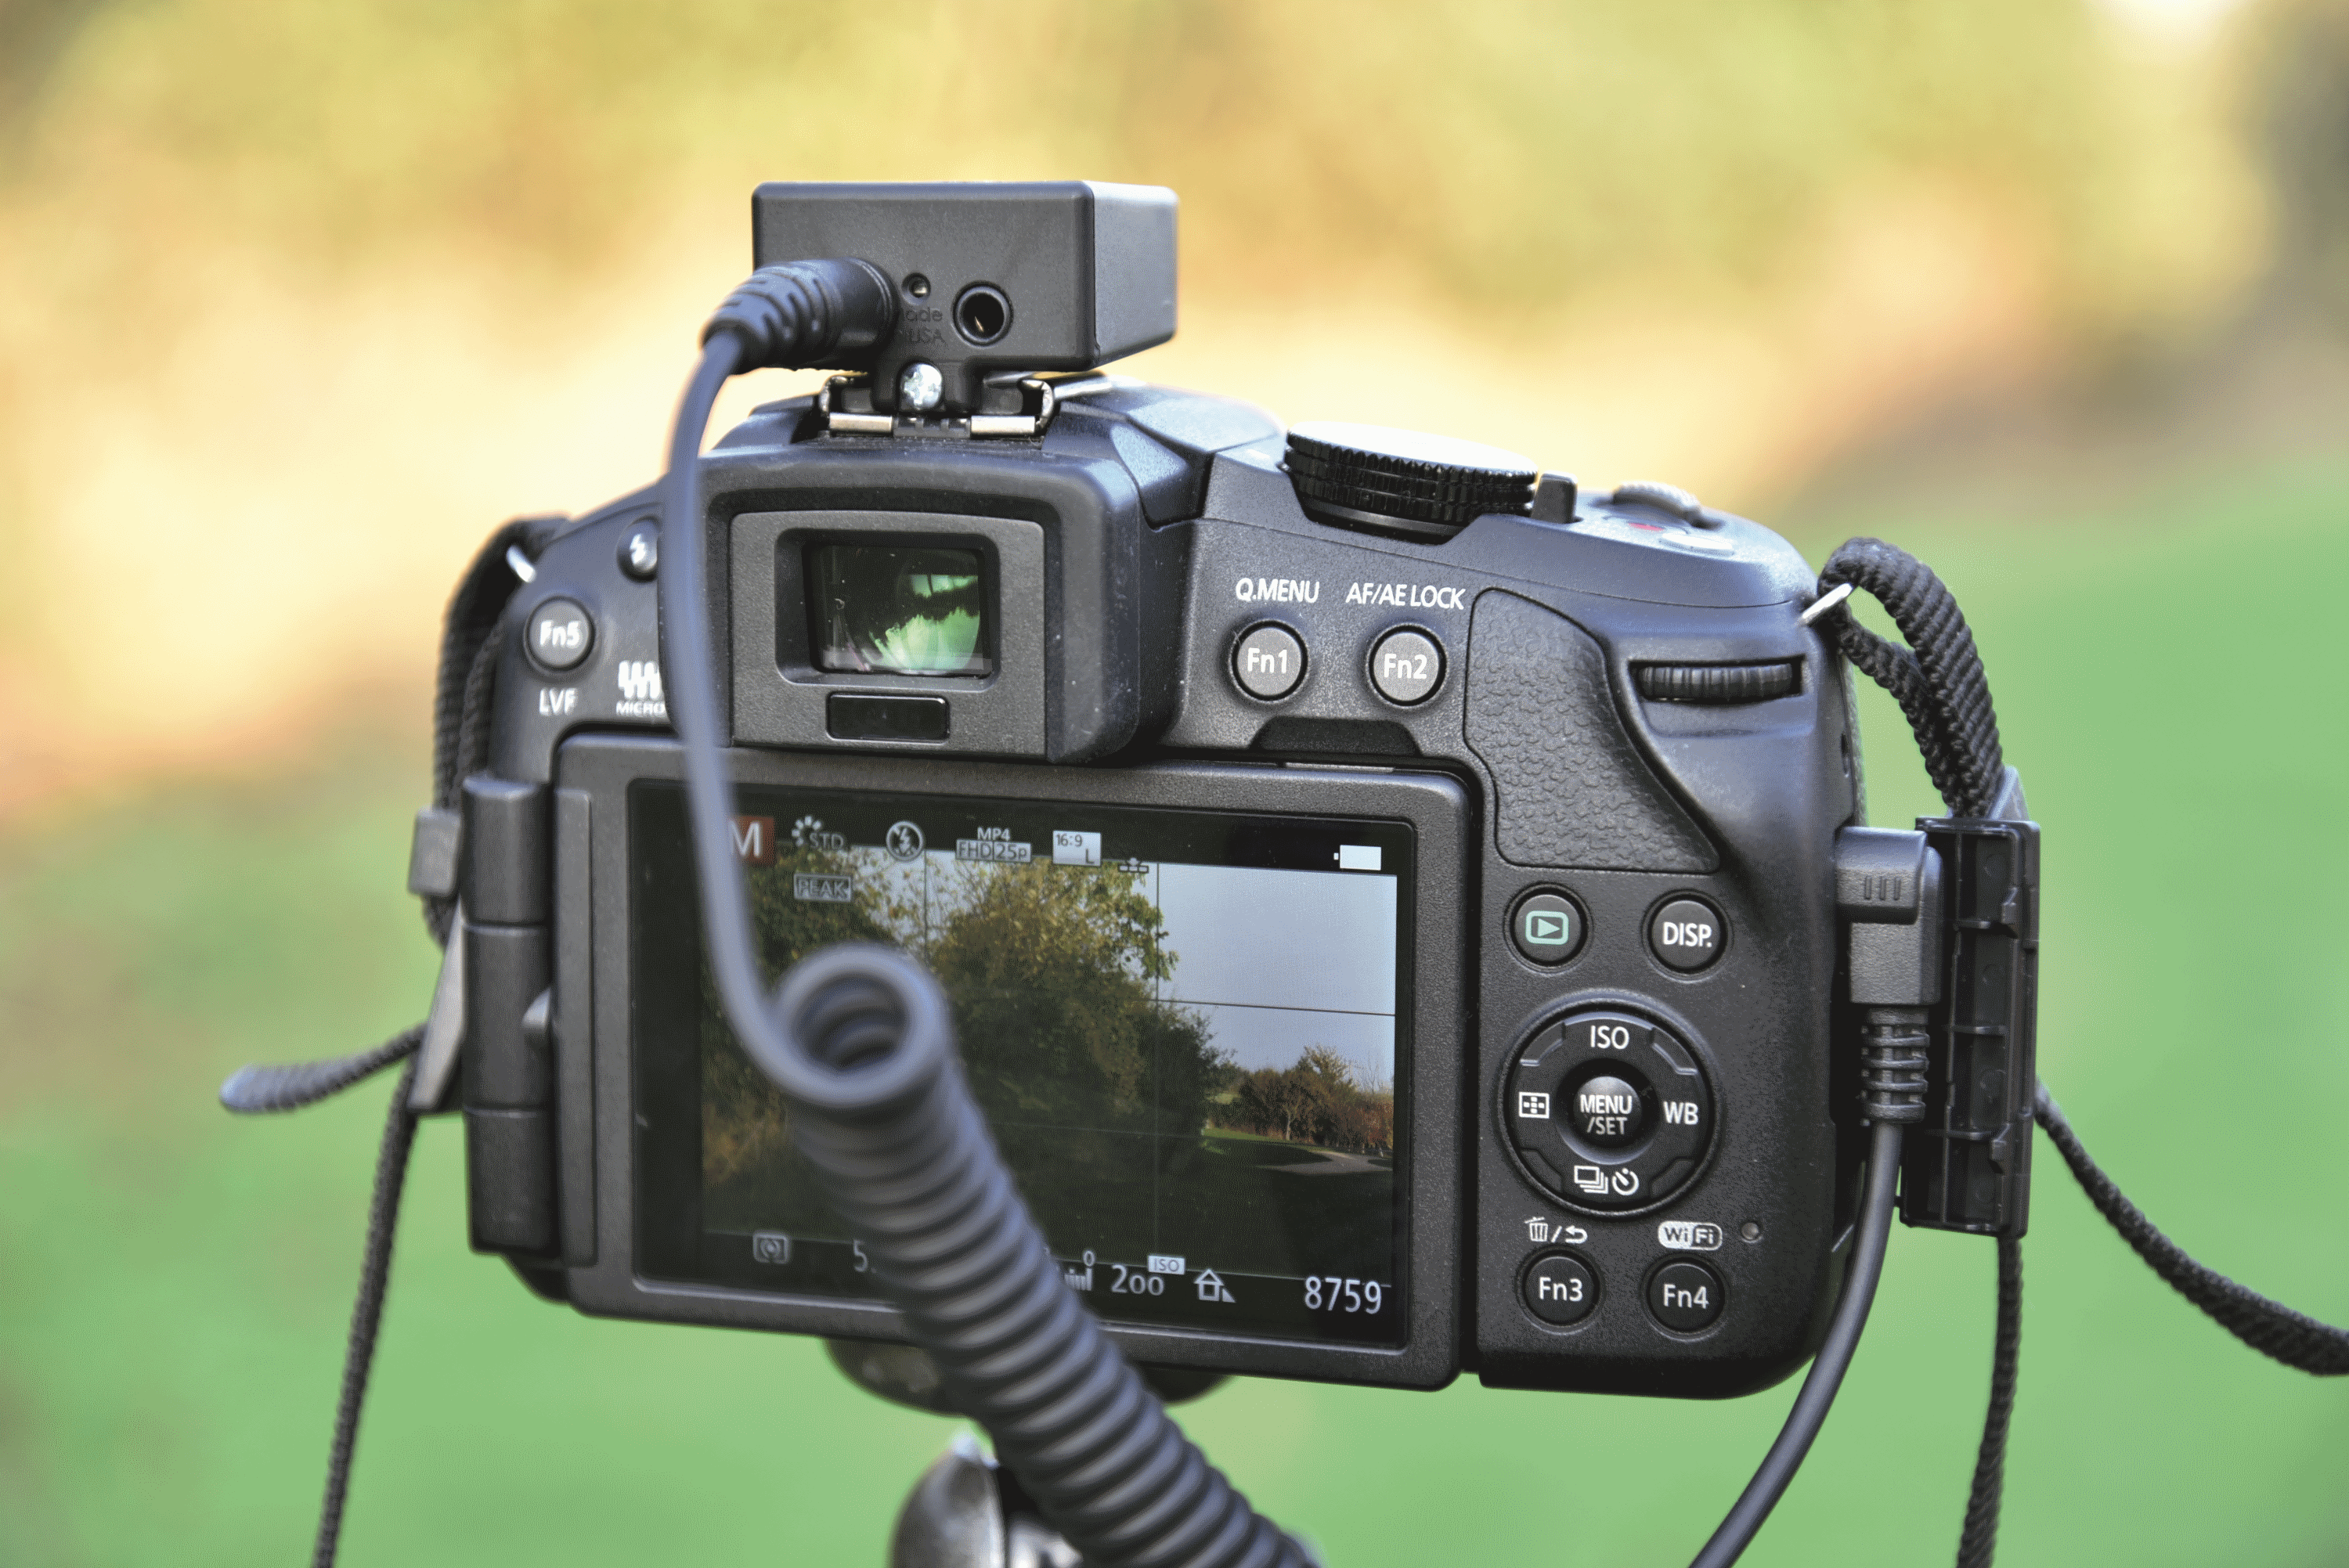
^ Alpine Labs’ Michron can be disconnected from the smartphone once it has been programmed
This approach is neater than leaving a smartphone or tablet plugged in. It also allows for time-lapses that last for many hours, where a smartphone’s battery might not go the distance. However, it rules out certain functions compared to Triggertrap. Essentially, Michron can run to a predetermined schedule but it can’t react to environmental input.
The Michron app doesn’t look as polished as Triggertrap’s but in some ways it’s more sophisticated. It starts with options to set the time-lapse’s total duration and interval. Clicking Advanced reveals options to delay the start, vary the interval over time, vary the shutter speed, use a fixed shutter speed or capture bracketed shots.
Bulb ramping is particularly well implemented. The amount of ramping is set in f-stops per 10 minutes or per 10 frames – an exponential metric that produces smoother transitions than Triggertrap’s linear approach. It’s also possible to limit the bulb ramping to a portion of time within a longer time-lapse. For example, you might have a three-hour time-lapse to capture a sunset, but only ramp the shutter speed for an hour in the middle of the sequence.
Bulb ramping with our Panasonic G6 wasn’t entirely successful. We were able to use shutter speeds between 1/10s and 1s but longer shutter speeds seemed to be impossible. The Alpine Labs website suggests that the most reliable results in bulb mode come from cameras with a built-in PC Sync port. Plugging a cable from this port into Michron’s audio socket allows for two-way communication, so Michron can monitor how long the shutter is actually held open.
We experienced some problems creating Interval Ramping curves in the Android app, although the iOS app behaved better. We also noticed a few occasions when the camera intermittently failed to respond to triggers. These issues may be atypical, though. Reassuringly, there’s a 30-day money-back guarantee including shipping, so you can test with your own camera to ensure that it works as expected.
Radian
Alpine Labs Radian is $250 (about £155) plus customs and VAT fees to ship from the USA. According to Alpine Labs, that all comes to £190 plus shipping – standard UK price to be confirmed soon. Radian is essentially the same as Michron but with the added ability to pan the camera. It sits between the tripod and camera, with tripod threads on the bottom and top. The top and base components then rotate in relation to each other to pan the camera. Rather than constantly rotating, Radian moves, shoots, moves again and so on to avoid motion blur in the shots. It feels suitably robust, and there’s an internal battery that’s charged using the supplied USB cable. Alpine Labs also sells an L-shaped bracket to allow for a vertical tilt function.
Radian is significantly more expensive than some rotating time-lapse devices such as the Veho Muvi X-Lapse. However, it’s also much more advanced, with most of the features of the Michron plus the ability to define the speed and direction of motion. Rotation speed can be varied over time by creating a speed ramping curve, although this is offered instead of rather than as well as Michron’s Interval Ramping feature. It also omits Michron’s HDR function, but includes the same sophisticated bulb ramping functions.
As with the Michron, we found Radian’s ramping features to be somewhat temperamental, but the same money-back guarantee applies. For simpler time-lapses with a rotating viewpoint, it was a great success.
Making videos
We covered time-lapse video production in Multimedia Expert, Shopper 319, so refer to that issue for full details on how to convert a sequence of photos into a video file. If you just want a quick fix, try the free utility called Images to Video, available at http://en.cze.cz/Images-to-video.
Part of the fun of these devices is coming up with new ways to use them. Radian can turn its hand to panorama capture, taking a few dozen shots at regular intervals in a 360-degree circle, ready to stitch together into a single photo. You could take advantage of SLRs and the Michron’s low power consumption between shots to capture a time-lapse that lasts for 24 hours. Triggertrap’s motion detection could be just the thing for capturing wild animals that visit your garden, or to find out who’s been raiding the biscuit tin. We’re sure you can think of lots of other projects to try.
Camera settings
Triggers that use the camera’s wired remote input can control the timing of a photo and possibly the shutter speed, but they have no control over other settings. In some cases it’s fine to leave the camera on automatic settings. However, for time-lapse and other techniques where you need consistency from one shot to the next, it’s best to set everything to manual: aperture, ISO speed, white balance, focus. If you’re not sure about what settings to use, take a photo on automatic settings, note down the settings the camera applied and then replicate them in manual mode. Manual focus is particularly important. Cameras typically take half a second to autofocus, and some won’t get around to taking a photo at all if the trigger duration is too short.
For best results we recommend shooting in RAW mode. Unpredictable lighting may cause a scene to be under- or over-exposed, but shooting RAW and using processing in software such as Lightroom gives far greater scope to colour correct than if you capture JPEGs. You’ll need a big memory card to store hundreds or even thousands of RAW files, but with 64GB SDXC cards available for around £25, this needn’t be an obstacle.
Lightroom’s Sync button makes it easy to replicate RAW-processing settings across the photo set, although you’ll probably need to leave it running overnight as it exports hundreds of images. You can even interpolate processing settings across the duration of a time-lapse sequence using the Panolapse utility.