To help us provide you with free impartial advice, we may earn a commission if you buy through links on our site. Learn more
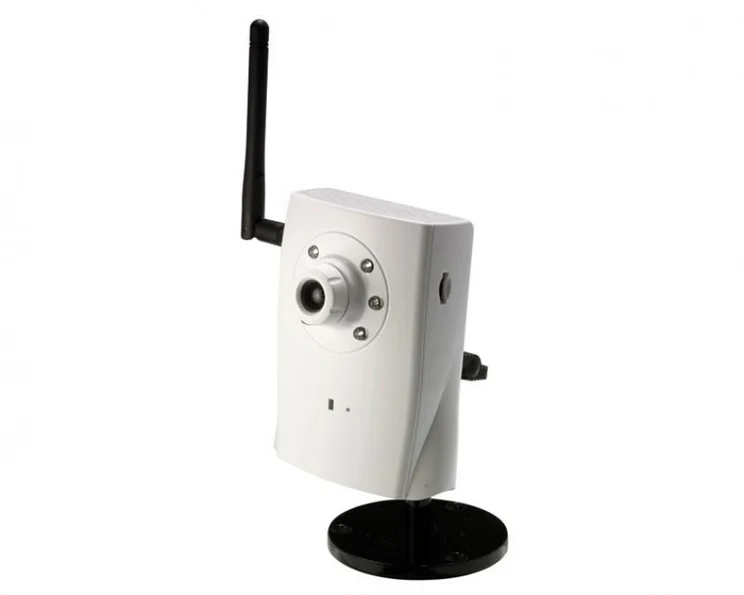

Flexibility is one of the most important aspects of an IP camera, so that you can place it where you want to keep an eye on your business or home. With LEDs to light up a dark area, Ethernet and 801.11n Wi-Fi networking and a maximum recording resolution of 1,280×1,024 at 15fps, Xvision’s The Cube is certainly one of the most flexible cameras you can buy.
We’ve seen this model recently, but our original review suffered from some browser issues (both desktop and Android), which have been resolved. Knowing this, we decided that it was only fair to revisit and update the review.
Set up of the camera is first by locating the camera on the network using the IP Wizard LAN software. Once detected, all management is done through a web browser. As with the majority of IP cameras, the configuration is best done with Internet Explorer, as the ActiveX plug-in gives you full access to all of the camera’s features and faster video streams.
The Cube will work in Firefox and Chrome, but you miss some ActiveX-only components, such as the movement threshold graph for motion detection calibration. As such, these browsers are better off thought of as for viewing only.
All of the camera’s settings are done through the web interface. It looks rather basic and we found that it could be slow to respond at times taking around 20 seconds or so to save settings. That said, it’s packed full of features and once you’ve got the camera correctly configured you’ll rarely need to come back into the interface.
By default the camera picks up an IP address from a DHCP server. As this is prone to change, a fixed IP address makes more sense, particularly if you want to access the camera from over the internet, as you’ll need to configure port forwarding in your router. Initial configuration has to be through a wired connection, but once into the interface you can add the camera to a wireless network. It automatically scans for available networks, making it straightforward to join one.
Once you’ve got your network configuration sorted out it makes sense to configure the camera’s feed and motion detection. There are settings to configure the camera’s white balance, color level, brightness and contrast. Focus is manually controlled by twisting the lens on the front.
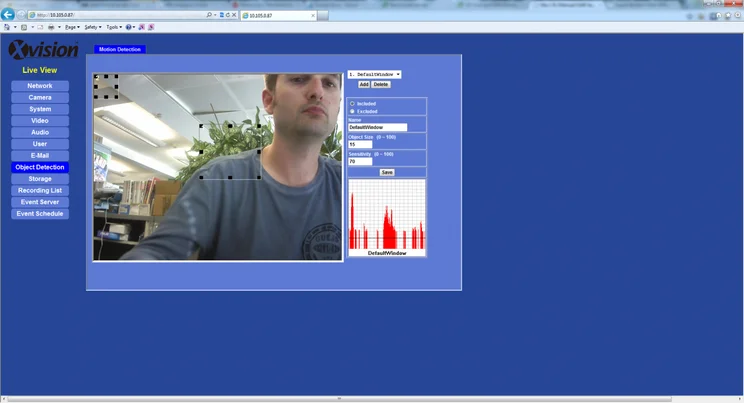
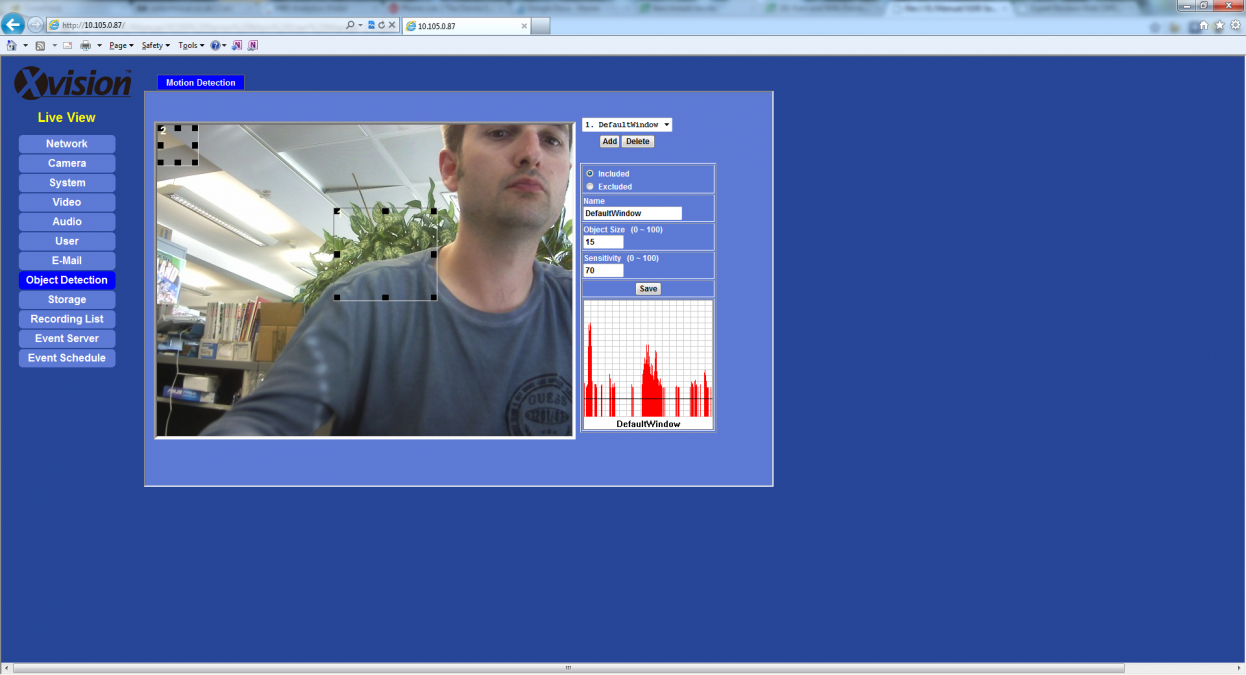
Motion detection is done by drawing windows of interest over the image of areas you want to monitor. Detection zones can be Included (motion is detected inside the box) or Excluded (motion inside the box is ignored). The latter option is useful to cut out movement through a Window or a door that you don’t need to monitor.
Each box has its own settings for Object Size and Sensitivity. These let you set the camera, so that it doesn’t go off all of the time. The manual is a little bare when it comes to setting these options, just saying that each has a value between 1 and 100. It’s a little annoying that there’s no description of what the graph means. How it works is that the black line on the graph represents the size of object detected. The moving bars on the graph represent detected movement. If the movement bars are higher than the object size line, they turn red showing that this would trigger an event; if the bars are lower than the object size line they’re blue. The sensitivity setting defines how much movement is required. By adjusting two you can make sure you don’t get false alarms.
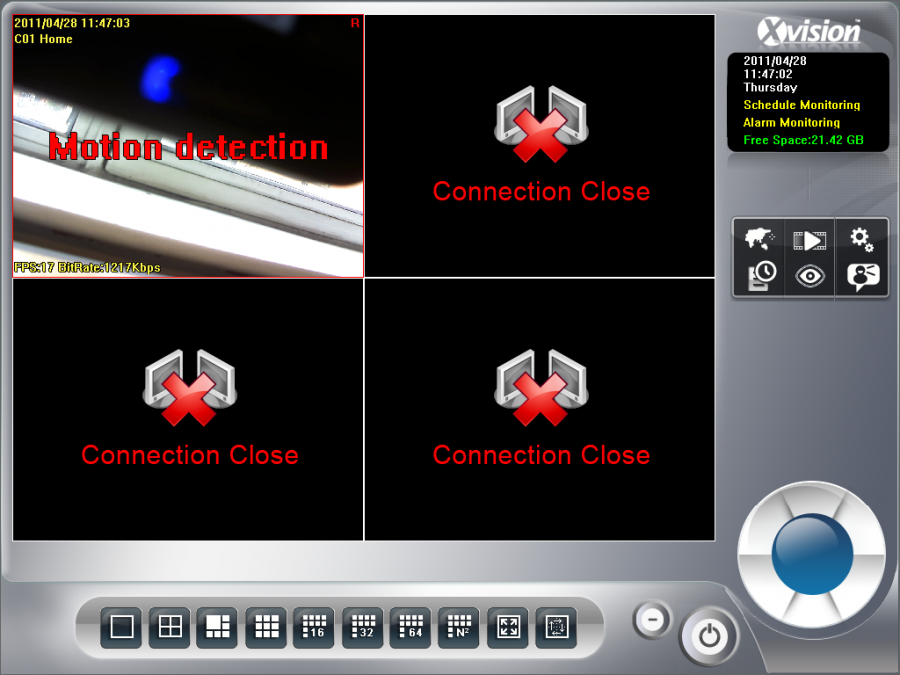
Once you’ve got your Object Detection windows you need to set schedules to record footage. These say what days and times the schedule is active and what to do with footage. Captured footage can be saved to MicroSD card, emailed or uploaded to a network share, FTP server or HTTP server. You can select the type of footage you want to capture (still JPEG, M-JPEG or H.264), but you can’t set the quality of stream. Instead, video is captured at the maximum quality settings.
At 1,280×1,024 at 15fps, the quality of the footage is pretty good. Compression artefacts are clearly visible and we found that text on stationary objects was hard to read. For this reason, this isn’t the ideal camera to have pointed at a car park if you want to read number plates. Most importantly, people’s faces were clear and easy to recognise.

The camera can cope with low-light situations in one of two ways. First, the shutter speed can be set to go to a maximum of 1/5s (five shots per seconds), which makes for jerky viewing, but captures all of the details in a dimly lit room. Secondly, the ring of white LEDs can be used to light up to 10m away, capturing a subject in full colour. It works really well and colour footage is preferred by courts if a theft or intrusion goes to trial.
The LED lights can be set to come on automatically when the natural light dims beneath a threshold, and to turn off when the light increases. You can set a timer so that brief flashes of light, such as a car passing by, don’t trigger the lights. Alternatively, you can set the light to turn on when motion is detected. This could be a good choice if you’ve got a dimly lit room that the camera can ‘see’ well at a low frame rate, but want to turn the lights on when there’s movement to capture full brightly-lit detail at a higher frame rate.
For monitoring footage, you can set two Regions of Interest (ROI) windows. These are displayed full-screen using a digital zoom, and let you quickly check your home or office when you’re out and about.
Mobile support lets you check footage from your smartphone. Using Android, the system let us choose the resolution and frame rate of the feed, plus connect to the RTSP feed; however, there’s no way to view the ROI you’ve set from the mobile site. There’s also a link to the Original Web, which lets you access everything and worked perfectly on our Android phone. We could even go into the Settings menu, although the Object Detection option was strangely missing.
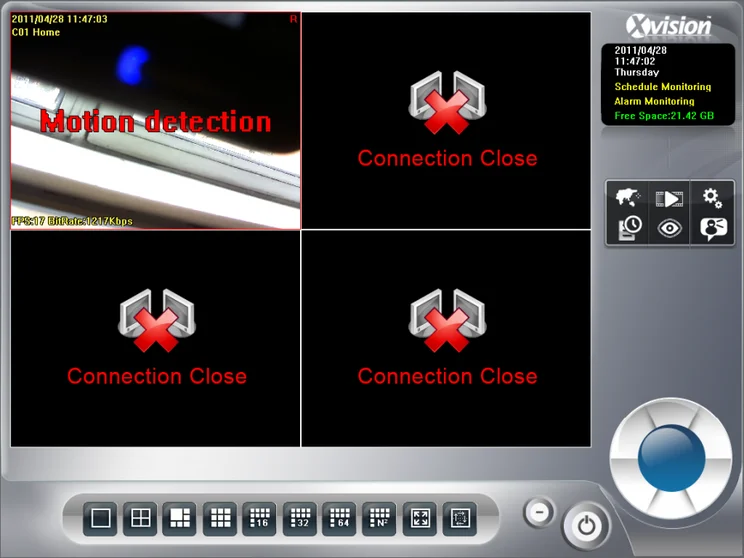
If you’ve got more than one camera, you can install the Xvision X64SW Lite Windows software, which can monitor up to 64 cameras on one screen. You can automatically flick between cameras or arrange the layout to view thumbnails of all the feeds; double-clicking a camera zooms in to its feed alone.
You can set the cameras to record automatically all day or you can get them to trigger on motion detection. You can also set alarms, so you have a siren go off if motion’s detected, making it a useful system for security guards to watch. All recordings are saved to the PC’s local hard disk, although we had to run the software in Administrator mode under 64-bit Windows 7 to get recording to work.
Captured footage is viewed through the dedicated playback software to view footage. The easiest way to find a recording is to use the event log and double-click an entry to view the footage. You can also search for footage in the playback software, which gives you a time line with colour-coded entries to show you what set the recording in motion. You then highlight the time period and cameras you’re interested in to view the footage. If you spot anything incriminating going on you can save the footage or take a snapshot. The interface is a little bit clunky and it takes a while to learn how to use the software, but it does a good job once you do.
There’s a lot to like about The Cube. Its interface can be a little bit clunky and the manual needs a bit of improvement to describe some features, such as Object Detection, in more detail. Once you’ve got it configured, though, the quality of the footage and range of features make this an attractive camera. We found the Compro IP70 slightly easier to configure and it’s probably the better choice for single use (it’s wired, but a Wi-Fi adaptor is available for around £15). That said, it use IR LEDs for night use, so if you need to capture footage in colour Xvision’s The Cube is well priced and a decent choice.