To help us provide you with free impartial advice, we may earn a commission if you buy through links on our site. Learn more

The latest smartphones are capable of shooting video with incredible quality, up to 4K. But a great YouTube clip is more than just how good the footage itself looks. To grab your audience, particularly when sharing via the attention-deficit-fuelled world of social media, you need to pick out the best bits and put them together creatively, with text and music to produce a piece with punch. What you need is video-editing software that’s easy to use and full of creative potential, which is where Movavi Video Editor Plus comes in.
One of the criticisms often targeted at video-editing software is that it is fiddly, hard to use and time-consuming. It’s certainly true that elaborate productions take time and effort. However, Movavi’s Video Editor Plus has an alternative called Quick Video, with a montage wizard that will do most of the heavy-lifting for you.

When you first load Video Editor Plus, you will be given the choice between the full interface and the Quick Video wizard. The latter will put together an edit for you, with minimal effort.
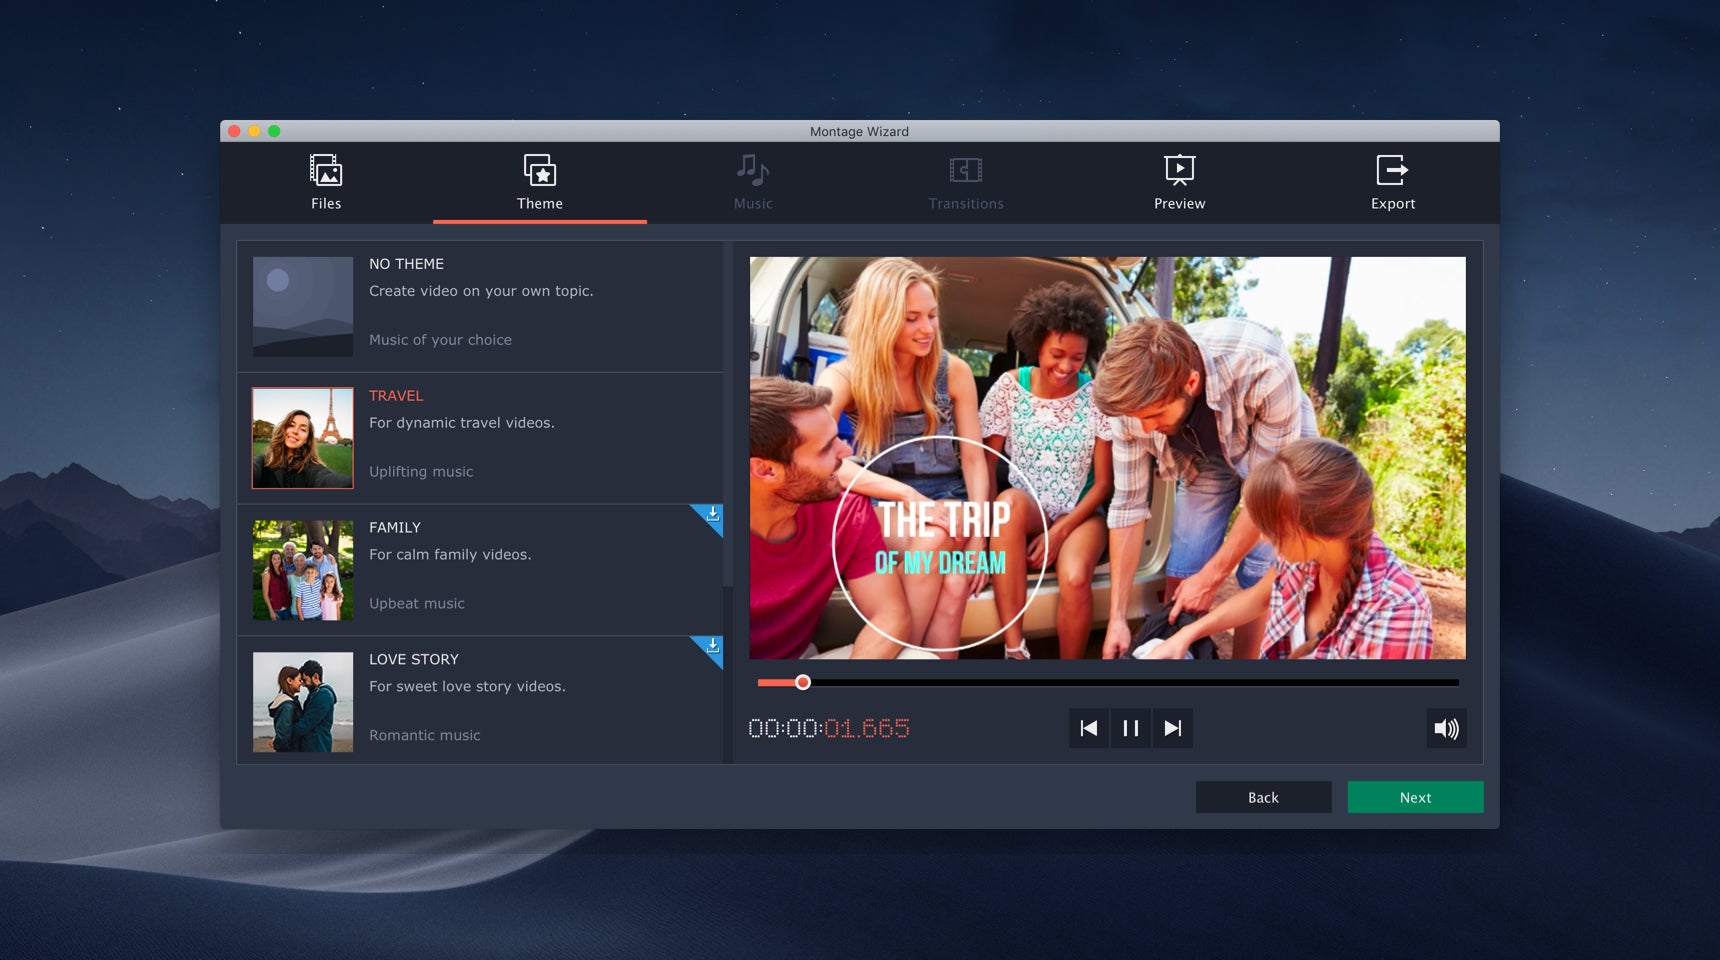
First, you import all the files you want to use. After clicking Next, you will be prompted to choose a Theme, with options including travel, family, love story and others. If you haven’t used that theme before, it will be downloaded. This pre-selects music and transitions for you, but you can create your own custom theme as well.
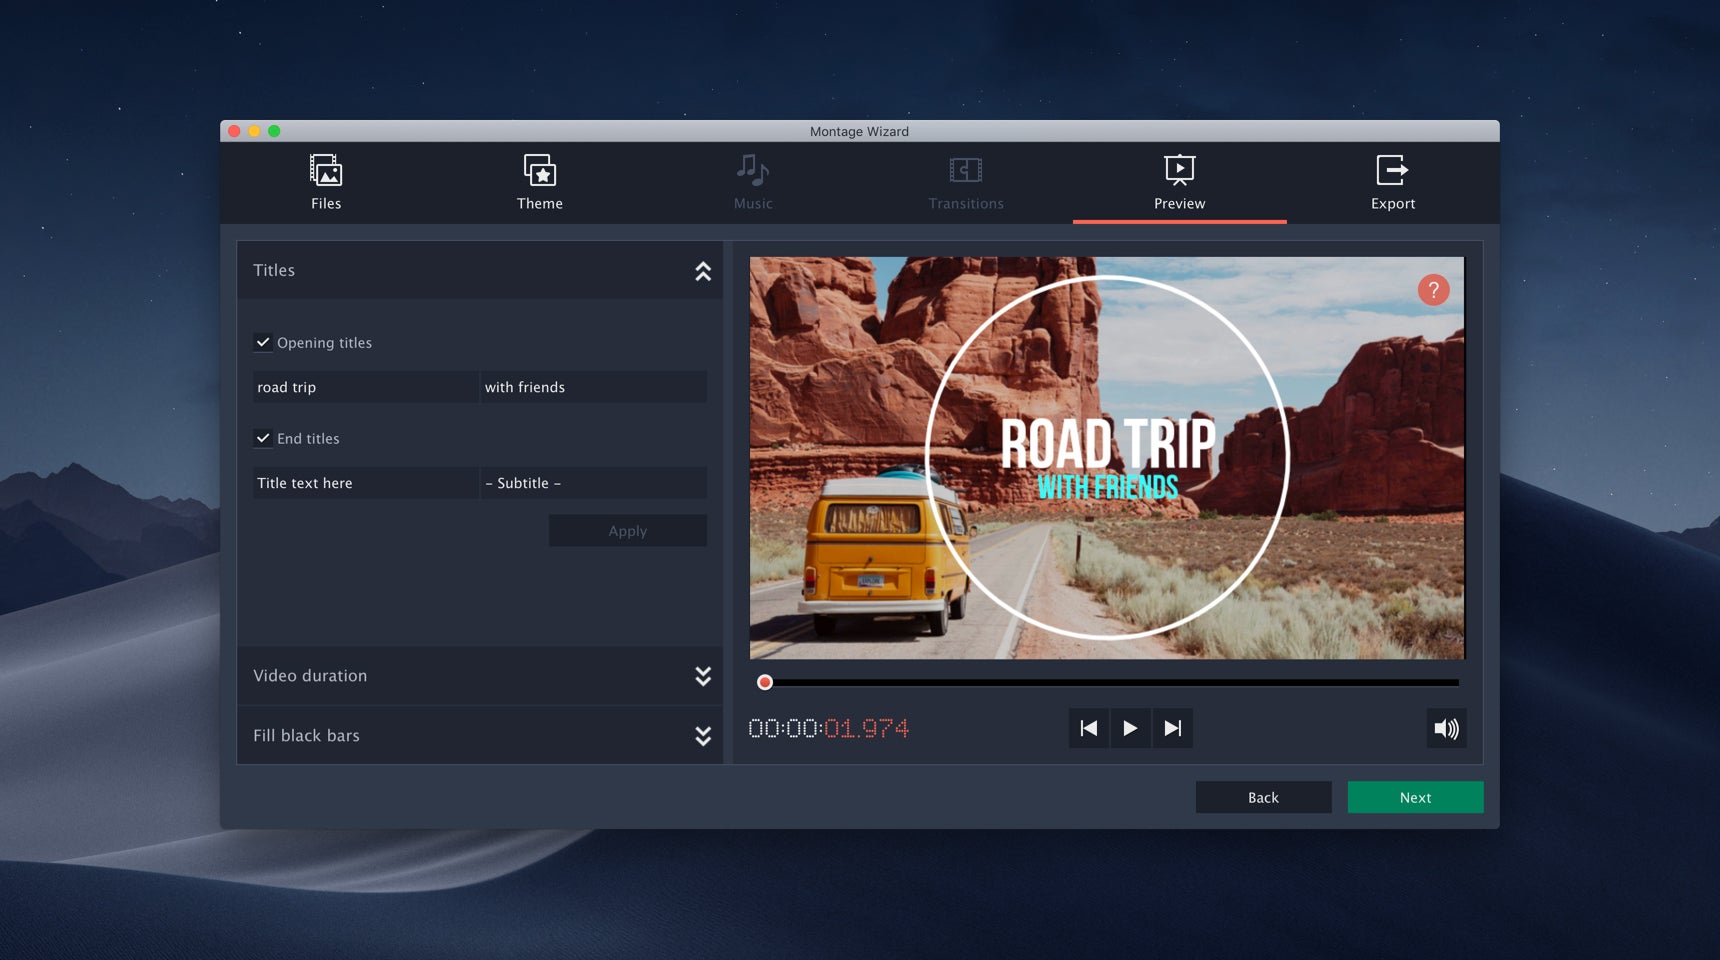
The final step before output from Quick Video is to add the text for the beginning and end of the video, select the desired duration, whether to fill the frame with black bars, and adjust the volume balance. You can then preview the automatically edited result, prior to exporting the end product to a video file, outputting to Google Drive, YouTube or Vimeo, or to Continue Editing.
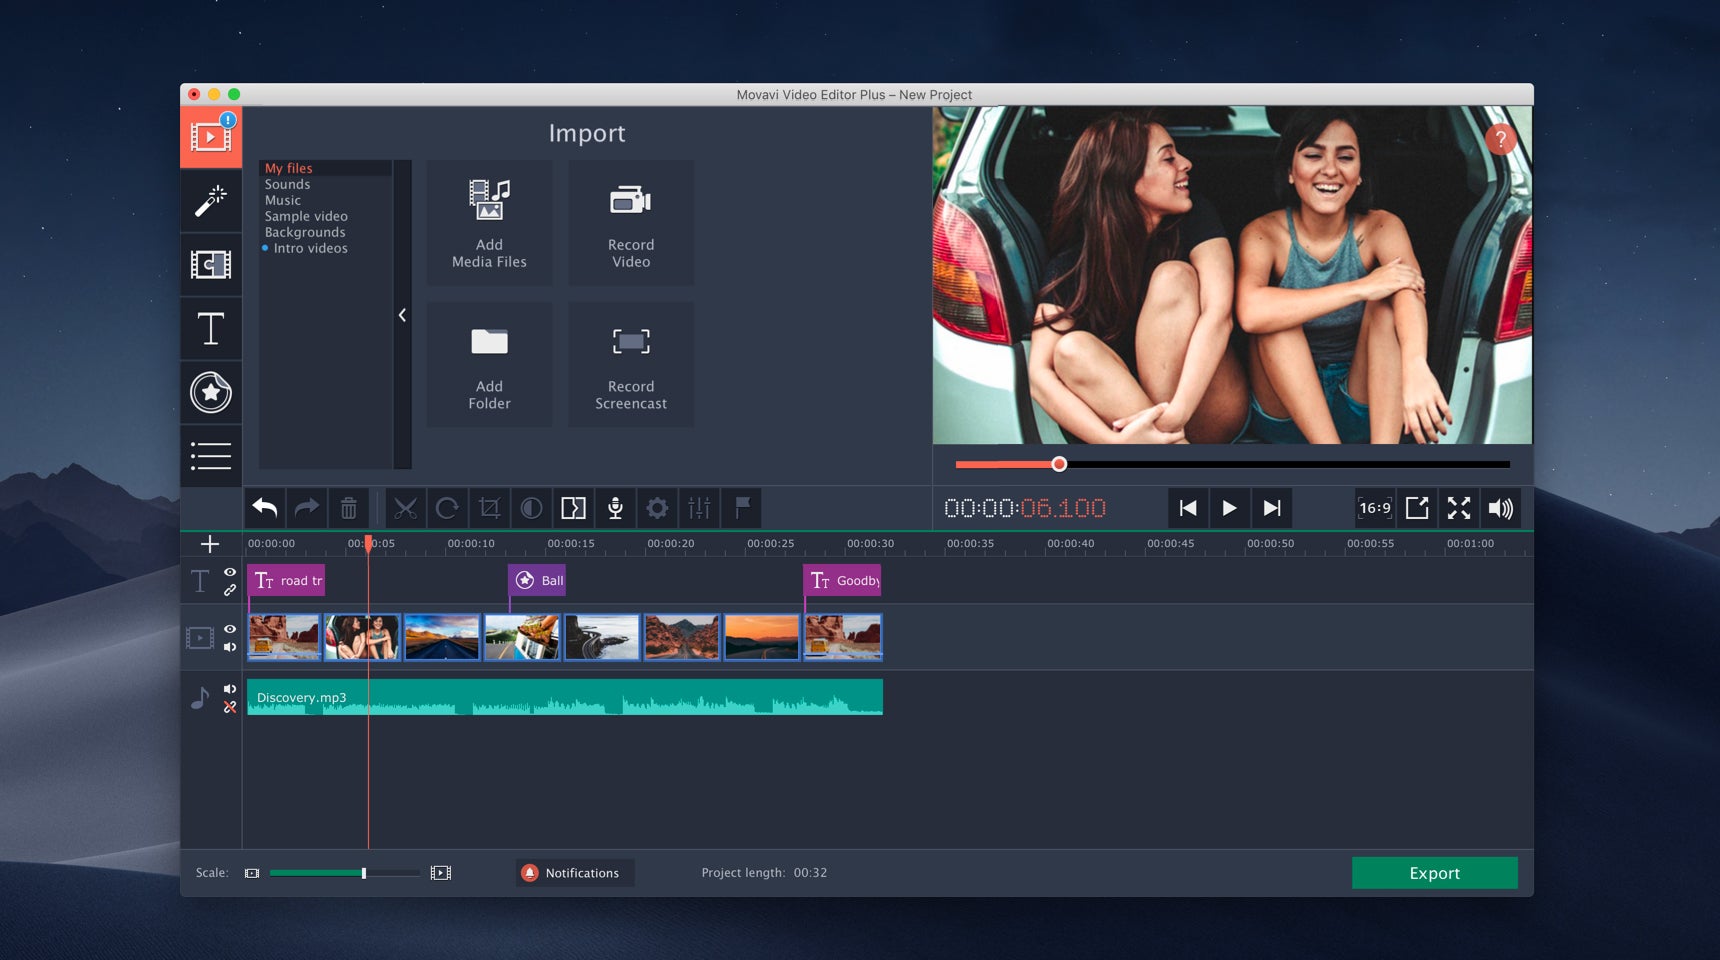
If you select Continue Editing, your project will be loaded automatically into the full Video Editor Plus interface, which is where the full power of the software reveals itself. The interface presents the typical ribbon of video-editing software. You can import more media files, an entire folder, and record video from a capture device on your computer such as a webcam, although the ability to record a screencast is an optional extra.
Improving your footage
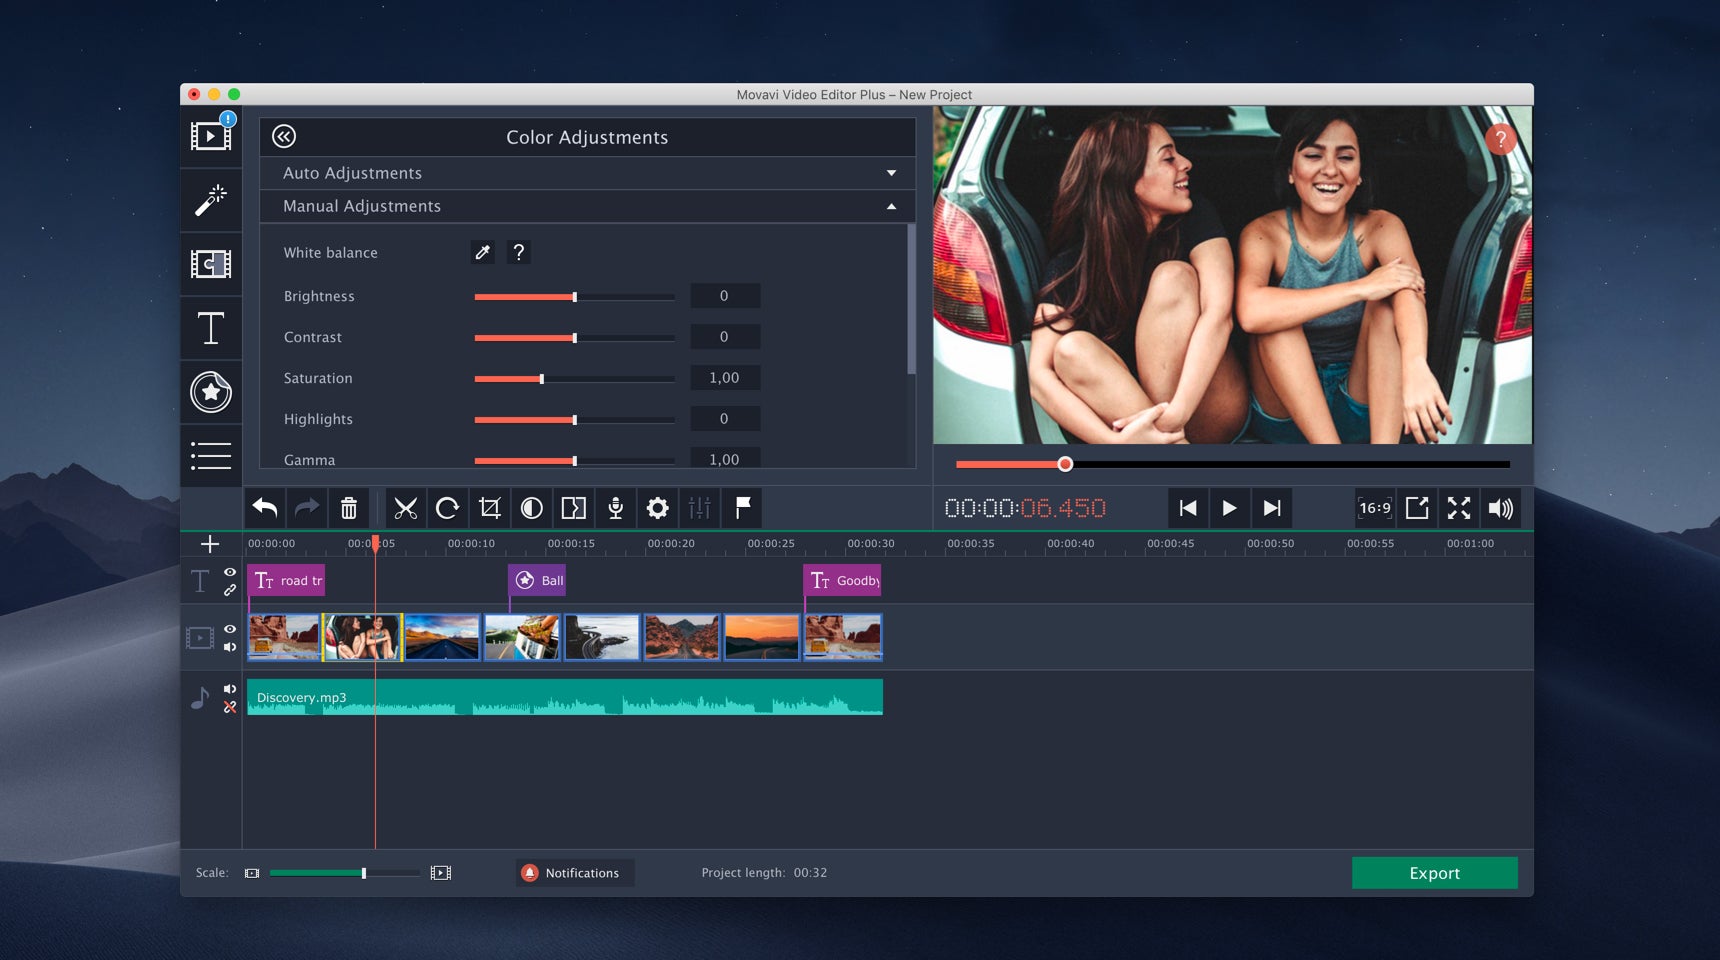
Adding more clips to your edit is as simple as dragging them from the folder on the top left onto the timeline. You can trim the clip by dragging either end of it on the timeline. The preview window will show the current frame, so you can fine-tune the in and out point. If you then double-click on a clip, you will find myriad options to adjust features like the volume of the audio and playback speed, including playing a clip in reverse. You can also apply one of four automatic colour corrections, or adjust the colour manually by contrast, hue, saturation and other parameters.
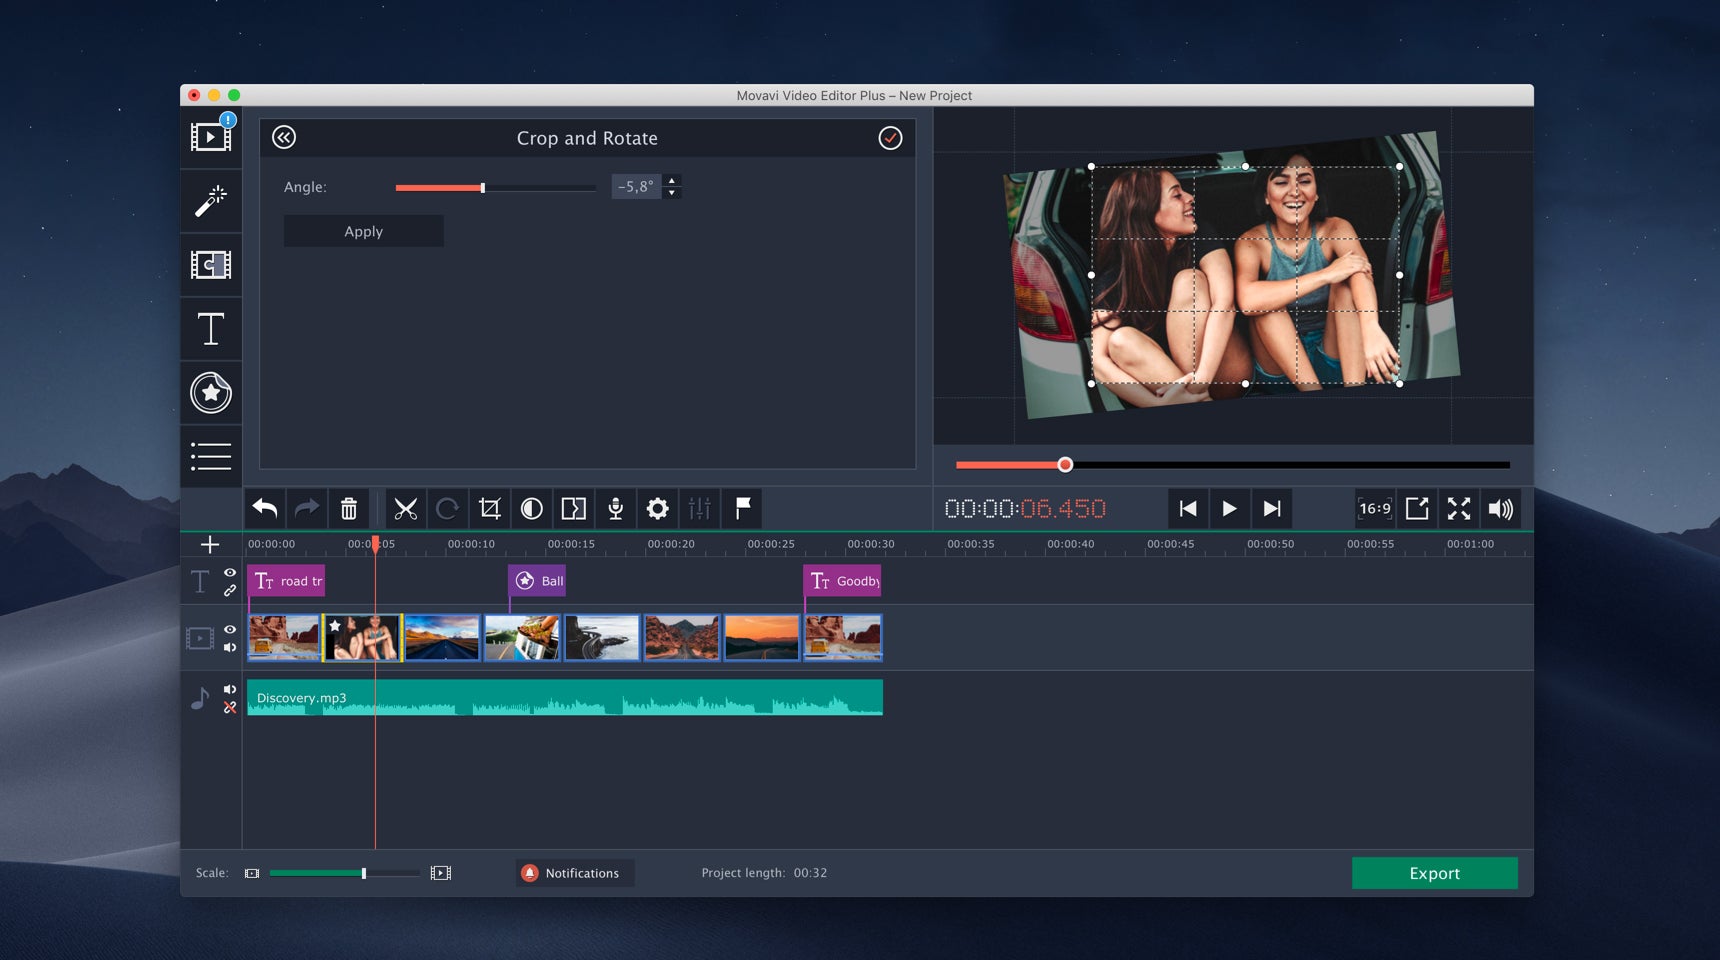
You can crop into your video and rotate it. The Angle slider provides the rotation, while selecting the crop icon below reveals the grid to help you adjust your segment from the frame.
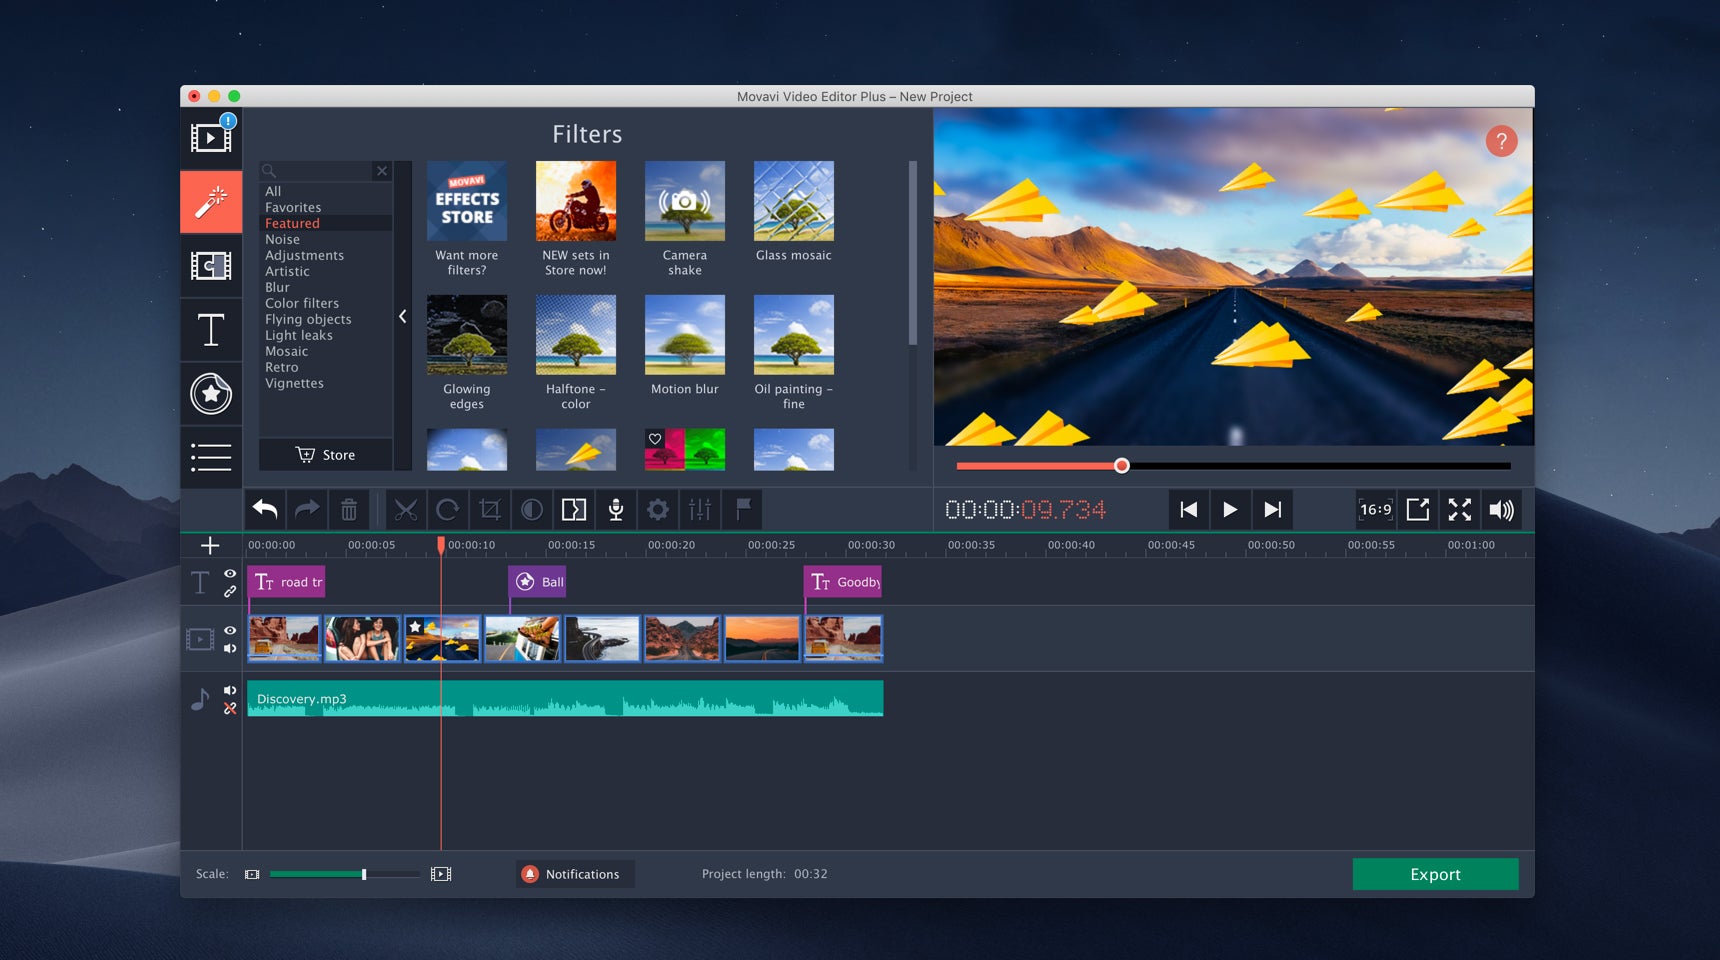
Video Editor Plus comes with a huge range of filters, found by clicking on the magic wand icon on the far left, and you can add even more by purchasing additional effects packs. Filters are applied by simply dragging them over to a clip, and you can apply more than one at once. Some filters even place moving objects over your video. For example, above is the infamous tilt-shift effect, with some animated paper aeroplanes over the top. There is a huge amount of creative potential here.
Effects, transitions and animation
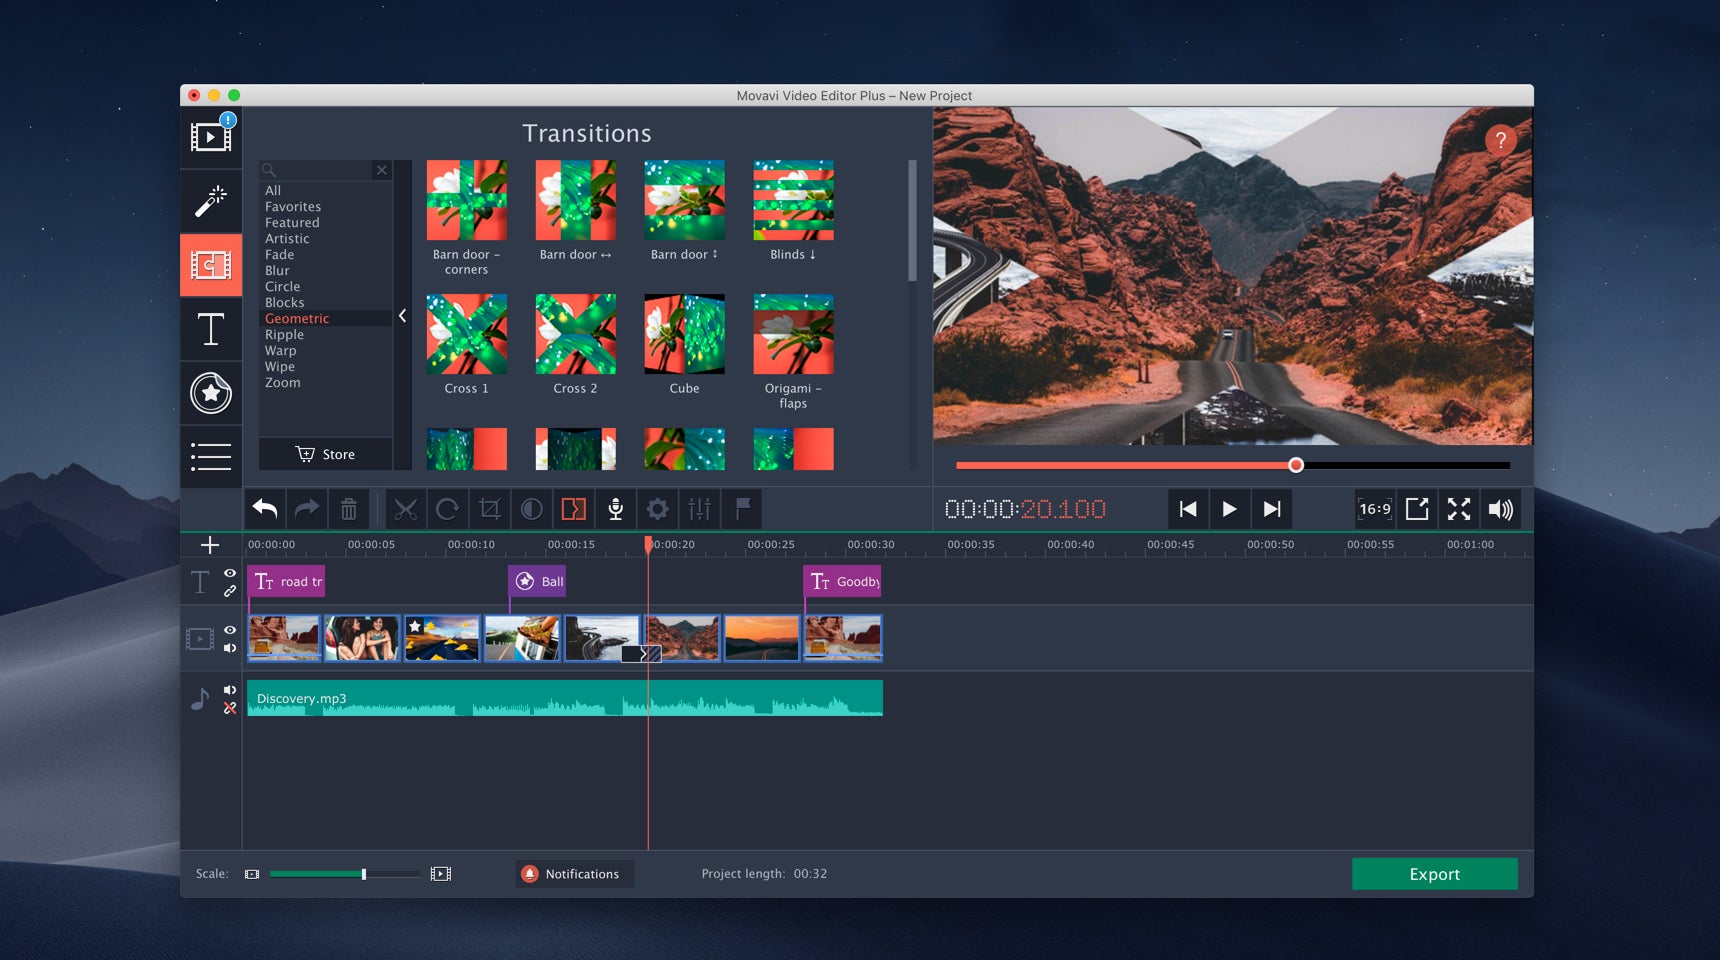
By default, Video Editor Plus just places straight cuts between clips. But if you want something more adventurous, there is a large range of alternative transition options, which you can find by selecting the third icon down on the far left, which looks like a cross between a film frame and a puzzle piece. The options go from simple fades and wipes to all manner of geometric transitions. Add in the effects packs and you can get truly incendiary options such as a meteor that explodes to reveal the next clip.
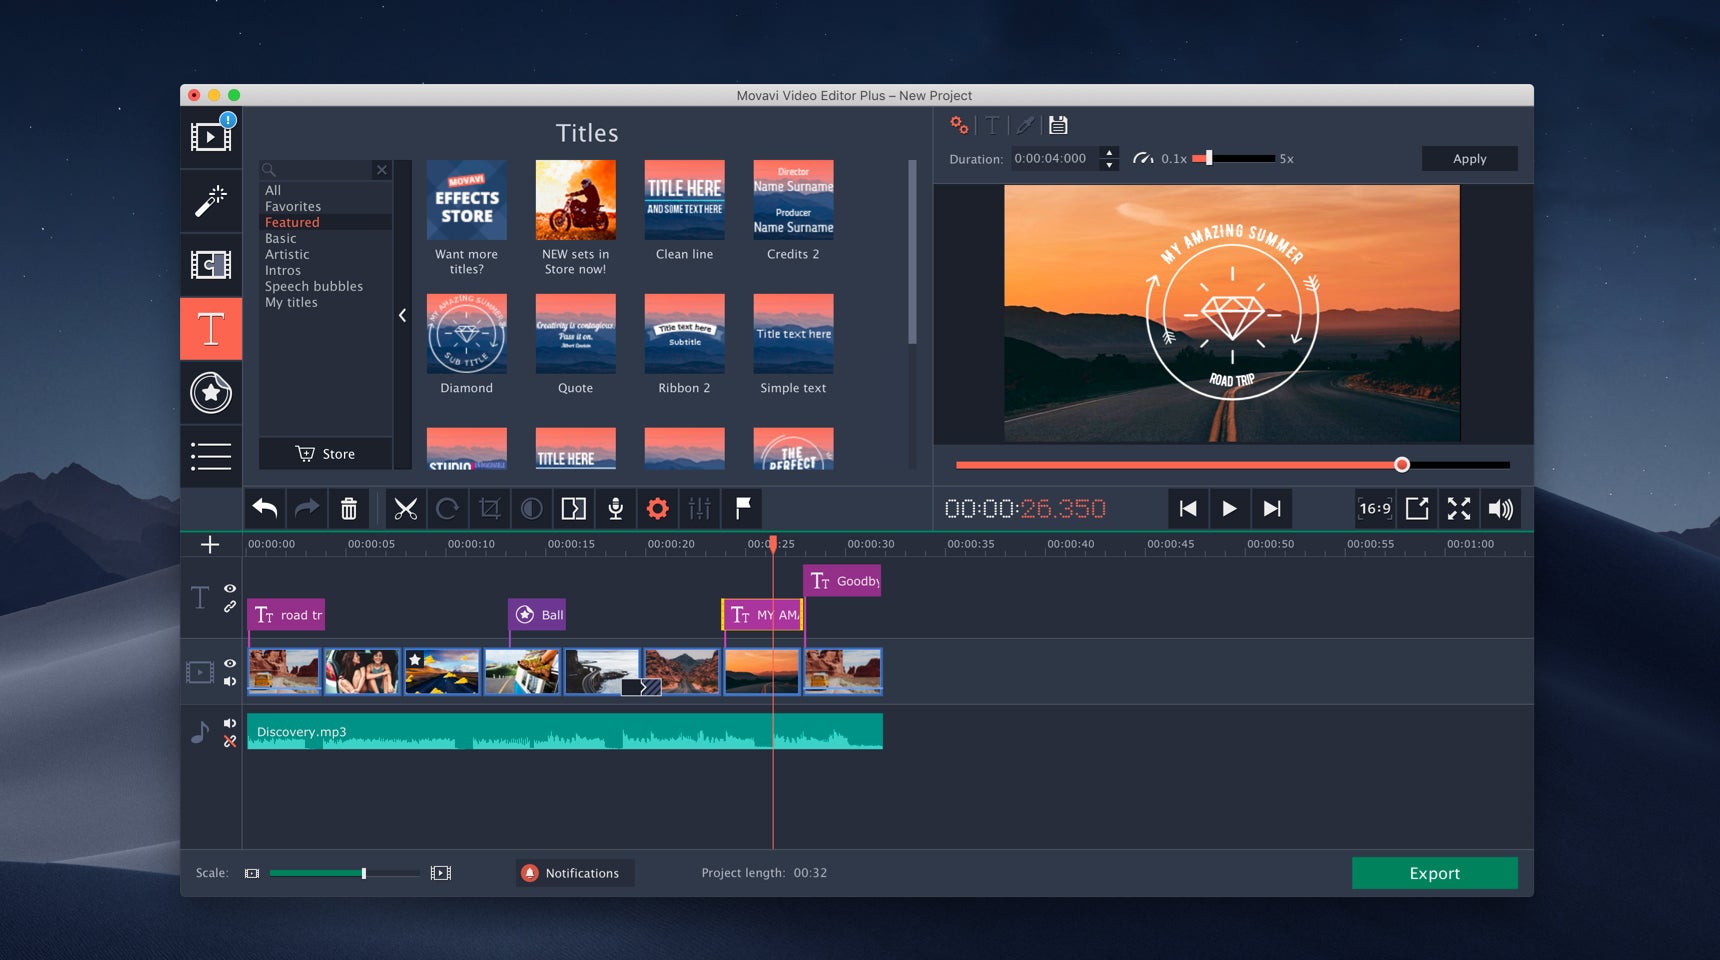
The Quick Video wizard will add a title at the beginning and simple credit text at the end, but lots more options are available via the T text icon on the left. If you want to introduce your participants’ names, or add subtitles, simply drag a design you like to the T title track above the video track. This will add your title over the top of the video layer. You can edit the text by clicking in the preview window. You can also move graphical elements around the screen.
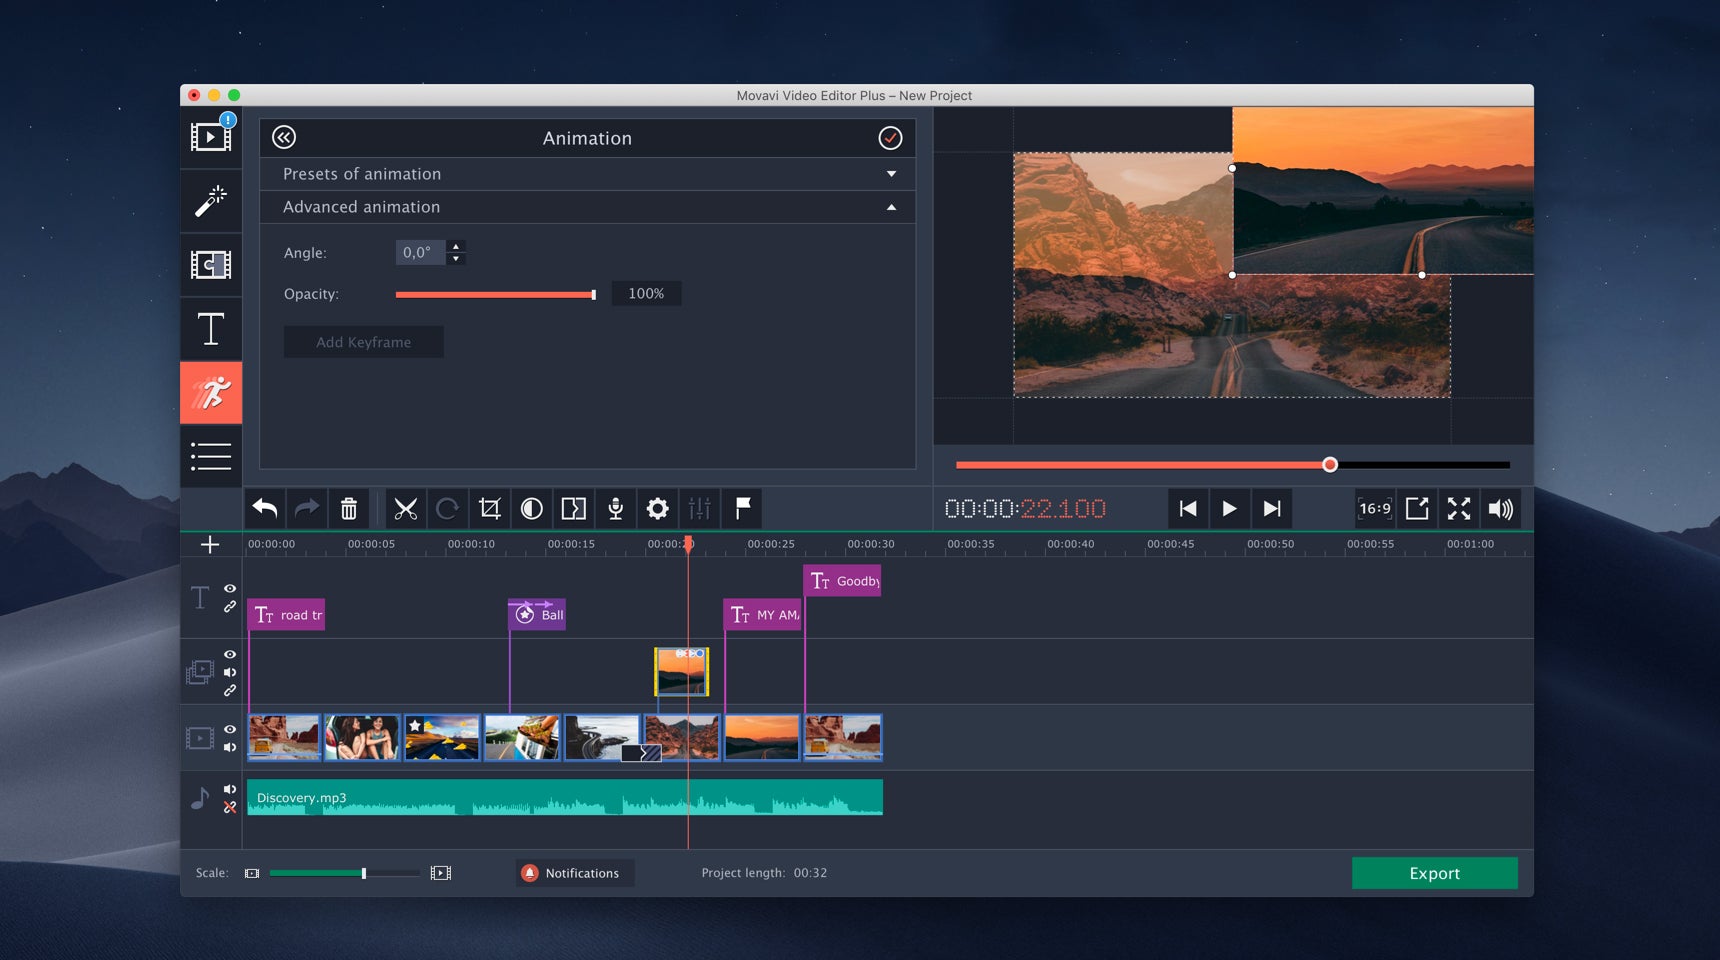
One of the most powerful of Video Editor Plus’s abilities is animation, which you can locate via the running person icon on the far left. You can drag one of the presets to a title or video clip, for example, so your subtitles come on and off screen. But you can also use the plus sign on the far left to add another video track, drag a clip onto this, and use the Advanced animation tools to bring it onscreen and scale it for a motion picture-in-picture effect. Move the time marker where you want to insert a keyframe, hit the Add Keyframe button, then adjust the size and position of your superimposed text.
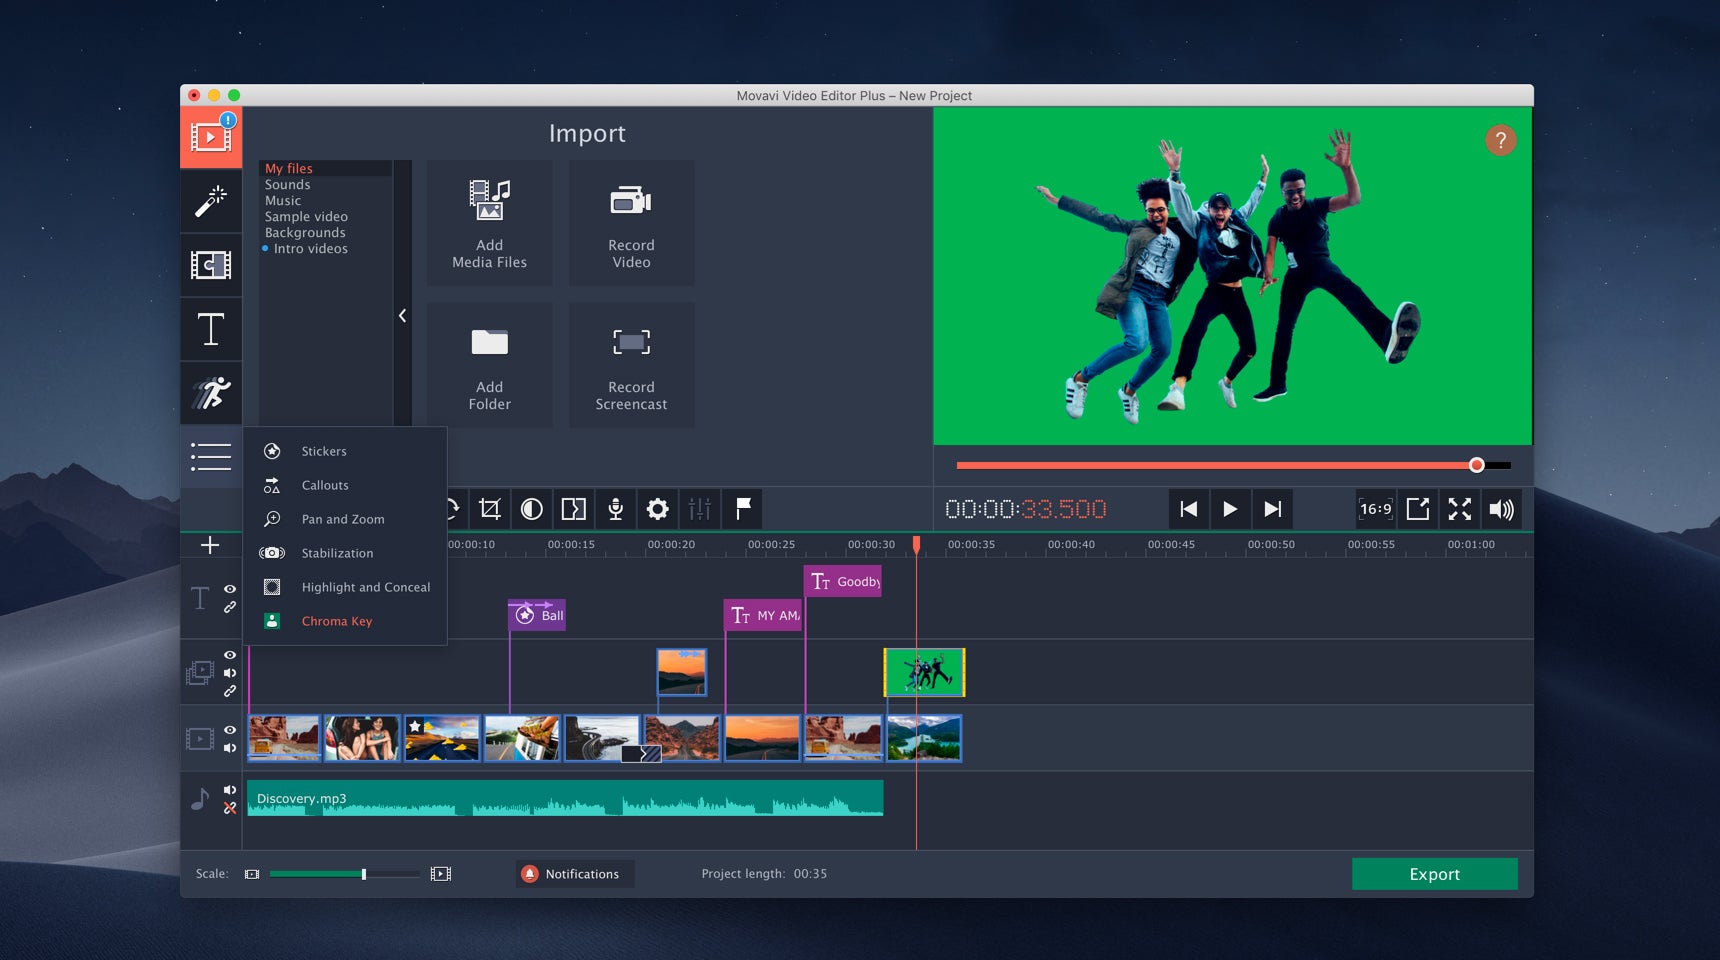
Unless you have a large enough screen to show all the options on the far left, underneath the animation icon is a three-line icon that provides access to the remaining advanced capabilities, including panning and zooming for those popular “Ken Burns” effects on images. You can also stabilise jerky footage that was shot handheld. The Highlight and Conceal option lets you block out a portion of the frame, for example to hide a car number plate or someone’s face. In the above image, we’ve chosen Video Editor Plus’s Chroma key, which will remove a solid colour background for that “weather presenter” effect. You use the colour picker to choose the colour to remove, then adjust the sliders until you obtain the desired result.
Getting your videos ready for social media

In these days of Instagram and Snapchat, no video would be complete without the facility to add garish stickers and callouts. Video Editor Plus comes with a healthy selection of these, which you can drag to the T text timeline. The effects packs further add to the library of options.
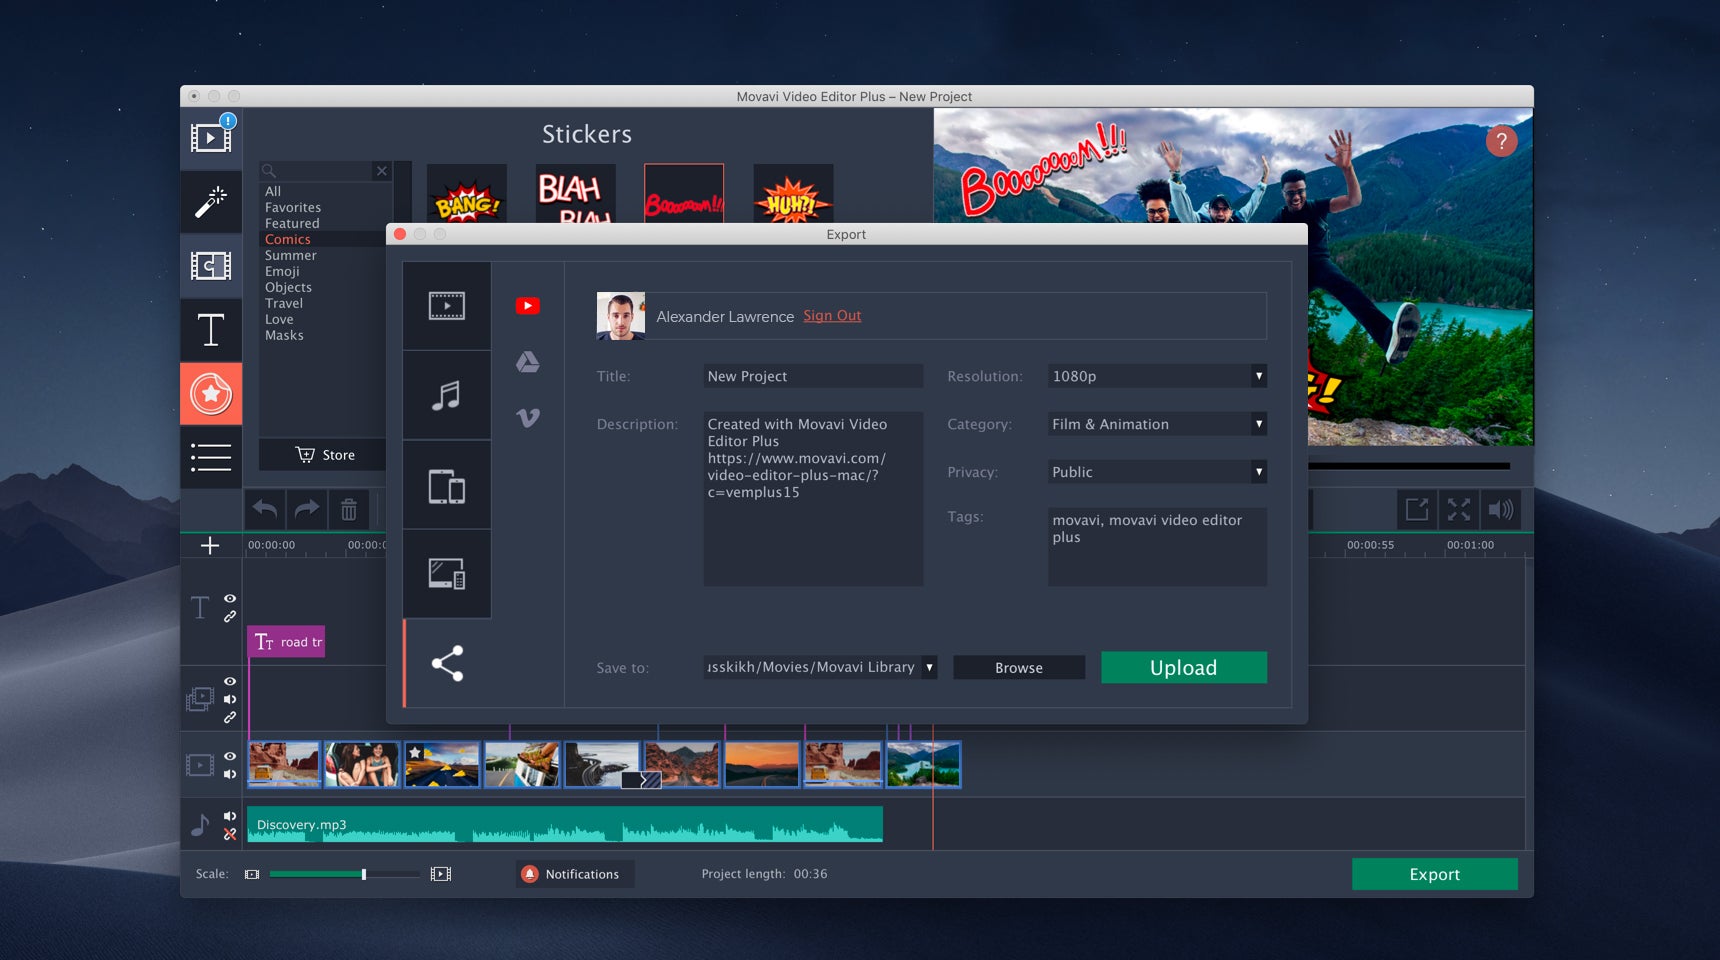
Once your masterpiece is complete, hit the Export button on the bottom-right corner. This will present numerous options, including output to a wide variety of video file formats, audio only, and presets for mobile devices and TVs. You can also share directly to YouTube, Google Drive and Vimeo. You’ll be asked to sign in to your service and give Video Editor Plus permission to gain access. You can then choose your resolution, category and other details before the software encodes and uploads your video.
Making your videos go bang
These are just the headline capabilities of this powerful video editor, with which you can elevate your footage from rough individual clips to finely composed pieces that will give your viewers much more pleasure, taking your footage to the next level. You can download the latest trial version of Movavi Video Editor Plus, which lets you use the software for a week for free and adds a watermark. After this you can buy an annual licence for just £29.95, a lifetime licence for £44.95, and a bundle with other Movavi software for £59.95. Effects packs start at £7.95 each. These are very competitive prices compared to options from Corel, Ulead and Adobe, making Movavi Video Editor Plus a solid option for improving your YouTube video bragging rights.


