To help us provide you with free impartial advice, we may earn a commission if you buy through links on our site. Learn more
Once you’ve decided on the best VPN for your needs, all that remains is to buy a subscription and install the software. However, the default settings may not be ideal for your purposes, and a few tweaks can help you make the most of your new purchase.
If you’re worried about delving into advanced technical settings, fear not. Most VPNs are pretty user-friendly, and we’re only talking about changing a few options, rather than getting under the digital hood.
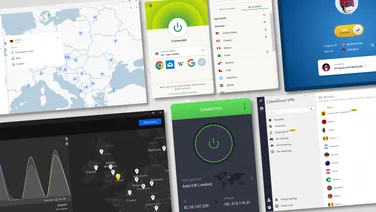
For this tutorial, we’ll assume you’ve already signed up with a VPN service and have some idea of how to use it (if you don’t, check out our guide “How to use a VPN”). We’ll use NordVPN for our examples since it’s our top pick – read our NordVPN review to find out why – but most of these points apply equally to other VPN clients, and we’ll mention other providers where it’s important.
READ NEXT: The best VPNs for Netflix
Installing a VPN
Installing a VPN client is generally pretty easy, but if you’ve had a VPN installed on the same machine before, it’s a good idea to start by uninstalling the old software. That’s because VPNs take control of your network connection, so having two on the same system may occasionally create issues. We’d also recommend uninstalling any adapter software related to your old VPN before installing a new one.
With this done, just follow the on-screen installation instructions for your new client and you should be fine. If you’re prompted to install a virtual networking adapter (or a “TAP adapter”) by your new VPN, you can safely agree.
READ NEXT: How to set up a VPN on your router
Auto-Connect
Once your VPN is installed, an important decision is whether you want your VPN to be loaded up automatically when your computer does – and if you do, do you want it to immediately connect to a VPN server, or just be at hand ready for you to hit the Connect button when desired? There are arguments to be made for either option.
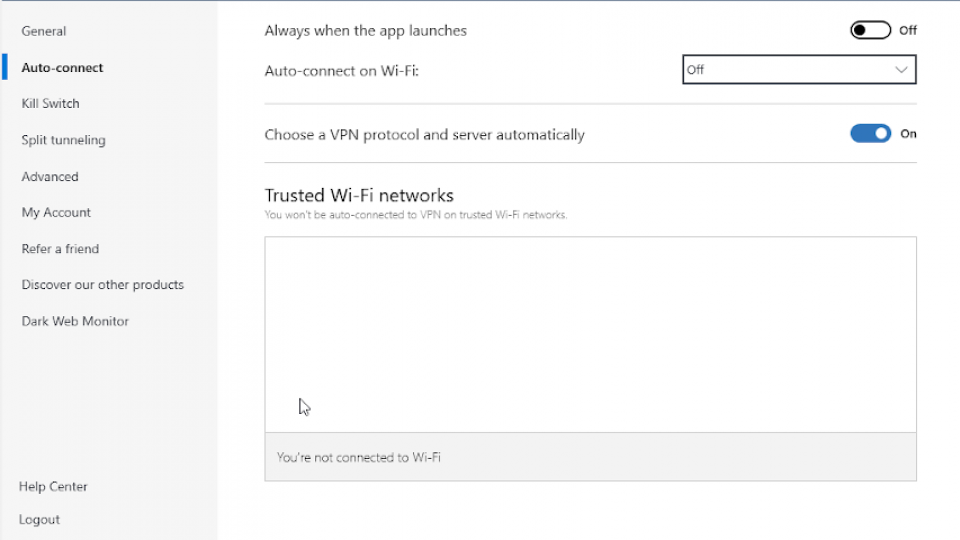
If you’re concerned about security and want to make sure you maintain a minimal digital footprint then it’s best to have the VPN connect when the computer starts every time. This can be particularly helpful for people living in countries where the internet is regulated or controlled.
However, if you only use your VPN for specific reasons and would rather not slow down your internet speeds when it’s not needed, leave the VPN on manual startup.
READ NEXT:
Protocols
Next up, you may wish to check out which communication protocols your VPN offers. You shouldn’t mess with these lightly, but the choice of protocol can affect the speed and security of your connection.
NordVPN uses a proprietary protocol called NordLynx, and actually makes it difficult to switch to anything else. This is fine by us, as no issues have been reported with NordLynx. However, some other VPNs such as Surfshark default to the older IKEv2 protocol; this is really fast, but it can also be blocked by firewalls, and it’s rumoured that national security agencies can spy on improperly secured IKEv2 connections.
You may therefore prefer to switch to a different protocol. Almost every VPN client should give you the option of switching to OpenVPN (the image above shows the selection page in ExpressVPN), which is a highly reliable protocol that strikes a good balance between security and speed. If it’s available you can alternatively try out Wireguard, which is even faster.
Whatever you do, though, never use the PPTP protocol – it’s very old and can nowadays be cracked quite easily.
Killswitch
The next thing you want to check is whether your VPN’s killswitch is enabled. This feature “kills” your internet connection when the VPN disconnects unexpectedly, ensuring that you don’t inadvertently send or receive data while unprotected. This is vital for people using a VPN to avoid persecution, but it’s useful for anybody.
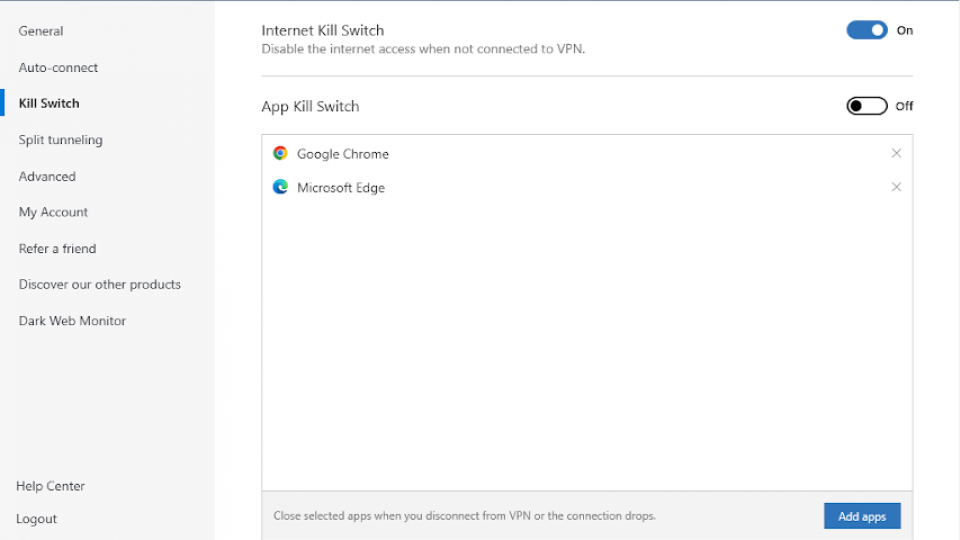
Oddly, not all VPNs have this feature enabled by default: for some reason both NordVPN and Surfshark need you to switch the killswitch on manually. We’ve no idea why, but whichever VPN you choose, be sure to check the settings and ensure that your killswitch is enabled before you start doing anything sensitive online. In NordVPN, the killswitch has a dedicated tab in the Settings menu, while in Surfshark it’s under the regular settings.
READ NEXT: The best Wi-Fi 6 routers to boost your surfing speed
Split Tunnelling
A final feature you may want to look at is split tunnelling. Not every VPN client supports this, but if available it allows you to route only certain apps or programs via the VPN, while the rest use your regular internet connection. It’s ideal if, for example, you want to browse the internet while watching overseas Netflix: you can use the full-speed, unprotected connection for your browser, while the Netflix app goes through the VPN.
Most major players, like ExpressVPN and NordVPN, support split tunnelling, and setting it up is easy. In the case of NordVPN, you can simply go to the relevant tab under settings, while in ExpressVPN you need to select the box that says “manage connections on a per-app basis” in the options menu.
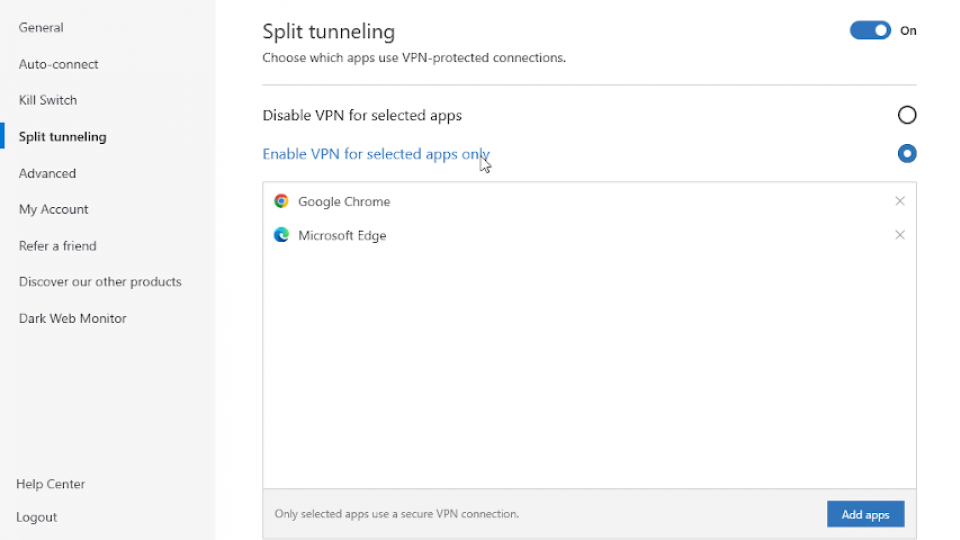
Then you just need to select the apps you want to use the VPN, and that’s pretty much it: increased performance for apps that don’t need the VPN, with protection for those that do.
Conclusion
VPNs are normally easy to use, but a few options can make a big difference in how you experience them. Feel free to experiment a little with these and any other settings that may be on offer – although be warned that choosing the protocol could reduce your security – and see what works best for you. Above all, enjoy your online privacy.