To help us provide you with free impartial advice, we may earn a commission if you buy through links on our site. Learn more
Knowing how to add a customer name in Wix email can be a real time-saver when you’re dealing with large lists of contacts. Nobody wants to wade through hundreds, or even thousands, of draft emails and personalise each one individually, but by using Wix’s Dynamic Values feature you can quickly introduce fields, such as a customer’s first name and last name, that will populate automatically, directly from your existing contacts. All you need to do is create a custom email campaign and decide where you want to introduce the dynamic values.
An obvious choice is in the intro of a newsletter. Kick off with “Hi” followed by the customer’s name and they will immediately feel an affinity with the brand. You could already be one step closer to a conversion, boosting your sales. But it’s not just the intro that you can personalise using Wix; email subject lines are ripe for personalisation too, ready to help build your brand before the email is even opened.
Here we show you how to create a new email campaign, access existing email campaigns, and introduce dynamic values to your emails.
How to create an email campaign
Here, we’ll show you how to create a new email campaign via the Wix Dashboard.
1. Pick a template
Head to Marketing & SEO in your dashboard and select Email Marketing to reveal three template options, or Start From Scratch. Choose the most suitable option for your needs – for this guide, we chose More Templates and the basic “send a newsletter” template to demonstrate the creation process. Select Preview to view on desktop and mobile.
2. Modify basic newsletter template
The basic newsletter template consists of text boxes with default text and image placeholders. To personalise the text, simply click on the text box and add your own text, for example, “Hi (name),” plus whatever copy you think is relevant. To add an image, just select the image box and upload your own. Select Next when finished.
3. Add recipients
Now select who the newsletter is going to be sent to. You’ll see a list of contacts that have been added previously, or segments you may have already created. If you have no contacts, you’ll need to import or add them.
4. Finish up
Finally, edit the subject line, make sure your sender details are correct, and check you have entered the right recipients. You can always send a test email to make sure that everything is displaying as desired.
READ NEXT: The best Wix deals
How to personalise an email by adding a customer name
To personalise an email in Wix, you first need an email campaign to work with. You can open an existing one, or create a new one (see above).
1. Open an email campaign
If you have previously created an email campaign, head to your Wix Dashboard and select Marketing & SEO | Email Marketing to show your email campaigns. Choose a campaign and select Edit to open.
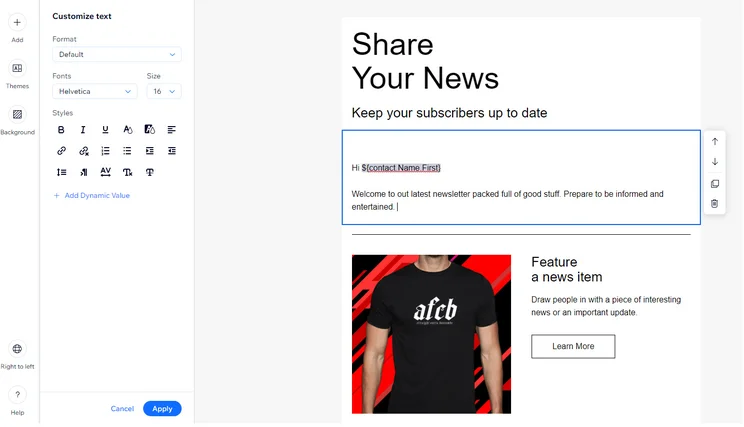
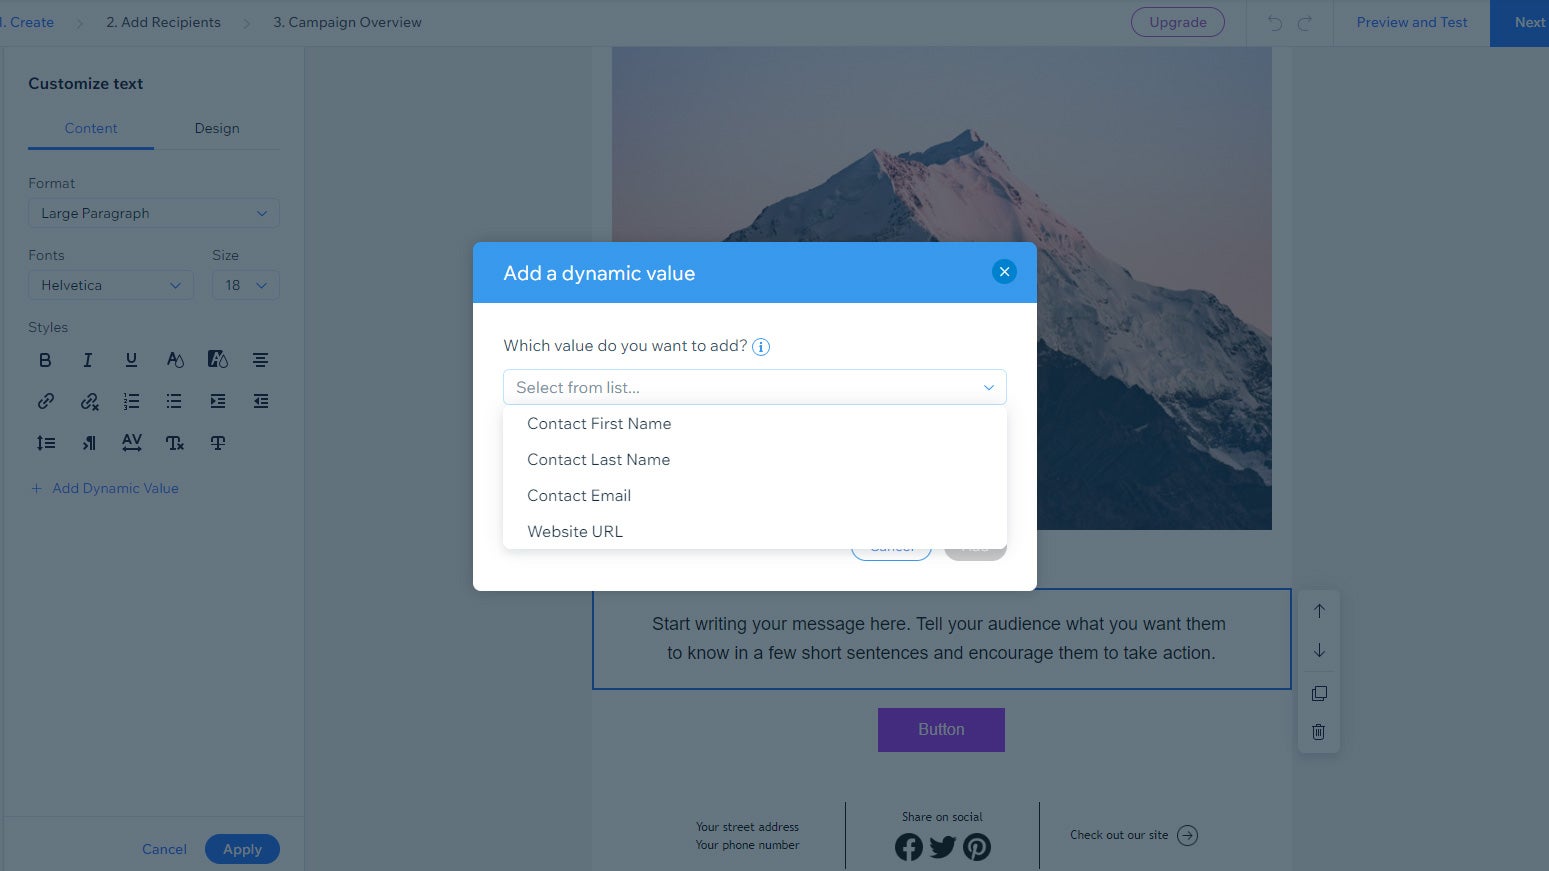
2. Add dynamic text
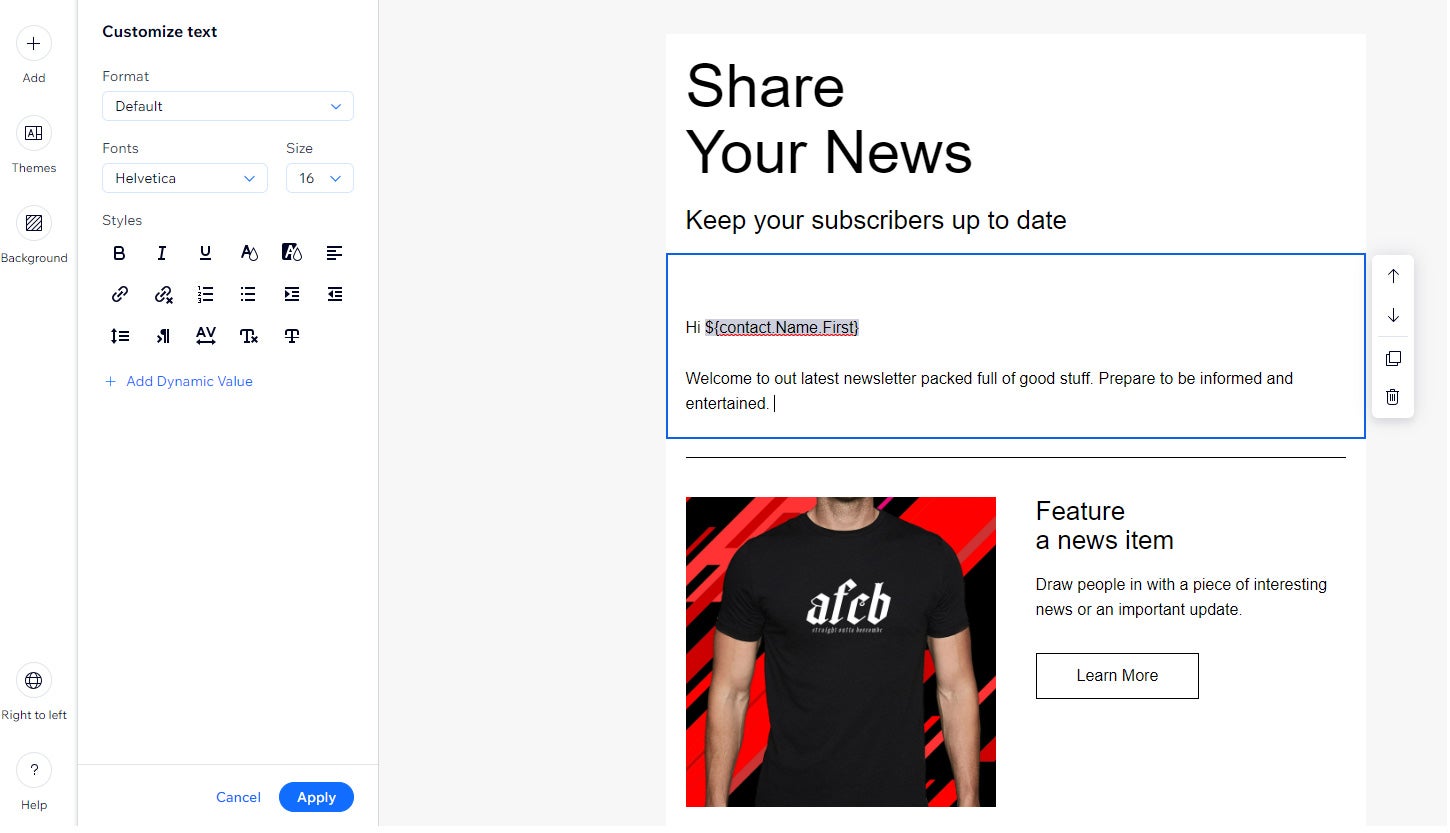
Select the text box you want to add a dynamic value to, and click where you want to add it – for example, adding the customer’s first name after the initial greeting. Now select Add Dynamic Value from the menu on the left to open a popup window. From the “Which Value Do You Want To Add?” drop-down, select the value you want – for this, you would choose Contact First Name.
For more professional best practice, it’s advisable to add some fallback text just in case the selected field – Contact First Name – does not exist. You can use generic text, such as “Hi, friend” or something similar that matches with your brand’s tone of voice.
3. Add a dynamic value to the subject line
To increase the amount of personalisation, and engage with a customer even earlier, you can introduce a dynamic value to your email subject line. Select an email campaign and click Next or Add Recipients from the breadcrumb menu. Select a group, segment or contacts (you’ll need at least one) and then click Next (top right).
Select Edit in the Subject Line section to reveal a popup window. The subject line field will contain default text and you should change this to create an engaging and personal message, being sure to leave a space for the name – for example, “Hi, (name)! We have a special offer for you…” or something similar. Select Dynamic Value and choose the field you want to add. Add preview text to further emphasise the subject line, and press Save.
It’s important to note that you won’t see the dynamic values when testing your emails; they’ll only appear in an email when you publish a campaign.
READ NEXT: The best website builders
How to manually add contacts
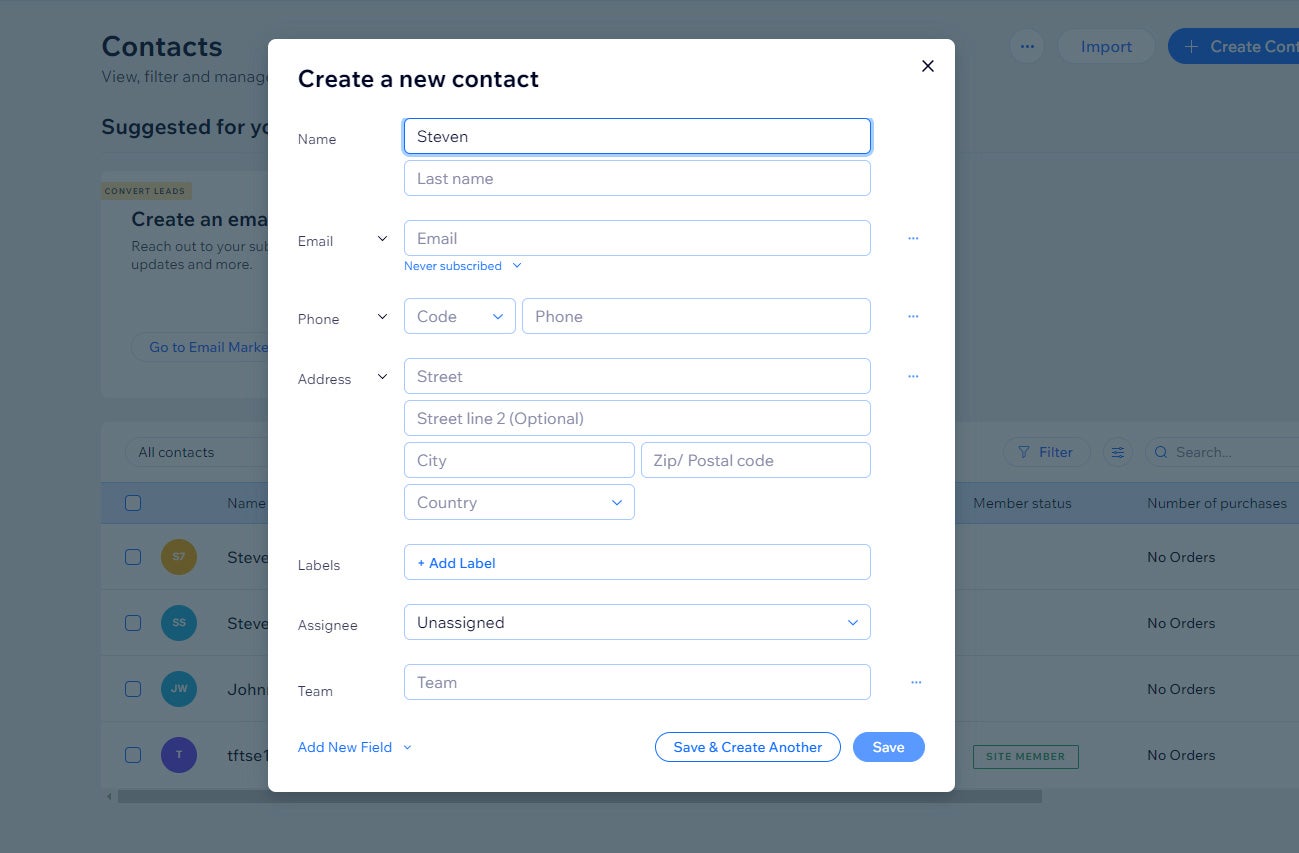
Building your contacts list will mean you can connect with more customers every time you send out an email campaign. To do this manually, head to Contacts | Contacts via the Wix Dashboard. Then select Create Contact, fill out the popup window, and click Save. You now have a new contact in your database.
Alternatively, to import a list of contacts, simply select the Import button and choose an option. You can import a CSV file, or connect to contacts in your Gmail account.


