To help us provide you with free impartial advice, we may earn a commission if you buy through links on our site. Learn more

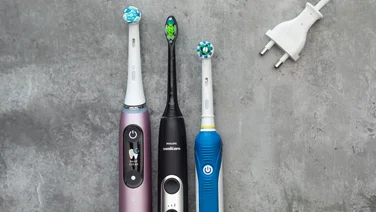
Water flossers are all the rage in the world of dental hygiene at the moment, but if you’re unsure about how to use them then you’re not alone. These fancy bathroom gizmos might appear confusing at best and gimmicky at worst, however research has shown that they help to remove plaque more effectively than string floss, reduce gum inflammation and are great for cleaning into the deepest, darkest corners of your mouth. Couple water flossing with one of the best electric toothbrushes for a sparkling grin and a healthy mouth.
In other words, adding a water flosser to your teeth-cleaning armoury has proven benefits to keeping your smile brighter and healthier. But, of course, this only applies if you know how to use it properly.
In this handy guide, we’ll answer some of the most common questions about water flossers and, hopefully, dispel some of the uncertainty surrounding how they work, what they actually do and how to use them for best results. Here’s what you need to know.
READ NEXT: Best water flossers
What is a water flosser?
A water flosser is a handheld tool that clears food debris and plaque build-up from between the teeth using a high-pressure jet of water. It uses an electric motor to power a pump that fires water in “pulses” between the teeth and around the gumline to keep everything nice and clean.
Do I still need to use regular dental floss with a water flosser?
It’s best to think of a water flosser as an addition to your existing dental-hygiene routine, rather than an alternative to traditional floss. Research indicates that best results are seen when a water flosser is used alongside string floss and a toothbrush for enhanced oral care.
That being said, it’s better to use a water flosser without string floss than to use nothing at all. Ultimately, both tools do the same job, in slightly different ways. As such, if you don’t have room to add yet another job to your morning to-do list, using one of the best water flossers in place of regular floss is better than using neither.
Do water flossers remove plaque?
In short, yes – water flossers are great for removing plaque. Are they better at the job than traditional string floss? Well, research in this regard is conflicting, which is the reason we would recommend using both.
What water flossers can’t do is remove hardened tartar from the teeth; but with regular use, using a water flosser can help to prevent it from forming in the first place – and we all know that prevention is better than cure.
READ NEXT: Best teeth whitening strips
Should I use a water flosser before or after brushing?
Recommendations on when to use a water flosser vary from brand to brand. Oral B suggests it’s used after brushing, while Waterpik advises that its devices are used beforehand. There are cases to be made for both approaches – but no matter which way round you decide to use it, your flosser will be doing the same job of dislodging food particles and preventing plaque and tartar build-up.
How do I use a water flosser?
Again, water flossers vary from brand to brand, but most follow the same basic principles. Whether you use yours before or after flossing, follow these simple steps for best results.
1. The clue is in the name, but in case you missed it, water flossers need a source of water to do their job. Depending on the model, you’ll need to either fill up a built-in reservoir or connect the flosser to a tap.
2. Place the nozzle in your mouth and turn on the power. Some flossers will allow you to dial the intensity up or down, so if this is the case, then start on a low pressure and work your way up to a level that feels comfortable
3. As the water pulses out of the nozzle, follow the gum line with the flosser, paying close attention to the gaps between your teeth. You might want to close your lips around the device to stop water from spraying out and making a mess.
4. Once you’ve done the top, repeat step three on the bottom teeth. The full process should take between two and three minutes to complete.
5. Once you’re done, empty the flosser’s reservoir and rinse it out thoroughly. Doing this will avoid the risk of any bacteria growing inside, which could make you ill.