To help us provide you with free impartial advice, we may earn a commission if you buy through links on our site. Learn more

A quality baking tray can transform the way you cook, making roasting and baking simple and fuss-free. However, when the question of how to clean your baking tray arises, things can get a little tricky. The high heat baking trays are used at, as well as long the durations they spend in the oven, can lead to incredibly tough to remove stains and baked-on food that feel like they are fused with the tray itself. That might make things sound a bit hopeless but never fear, our guide to cleaning your baking tray has a number of techniques and products to help restore your kitchen equipment to its former glory. What’s more, if you’d like to expand your arsenal of roasting and baking supplies, be sure to check out our full round-up of the best baking trays.
READ NEXT: The best oven for your kitchen
Don’t throw it out
It might seem obvious, but the first thing you need to do is not abandon hope. Perfectly salvageable kitchen equipment is thrown out every day, creating waste and requiring money to be spent needlessly on replacements. Before you bin another baking tray, try the full list of solutions below.
How to maintain your trays and prevent stains and build-up
The best solution to any problem is prevention, so before we get into our full range of cleaning methods, take these steps to keep new baking trays from getting stained in the first place.
1. Always carefully line your trays with baking paper.
2. As soon you as can after cooking, soak pans in hot, soapy water to prevent foods sticking to the surface.
3. Stick to non-abrasive sponges and cleaners on any non-stick trays, so as not to damage the coating – this will make food less likely to stick in future.
4. Use kitchen paper to mop up grease before and after cooking to prevent staining.
5. Check your tray’s suitability for machine washing before putting it in the dishwasher. Stainless steel or anodised aluminium trays are dishwasher-safe, but ordinary aluminium trays and some non-stick coatings will be damaged if you run them through the dishwasher.
6. If you have a new cast-iron or hard-anodized baking tray, it won’t have its own non-stick coating. To prevent food baking on you should season your kitchen equipment with cooking oil. If your cookware is new, remove any packaging and then wash with warm soapy water, before gently heating it in the oven. Once you’ve heated your tray to a reasonable temperature you should rub down its surface with oil, wiping away any excess that remains at the end.
READ NEXT: The best free-standing dishwashers
Abrasive methods for cleaning aluminium baking trays
One of the simplest ways to remove stains and residue from your baking tray is to get scrubbing. The methods below use abrasive tools to chip away at burnt-on bits. One thing to remember is that these methods are intended for use on aluminium baking trays – don’t use abrasive methods on cast-iron or non-stick trays as they could be severely damaged.
The 2p method: This popular trick might sound a little strange, but it’s proven effective and uses an item you’ll likely have to hand in the house. Simply leave your tray to soak in hot soapy water for 30 minutes, then scrub it with a 2p coin, using a circular motion, before rinsing as normal. This tip seemed to originate on Facebook and has amassed hundreds of replies from users stating that it worked for them.
READ NEXT: The best taking trays you can buy
Steel wool and copper cloths: If the 2p method sounds a bit too fiddly for you, try soaking as above, then scrubbing with some good quality steel wool. If you want to try a more versatile option, investing in some copper cloths could be a good idea. These reusable cloths provide good scrubbing power but are slightly gentler than steel wool and therefore more suitable for a wide range of surfaces.

Dish soap and salt: Salt’s graininess can come in handy for cleaning in a pinch. Simply sprinkle a few spoonfuls of salt – coarse sea salt works best – over your tray, before adding dish-soap to create a mildly abrasive cleaning paste. Then simply scrub with your brush or sponge of choice to remove any crusts and crispy bits. Rinse and repeat until your tray is as good as new.
Cupboard ingredient cleaning method for non-stick trays
Many baking trays come with non-stick coatings that make them harder to get dirty, but also a little harder to clean, as you’ll need to use non-abrasive cleaning methods to restore their surfaces. The below method is suitable for non-stick surfaces and uses staple and natural cupboard ingredients.
Baking soda and vinegar: Sprinkle a decent amount of baking soda – be sure you’re using baking (bicarbonate) soda NOT baking powder – over your tray, concentrating on problem areas. Next, spritz some white vinegar on top and let it sit for around 30 minutes – if the mixture fizzes at this point, don’t worry, this is just a base and an acid coming into contact and working their magic. After 30 minutes, simply scrub gently with a non-abrasive scourer using circular motions and everything should lift right off.
Methods for cleaning baking trays with commercial cleaners
If you don’t fancy yourself a kitchen MacGuyver, there’s no harm in using commercial cleaners specifically designed for the job. Below are a range of intensive and gentler cleaning products that should get your baking trays sparkling.
Commercial oven cleaner: If you don’t want to use cupboard ingredients or tire your arms out scrubbing away, using a commercial oven cleaner on your baking trays might be the way to go. The only drawback of these products is that they contain hars, strong-smelling chemicals, so you’ll have to use these products in a well-ventilated area and follow the manufacturer’s instructions to the letter.
General purpose cleaning paste: If you want a less intensive solution, a cleaning paste is well worth a try. We recommend trying The Pink Stuff cleaning paste on your baking tray. This paste is non-toxic and free from harsh chemicals, though it is mildly abrasive and may not be suitable for non-stick trays. It’s also budget friendly and versatile – you can use it to clean basically anything in your home except plastic, acrylic surfaces and highly polished metal. Not many products boast such a dedicated following, so why not give it a try?

Oven rack cleaner bags: While this article is primarily focused on trays, we thought this unique solution for cleaning oven racks was worth a mention, as they can get just as filthy as baking trays and are even harder to clean. Oven rack cleaning bags work by placing the rack and some cleaning solution into a specially designed plastic bag and allowing them to sit for a period of time. These Oven Mate Cleaning Bags or this Oven Pride Cleaning Kit are two reliable solutions for racks that need their shine restored.
READ NEXT: Our round-up of the best cleaning products for your home
Invest in a self-cleaning oven
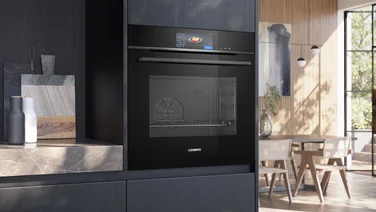
If none of the above options seem appealing and the idea of oven cleaning is a source of constant dread in your life, upgrading your oven could be the answer. Most mid to high-end ovens, such as the Neff Slide and Hide, now come with a pyrolytic cleaning function. It works by heating the oven to temperatures above 400°C, turning any stubborn crust or food stains to easily swept-up ash.

These settings don’t just clean your oven, though, many also work on trays and racks as well – although it should be noted that not all trays can take this intense heat, so do check beforehand. While this method isn’t perfect, it’s an option to consider if you want to cut back on scrubbing your trays and grills.