News

Samsung details Galaxy Glasses features – but still no price
The Samsung Galaxy Glasses are said to have fantastic battery life and useful Gemini integration – now we just need a price
-
 Virgin Media handed £28m fine for "shocking" call centre tactics Ofcom is making Virgin Media pay for intentionally preventing customers from straightforwardly cancelling their contracts - and it's the largest fine of its kind
 -
 It’s Coming Home(line) IV: Marshall unveils new Bluetooth speakers to soundtrack a rocking summer Marshall has launched two Bluetooth speakers as part of its new Homeline IV range, with a third more portable option arriving next month
 -
 Samsung drops some tasty teases for the new Galaxy Fold Wide Slyly winking at the design we’ve all seen leaks of by now anyway, Samsung starts the marketing campaign for its redesigned foldable
 -
 Amazon Prime Day 2026: The BIGGEST laptop deals Keep up to date with the latest, greatest laptop deals from Amazon's week of Prime Day deals 2026
 -
 Today's best Prime Day deals on home and tech I'm here to help make Prime Day as simple as possible, with expert-approved deals in one handy place
 -
 Forget buying Ring doorbells this Prime Day - our alternatives are better Prime Day deals on Ring doorbells are here again but here's why you should avoid them
 -
 The best prime day cooling deals for beating the heatwave Tired of sweating buckets? I've picked out these Prime Day cooling deals to stick it to British summer
 -
 The Amazon Kindle Scribe Colorsoft is one of the best Prime Day deals this year Digital notepads are the future and now is the time to buy one
 -
approved deal
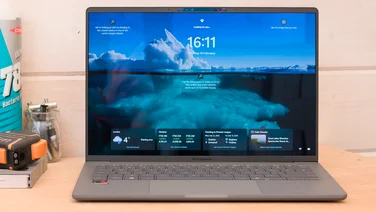 I love the Asus Zenbook A14 and it's now on sale for a song in the Amazon Spring Sale The Asus Zenbook A14 is incredible value for money at £530 - you won't find a better deal during Prime Day 2026
 -
 When is Amazon Prime Day 2026? Prime Day 2026 is officially underway - here's everything you need to know
 -
 Asus ROG Xbox Ally X20: Augmenting handhelds with AR glasses This special edition Xbox Ally pairs a sleek black-and-gold ROG Xbox Ally with XREAL R1 AR glasses for ROG’s 20th anniversary
 -
 Acer debuts massive Aspire 18 AI laptop ahead of Computex The 18in behemoth was unveiled alongside a new Predator gaming handheld, laptops running on the latest Snapdragon platforms and more
 -
 Is Dell's budget XPS 13 a better MacBook Neo? Microsoft's newly affordable XPS 13 takes on the MacBook Neo at a tempting $699 price