To help us provide you with free impartial advice, we may earn a commission if you buy through links on our site. Learn more
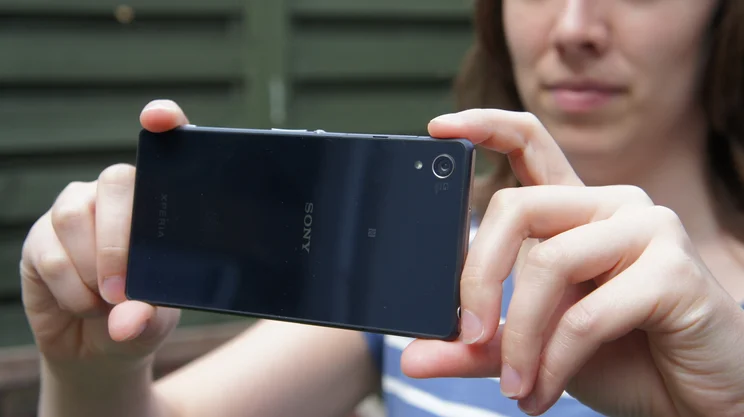
The Xperia Z2 is the pinnacle of Sony’s smartphone knowhow, and with a 20.7-megapixel camera sensor it’s a seriously capable handset for photographers. It might not have a depth-sensing secondary camera like the HTC One (m8) or a laser autofocus like the LG G3, but it’s still able to produce some impressive high-resolution images.
You can let Sony’s Superior Auto mode do all the hard work for you, adjusting those trickier variables like white balance and ISO automatically so you can concentrate on the scene being photographed, but with our in-depth guide you’ll soon be dipping into manual mode and making the most of the Xperia Z2’s other camera features.

Use the physical shutter button
The Xperia Z2 is one of very few Android smartphones with a dedicated camera shutter button, which is great for two reasons. Firstly, it gives you much greater precision control when taking photos; the button presses in half way to lock the focus, then fully to take a photo, which lets you be much more accurate than tapping the screen. This works best if your subject is in the centre of the screen, although you can tap to set an off-centre focus point then use the shutter button to take the photo when you’re ready.

The physical shutter button also lets you jump straight into the camera app at any time – even if you’re using another app, or the phone is locked. Holding down the button fully for one second will automatically launch the camera app, letting you snap without having to enter a password or head back to the main menu first. If you’re worried about security, anyone using your phone when locked will only be able to snap new pictures, and won’t be able to access your saved shots.
Get arty with Background defocus
Background defocus lets you be a lot more creative with your images by blurring out everything apart from the subject to give it more prominence. It does a surprisingly good job at copying the depth of field effects an expensive digital SLR camera is capable of creating, without needing a big lens. Background defocus only works well in certain situations though. Without a prominent object in the foreground, there’s nothing for the camera to focus on and it can’t create a background blur. That means you shouldn’t use it for shooting landscapes or architecture, but it works very well for portraits.
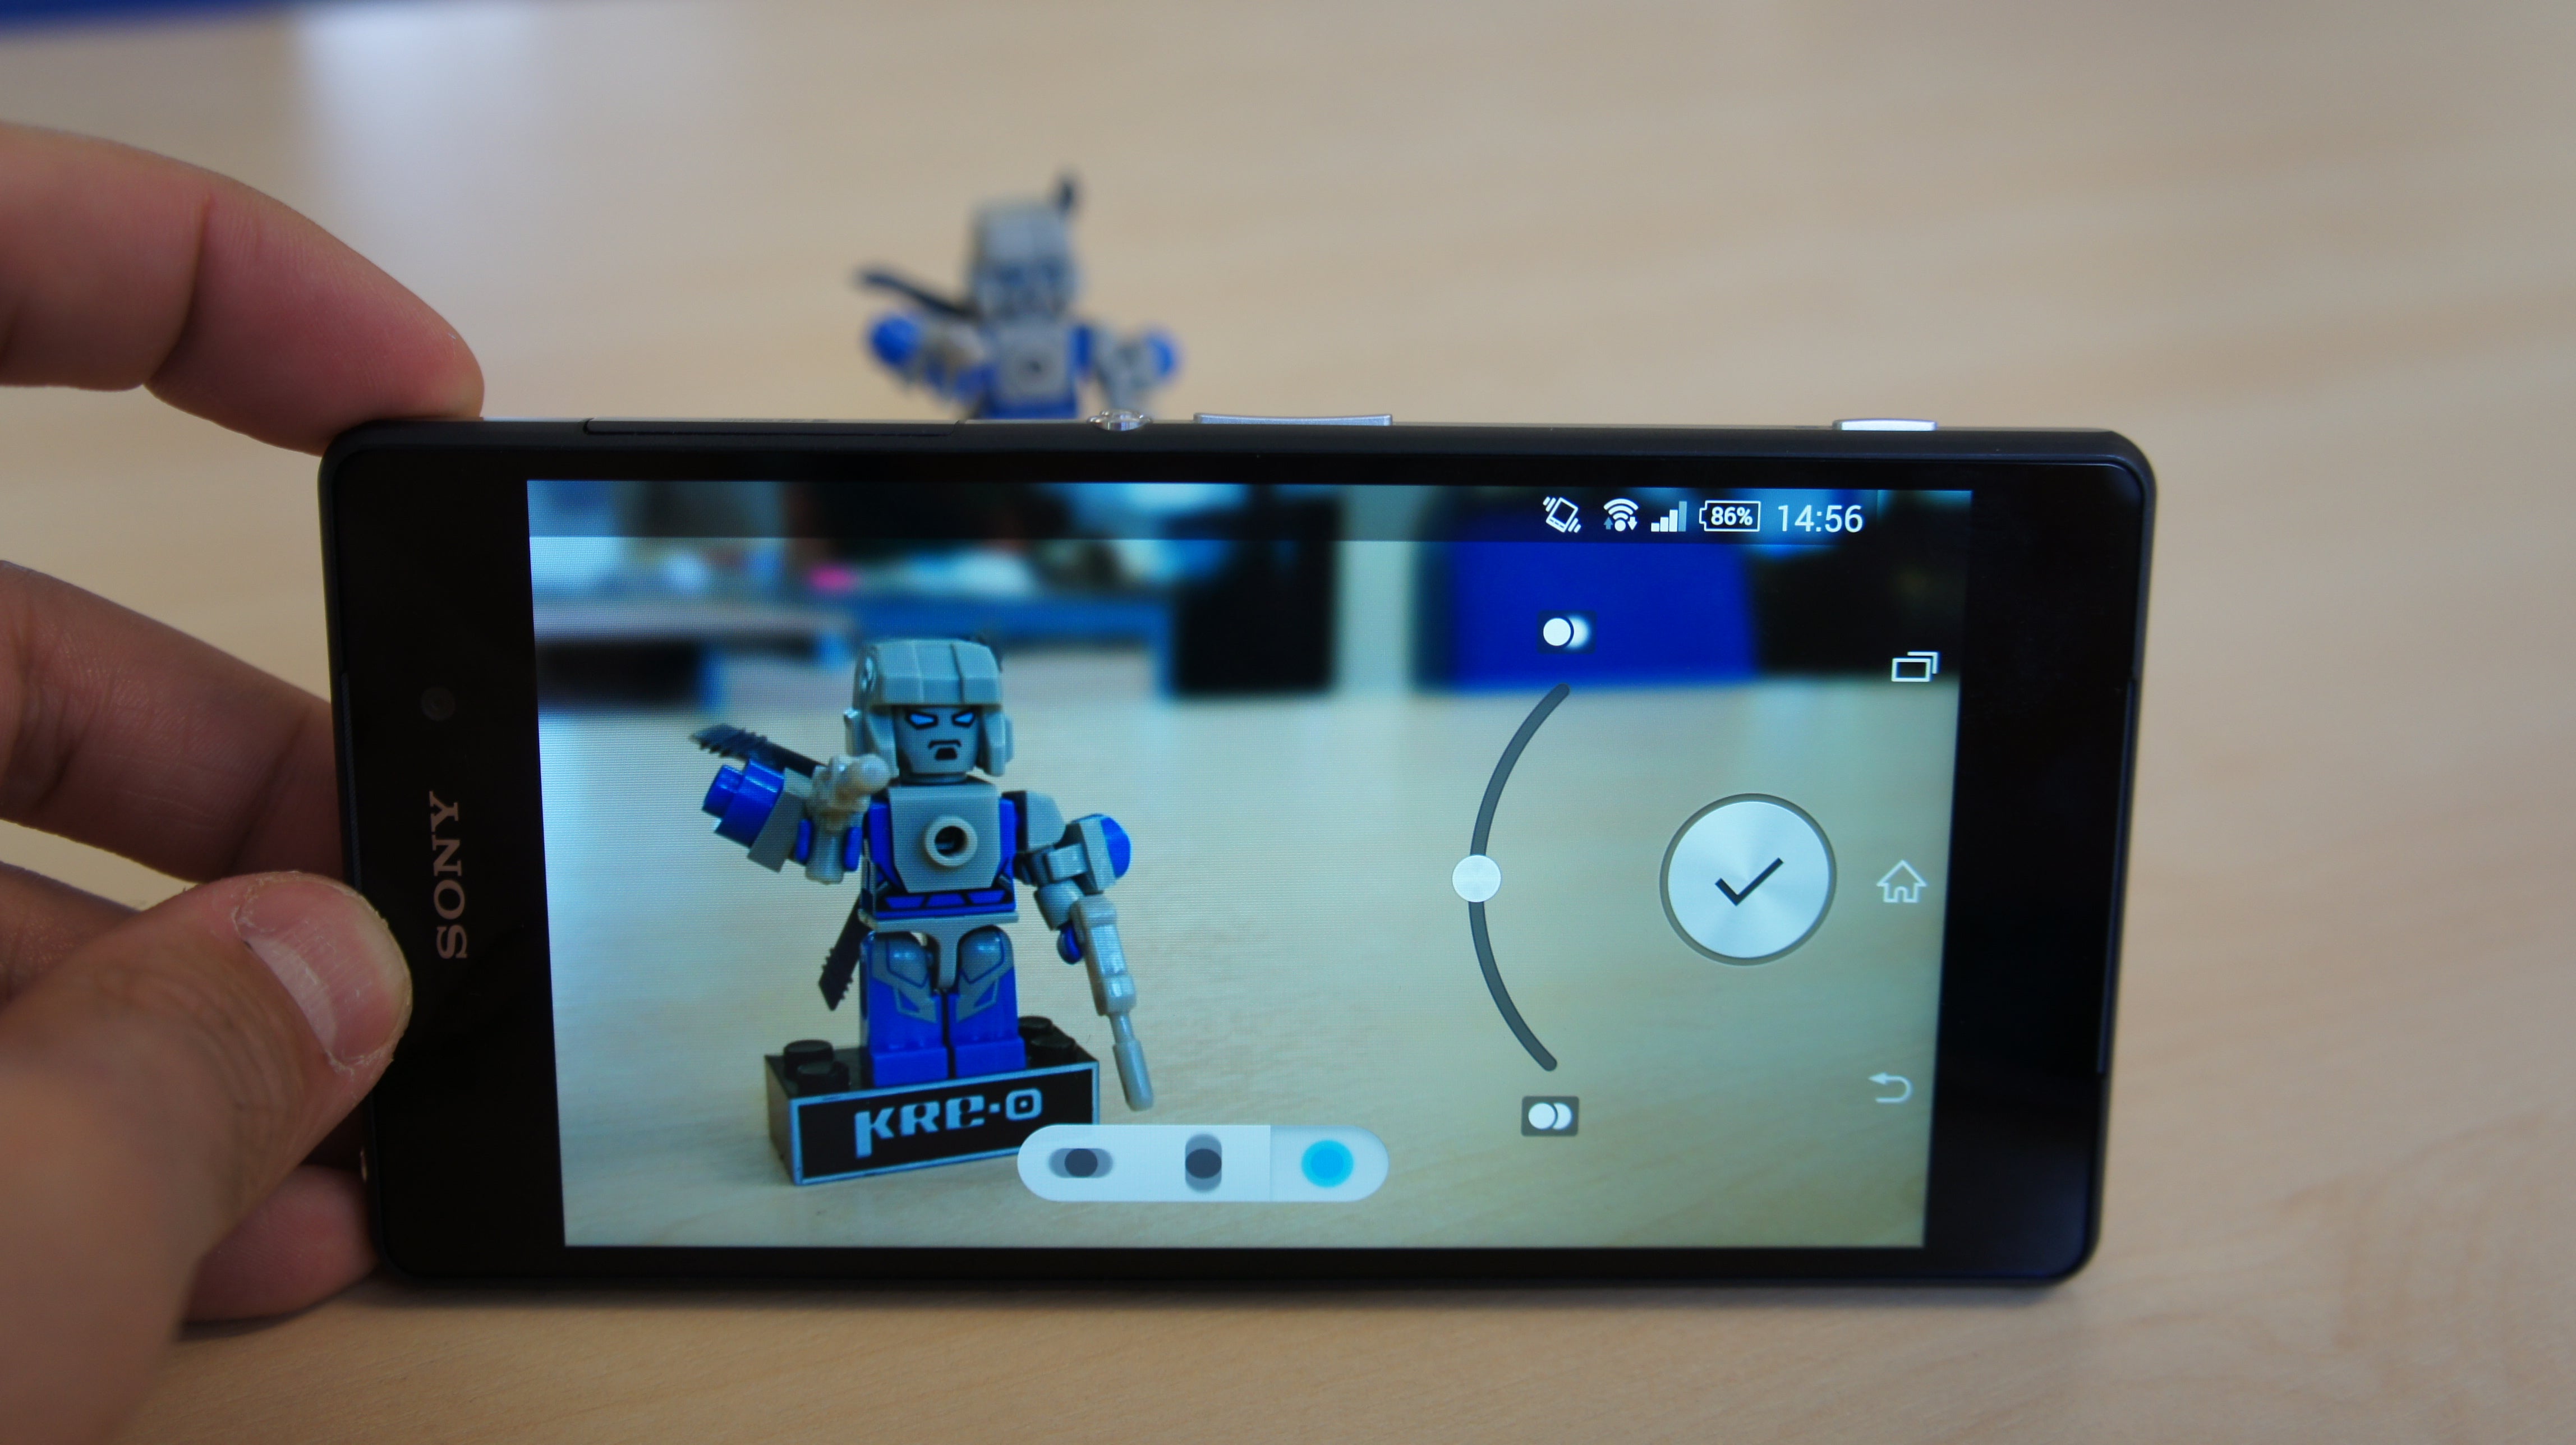
To use background defocus, open the camera app and tap the mode button. Select background defocus, then tap on the part of the scene you want to keep in focus. Press the shutter button, then hold the phone steady while it takes several exposures with different focus settings. When it’s finished, a screen will appear that lets you tweak the effect. A slider lets you choose the intensity, and the three icons let you set horizontal, vertical, or spherical blur. When you’re happy with the final image, hit OK to save it to your camera roll. Just remember that once you hit OK, you can’t go back and edit your images a second time.
Never miss a moment with Timeshift burst
If you’re shooting a moving subject, or something that could disappear any second like wildlife, you really don’t want to miss the perfect shot because you weren’t quick enough on the shutter. That won’t be the case with the Xperia Z2 if you use Timeshift Burst. It captures 30 images before and 30 images after you press the shutter, letting you pick which image is the best. It’s also great if someone wasn’t smiling at the moment you press the shutter, as you’ll almost certainly have one usable image – it certainly beats getting people to pose for the same picture again.
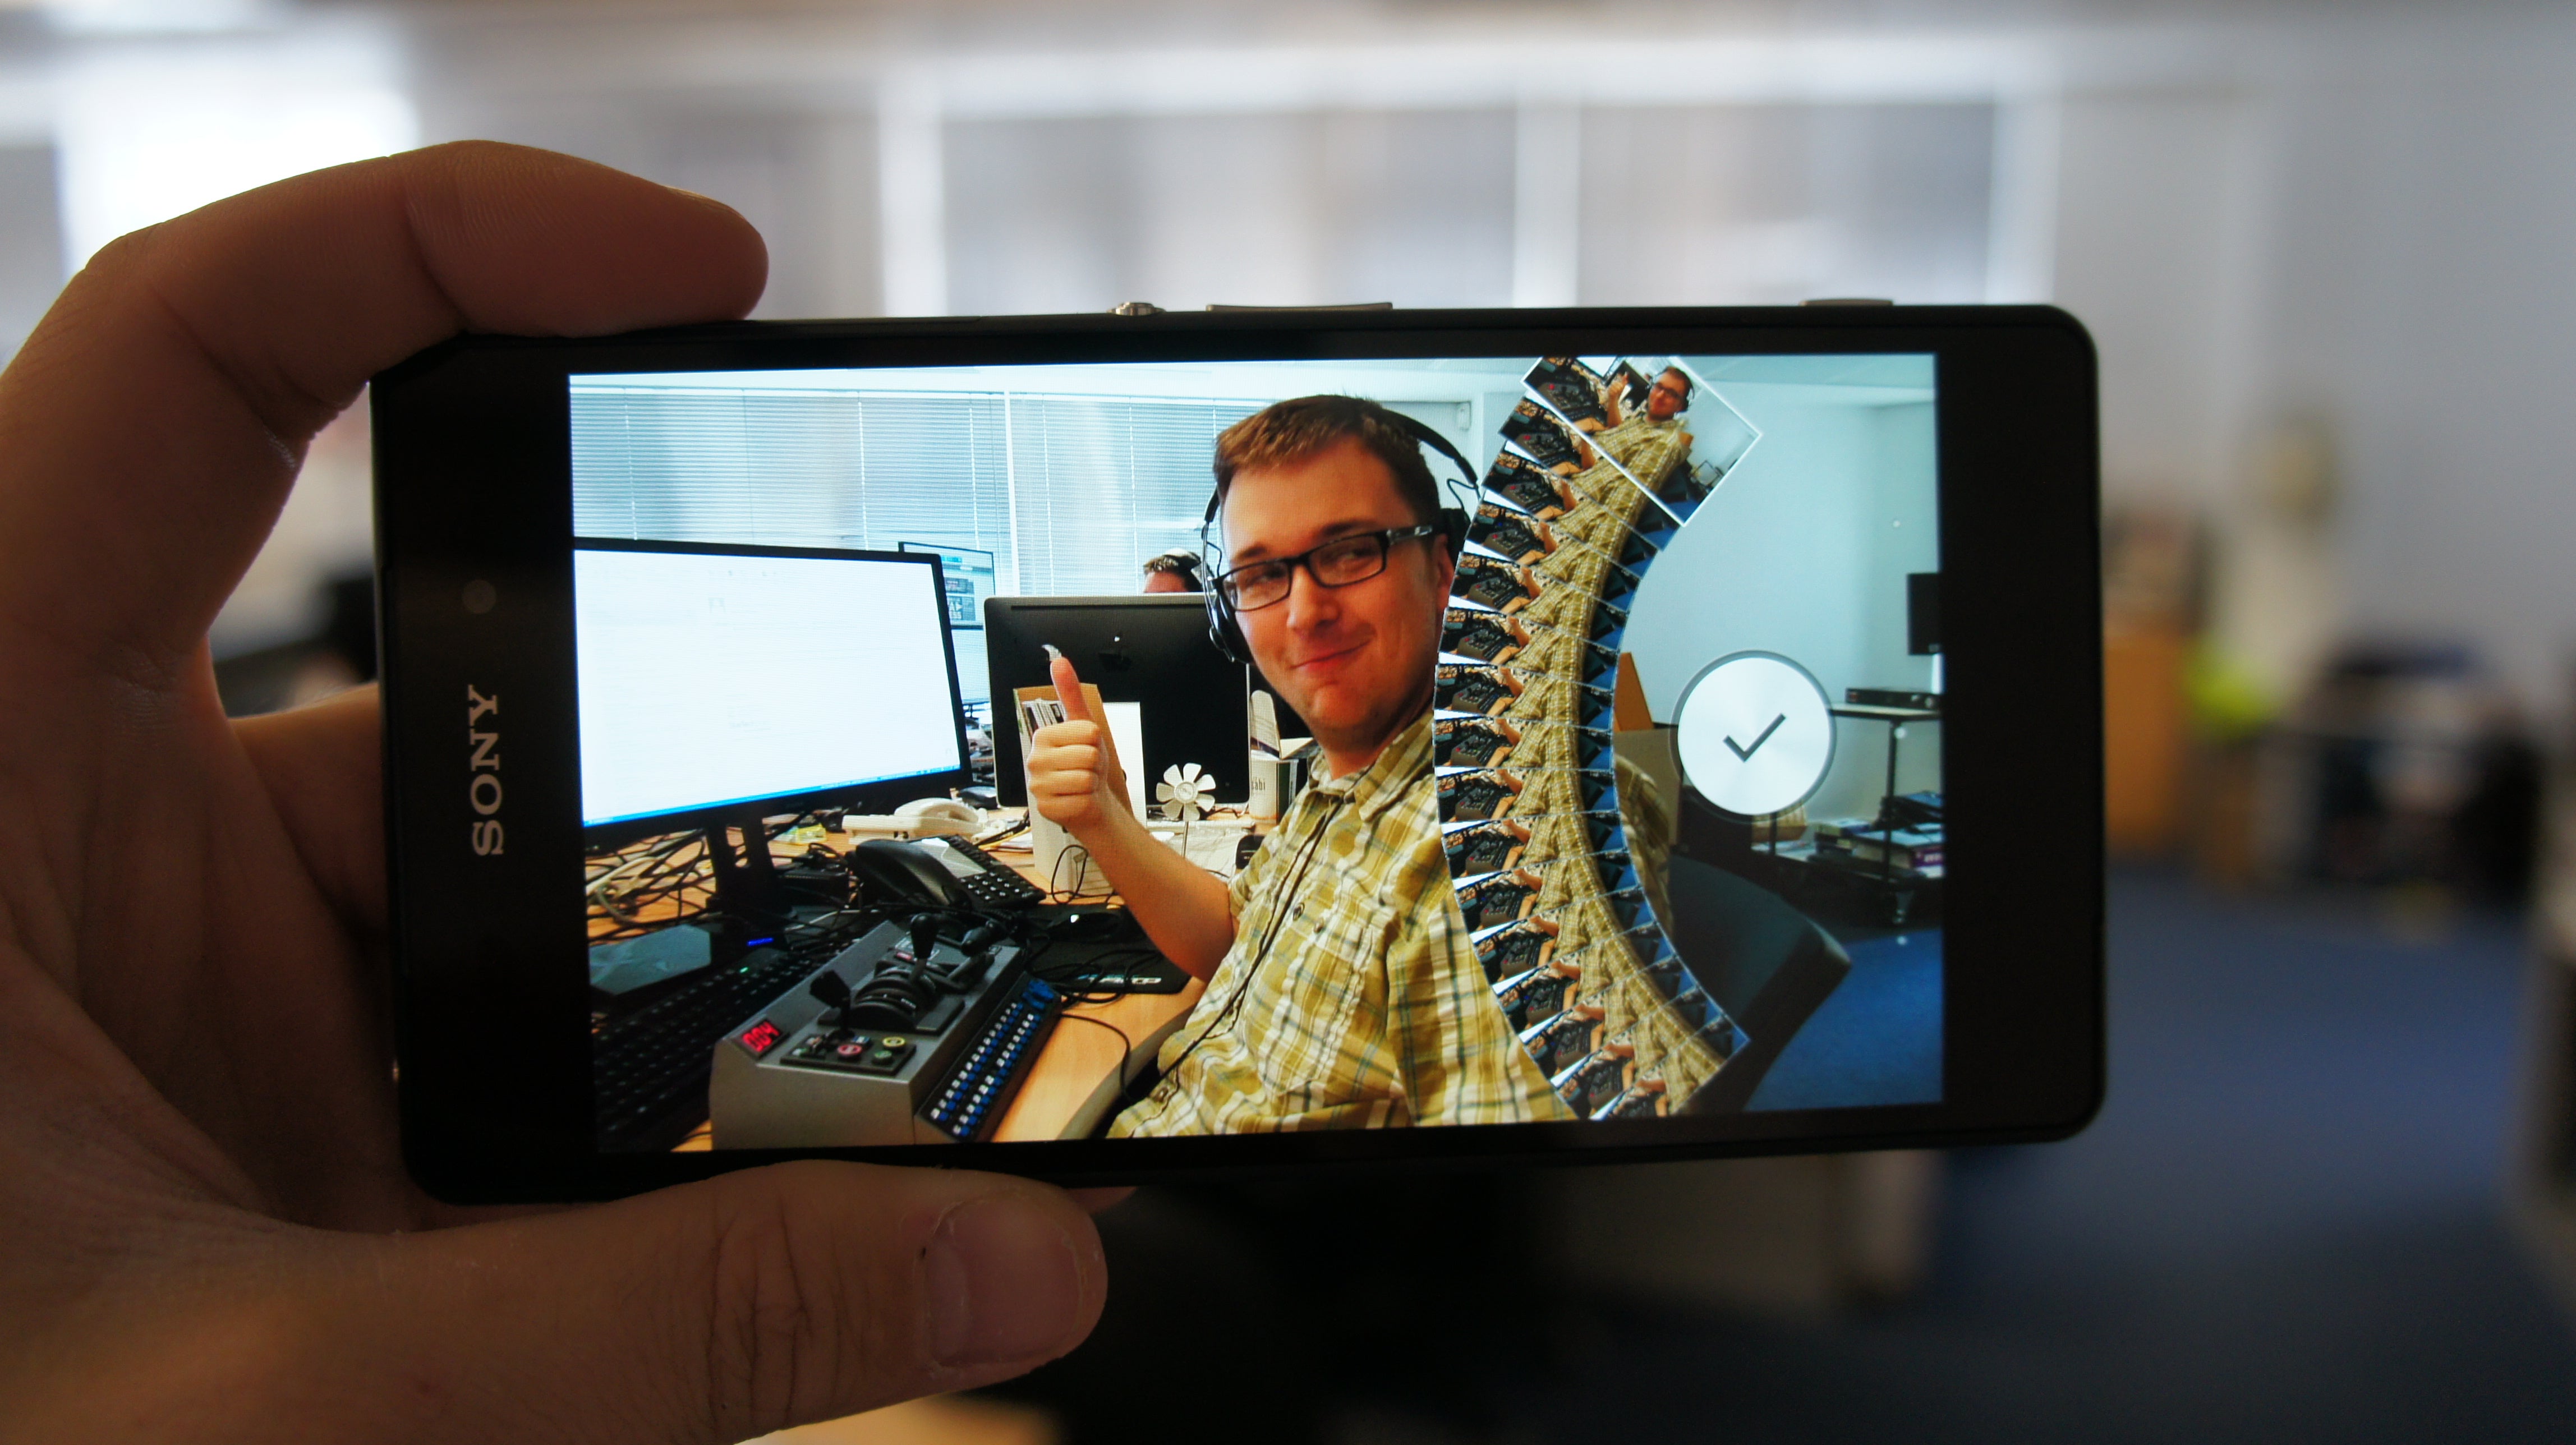
To enable Timeshift burst, open the camera app and tap the mode button. Scroll down through the menu that appears and select Timeshift burst. Now you just have to take a photo – keep in mind that the focus ring disappears in this mode, so let the camera autofocus on the scene before pressing the shutter. Once you take an image, a screen will appear with a slider, letting you check sixty different photos to find the perfect shot. When you’re happy with the result, press OK to save it to your camera roll. This isn’t a one-time choice, so if you decide you’ve chosen the wrong shot you can go back into the Album app and re-select your favorite image.
Use manual mode for more control
Sony has made sure to provide plenty of manual controls with the Xperia Z2, but unless you head into the mode menu you might never see them. Open up the camera app, tap on the Mode button and select Manual mode. From here, new menus will appear on the left side of the screen, letting you select from five different white balance settings, adjust the exposure level by +/- 2EV, change the ISO level, adjust the metering mode and chose from 17 different scene modes.
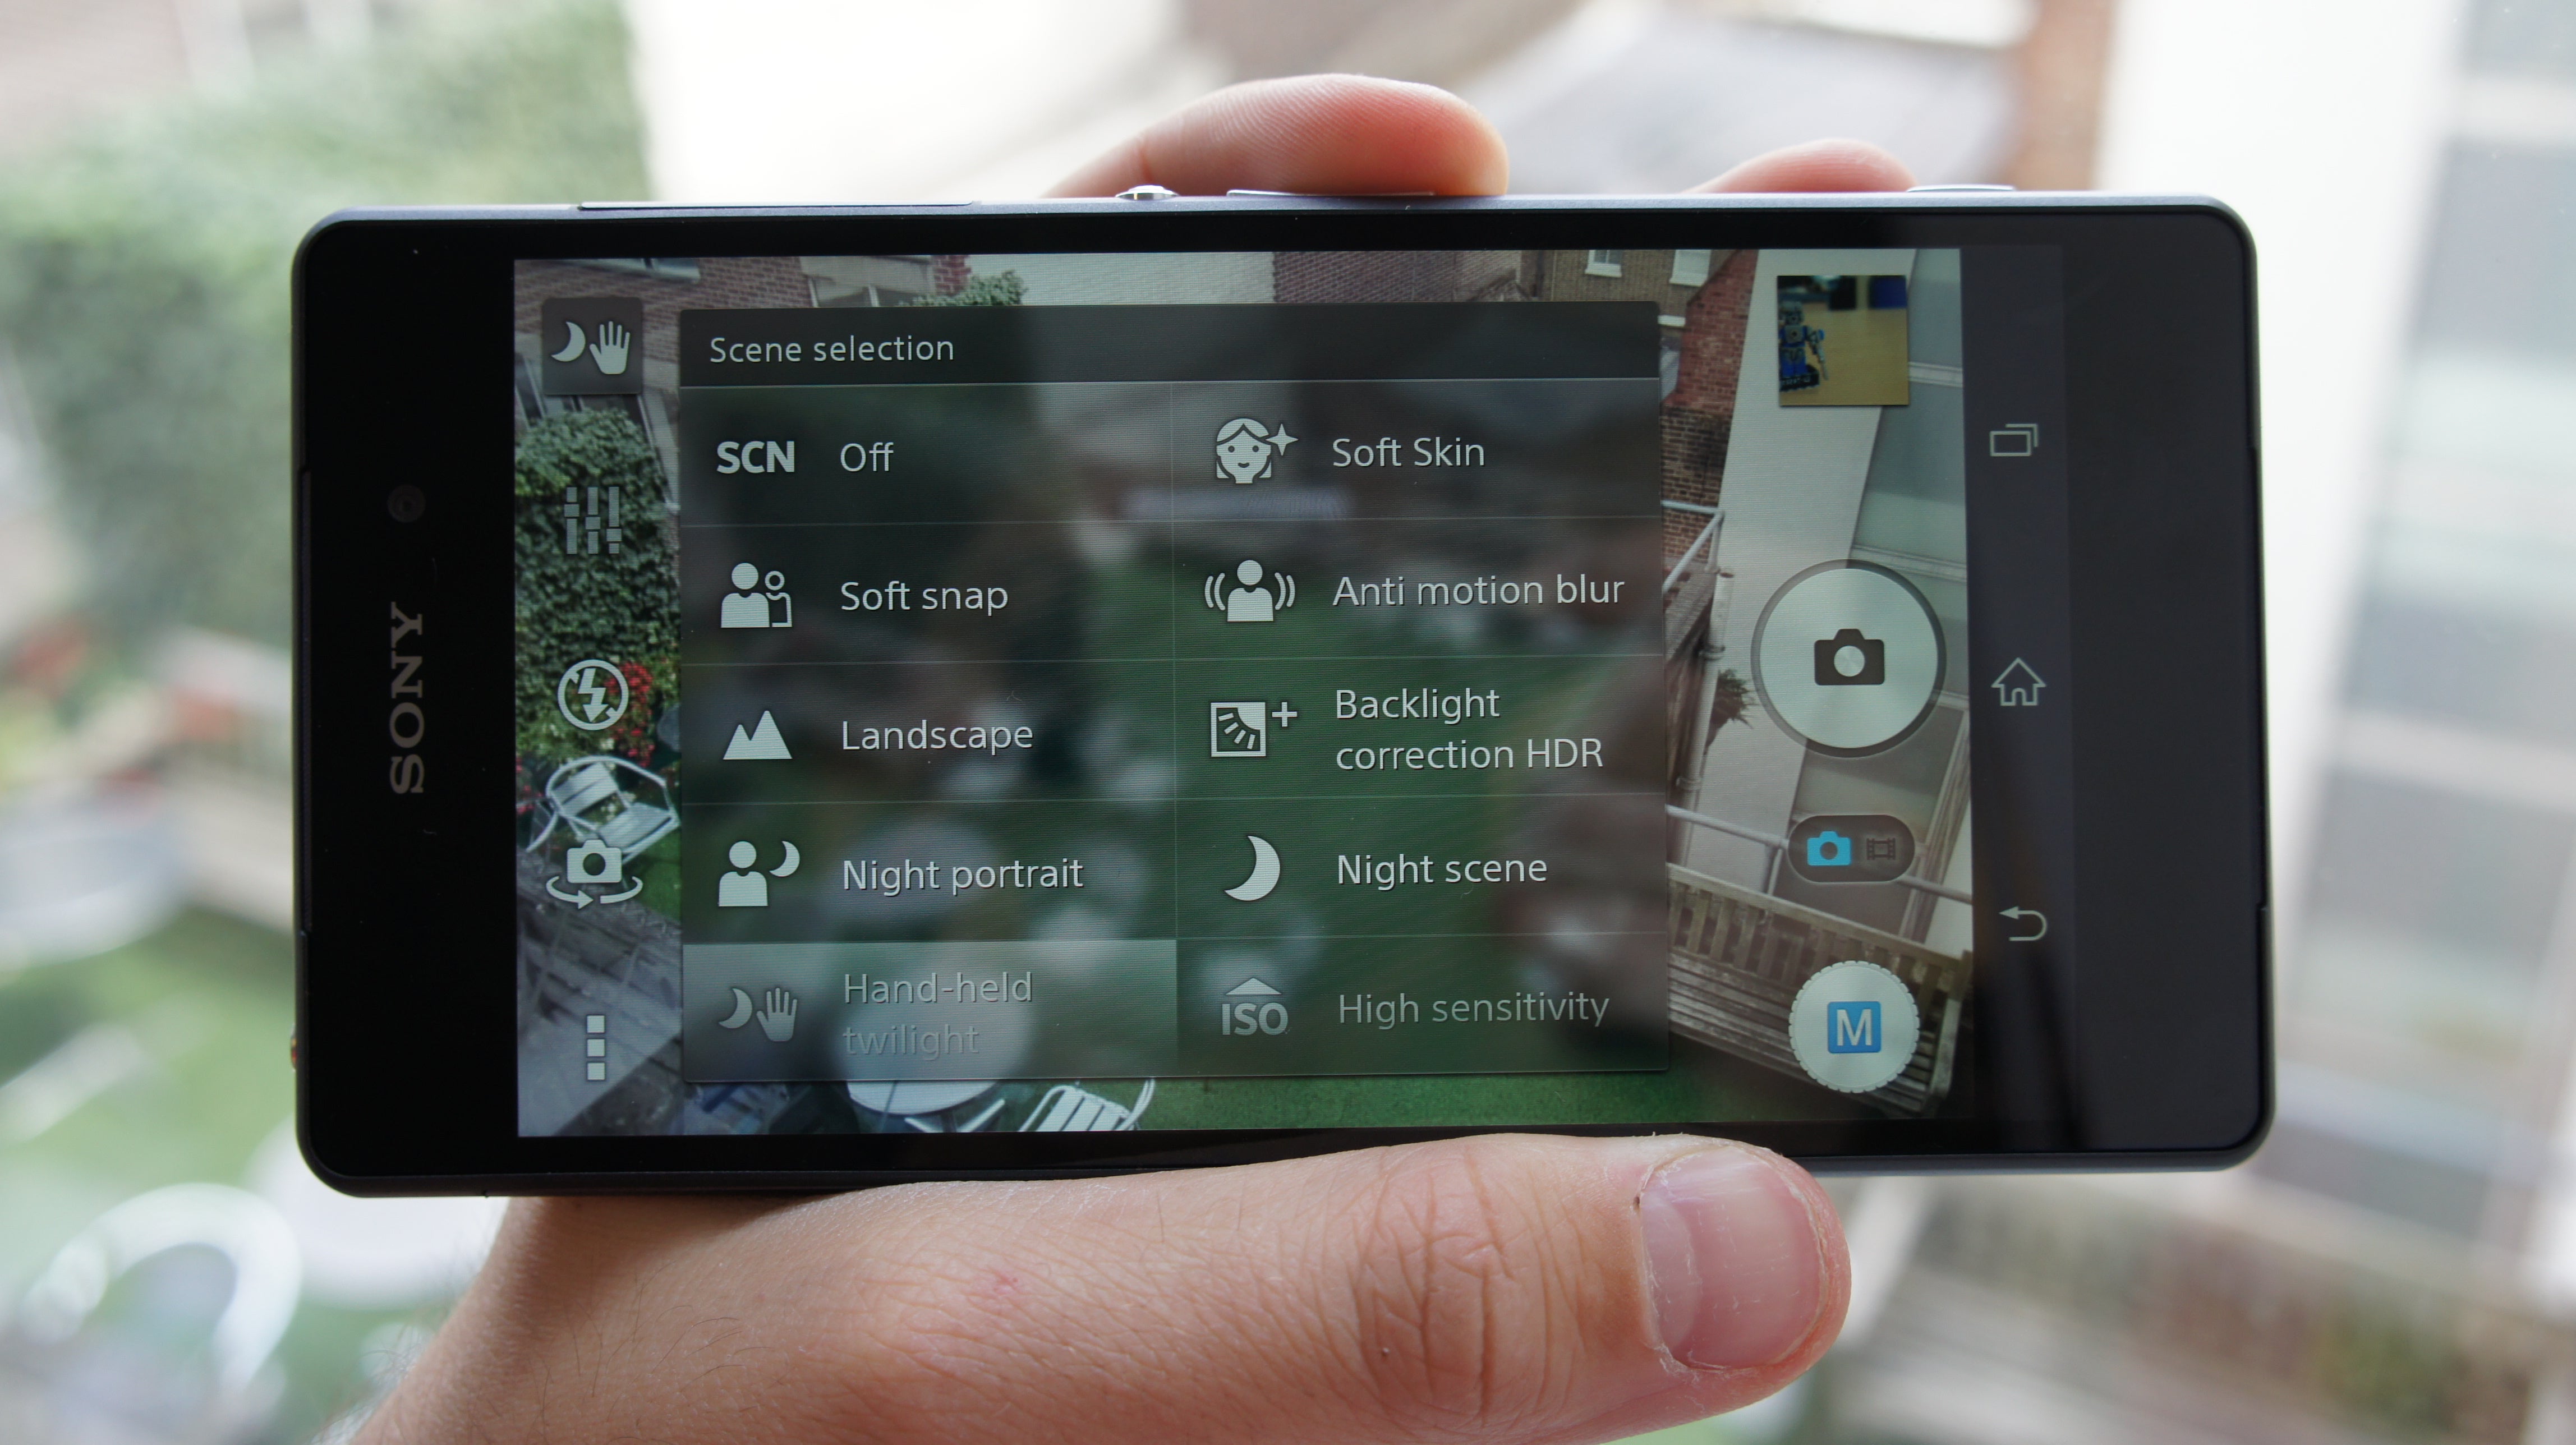
Even if you aren’t familiar with ISO settings or exposure compensation, these scene modes are still worth trying out. Night portrait, Night scene, and hand-held Twilight in particular are great if you’re shooting in the dark, as it helps the camera capture more light and compensate for your natural hand shake when shooting longer exposures. Simply tap SCN in the top right corner and select the right scene mode to start shooting. Every other setting will still be automatically controlled by the camera, letting you concentrate on getting the best photo.
Try HDR mode
The Xperia Z2 buries its HDR, or High Dynamic Range mode, in the manual shooting menu, meaning it’s easy to miss, but is definitely worth giving a try. Cameras typically have a limited exposure range, meaning detail often gets lost in the brightest or darkest parts of a photo, but with HDR you’re able to capture a wider range of light than a regular image by combining multiple photos taken at different exposure settings.
On the Xperia Z2, You’ll have to be shooting at 8-megapixels, and have the Image Stabiliser mode switched off to enable HDR. After opening the camera app, press the mode button and select Manual mode, if you aren’t on it already. From here, press the menu button (the three vertical dots on the bottom left) and scroll down to HDR. Make sure it is enabled by swiping the toggle to the right. You can leave all the other settings on automatic if you don’t feel confident setting ISO or white balance. Just make sure to hold the phone steady when shooting HDR, as it has to take multiple exposures and will produce blurry images if you don’t keep the handset still.
The trees are underexposed in this non-DHR image, losing detail to keep the rest of the image visible

Enabling HDR restores the lost detail, bringing out the depth and detail in the trees without overexposing the sky
It’s a shame that the Xperia Z2 doesn’t have a live-view HDR mode like Samsung’s Galaxy S5, as you won’t be able to see what your HDR images look like until you go into the camera roll and check your results. On the S5, you can see what effect HDR will have on your images before you take a shot, so you can decide whether you need the mode enabled before you press the shutter. On the Z2, you’ll have to snap an image, check the results then take another image if you prefer the scene without HDR.
Capture the whole scene with Sweep Panorama
Sweep Panorama first made an appearance on Sony’s NEX digital camera range, but the Xperia Z2 does a great job with it too. It lets you capture a much wider view than you’d normally get with a single image by stitching multiple photos together. The end result is significantly wider than a regular photo, so you won’t be able to fit it all onscreen at once, but you’ll get a much better idea of what a landscape or location was actually like when you get home.
After opening the camera app, press the Mode button and scroll down to Sweep Panorama. From here, you can choose the shooting direction on the left, or press the shutter button to start capturing an image. Pan the phone in the direction suggested, until you reach the end. It will automatically snap a new shot every time you cover a new part of the scene, until it has an entire image. The images are automatically stitched together and send to your camera roll. Just make sure to pan slowly, otherwise the final image might appear blurred.
Thanks to Three for supplying the Xperia Z2 we used for our camera guide.