To help us provide you with free impartial advice, we may earn a commission if you buy through links on our site. Learn more
iOS 12 is finally here. With all of its fancy bells and whistles it brings to the table, many Apple users are again running into the “Unable to Verify Update” error when trying to install iOS 12. Despite these free iOS updates being easy for the most part, this error is a very common issue. The “Unable to Verify Update” error is infuriating if you’ve come across it, with your iPhone or iPad telling you you’re no longer connected to the internet, even if you are. Annoying, and now that the iOS 12 is available for your iPhone, this problem has reared its head once more.
Thankfully, this is a bug that has appeared on many iOS updates in the past and as such, we know a handy fix. This simple solution is the same as the error message we received in iOS 11, iOS 10, iOS 9.3 and below. I’ll guide you through any potential issues you might have with the iOS 12 update, and tell you the best methods in fixing them. Below, the guide is divided into two sections: The regular, public updates (the official launches) and the beta updates (the ones you have to sign up to get before anyone else). Both are handled a little bit differently, but the issue is the same.
Before we start: It’s crucial that you make sure that your Apple device is connected to the internet when performing this fix. To do that, simply open up Safari and load a web page. If it loads without any issues, you’re good to go. If it doesn’t work, disconnect and reconnect to your Wi-Fi router or turn your router off and on again. It’s also important that you’re connected to a home network, as many company networks might filter out the connection to Apple’s servers.
Once you’ve done that: here’s how to fix the annoying “Unable to Verify Update” iOS error for iOS 12, iOS 11, iOS 10, iOS 9.3 and below.
Unable to Verify Update error: Regular updates
Regular updates are the official versions that Apple releases to the public, having completed its testing on all devices. These are the ones that most of you will be familiar with.
1. Shut down the Settings app
The first thing to try is shutting down the Settings app. Double-tap the home button then swipe up on the Settings app until it slides out of view. Now, tap Settings from the homescreen and go to General | Software Update. Try to install the update again.
2. Refresh your iPhone or iPad
If that doesn’t fix the problem, you can use our refresh your iPhone or iPad guide. This refreshes your device’s memory and solves loads of problems.
3. Reset your Network Settings
Sometimes a network issue can cause the problem, but you can reset these settings easily. Be warned, doing this will require you to enter all of your Wi-Fi passwords again. Go to Settings | Reset | Reset Network Settings and then tap Reset in the dialog box. When your device has completed the reset, rejoin your Wi-Fi network and try the update again.

4. Delete the update
Sometimes a corrupt update can cause a problem, but you can remove and retry. Go to Settings | General | Storage & iCloud Usage. Tap Manage Storage and wait for the list to be populated. Scroll through it until you see Software Update, then select this entry and tap Delete Update. You can now try to install the update again.

In my experience, these four steps will fix any problems with regular Apple updates and will let you upgrade your device to the latest version of iOS.
Unable to Verify Update error: Beta updates
If you want to try out the latest releases before anyone else, you have to sign up for the Apple Public Beta service on each device you want to use. This will get you the latest version of iOS before other people, but there will still be bugs, so it’s not for everyone. Using beta software introduces a new element of complexity to the update process. You can try all of the Regular update fixes above, but in some situations, this won’t fix the problem. I found that if my device wasn’t updated to the latest official release of iOS, I had problems with getting the latest beta release. Here’s how you fix them.
1. Delete the current beta update
Go to Settings | General | Storage & iCloud Usage and tap Manage Storage. Wait for the list to be populated, then scroll down, tap Software Update and then Delete Update.
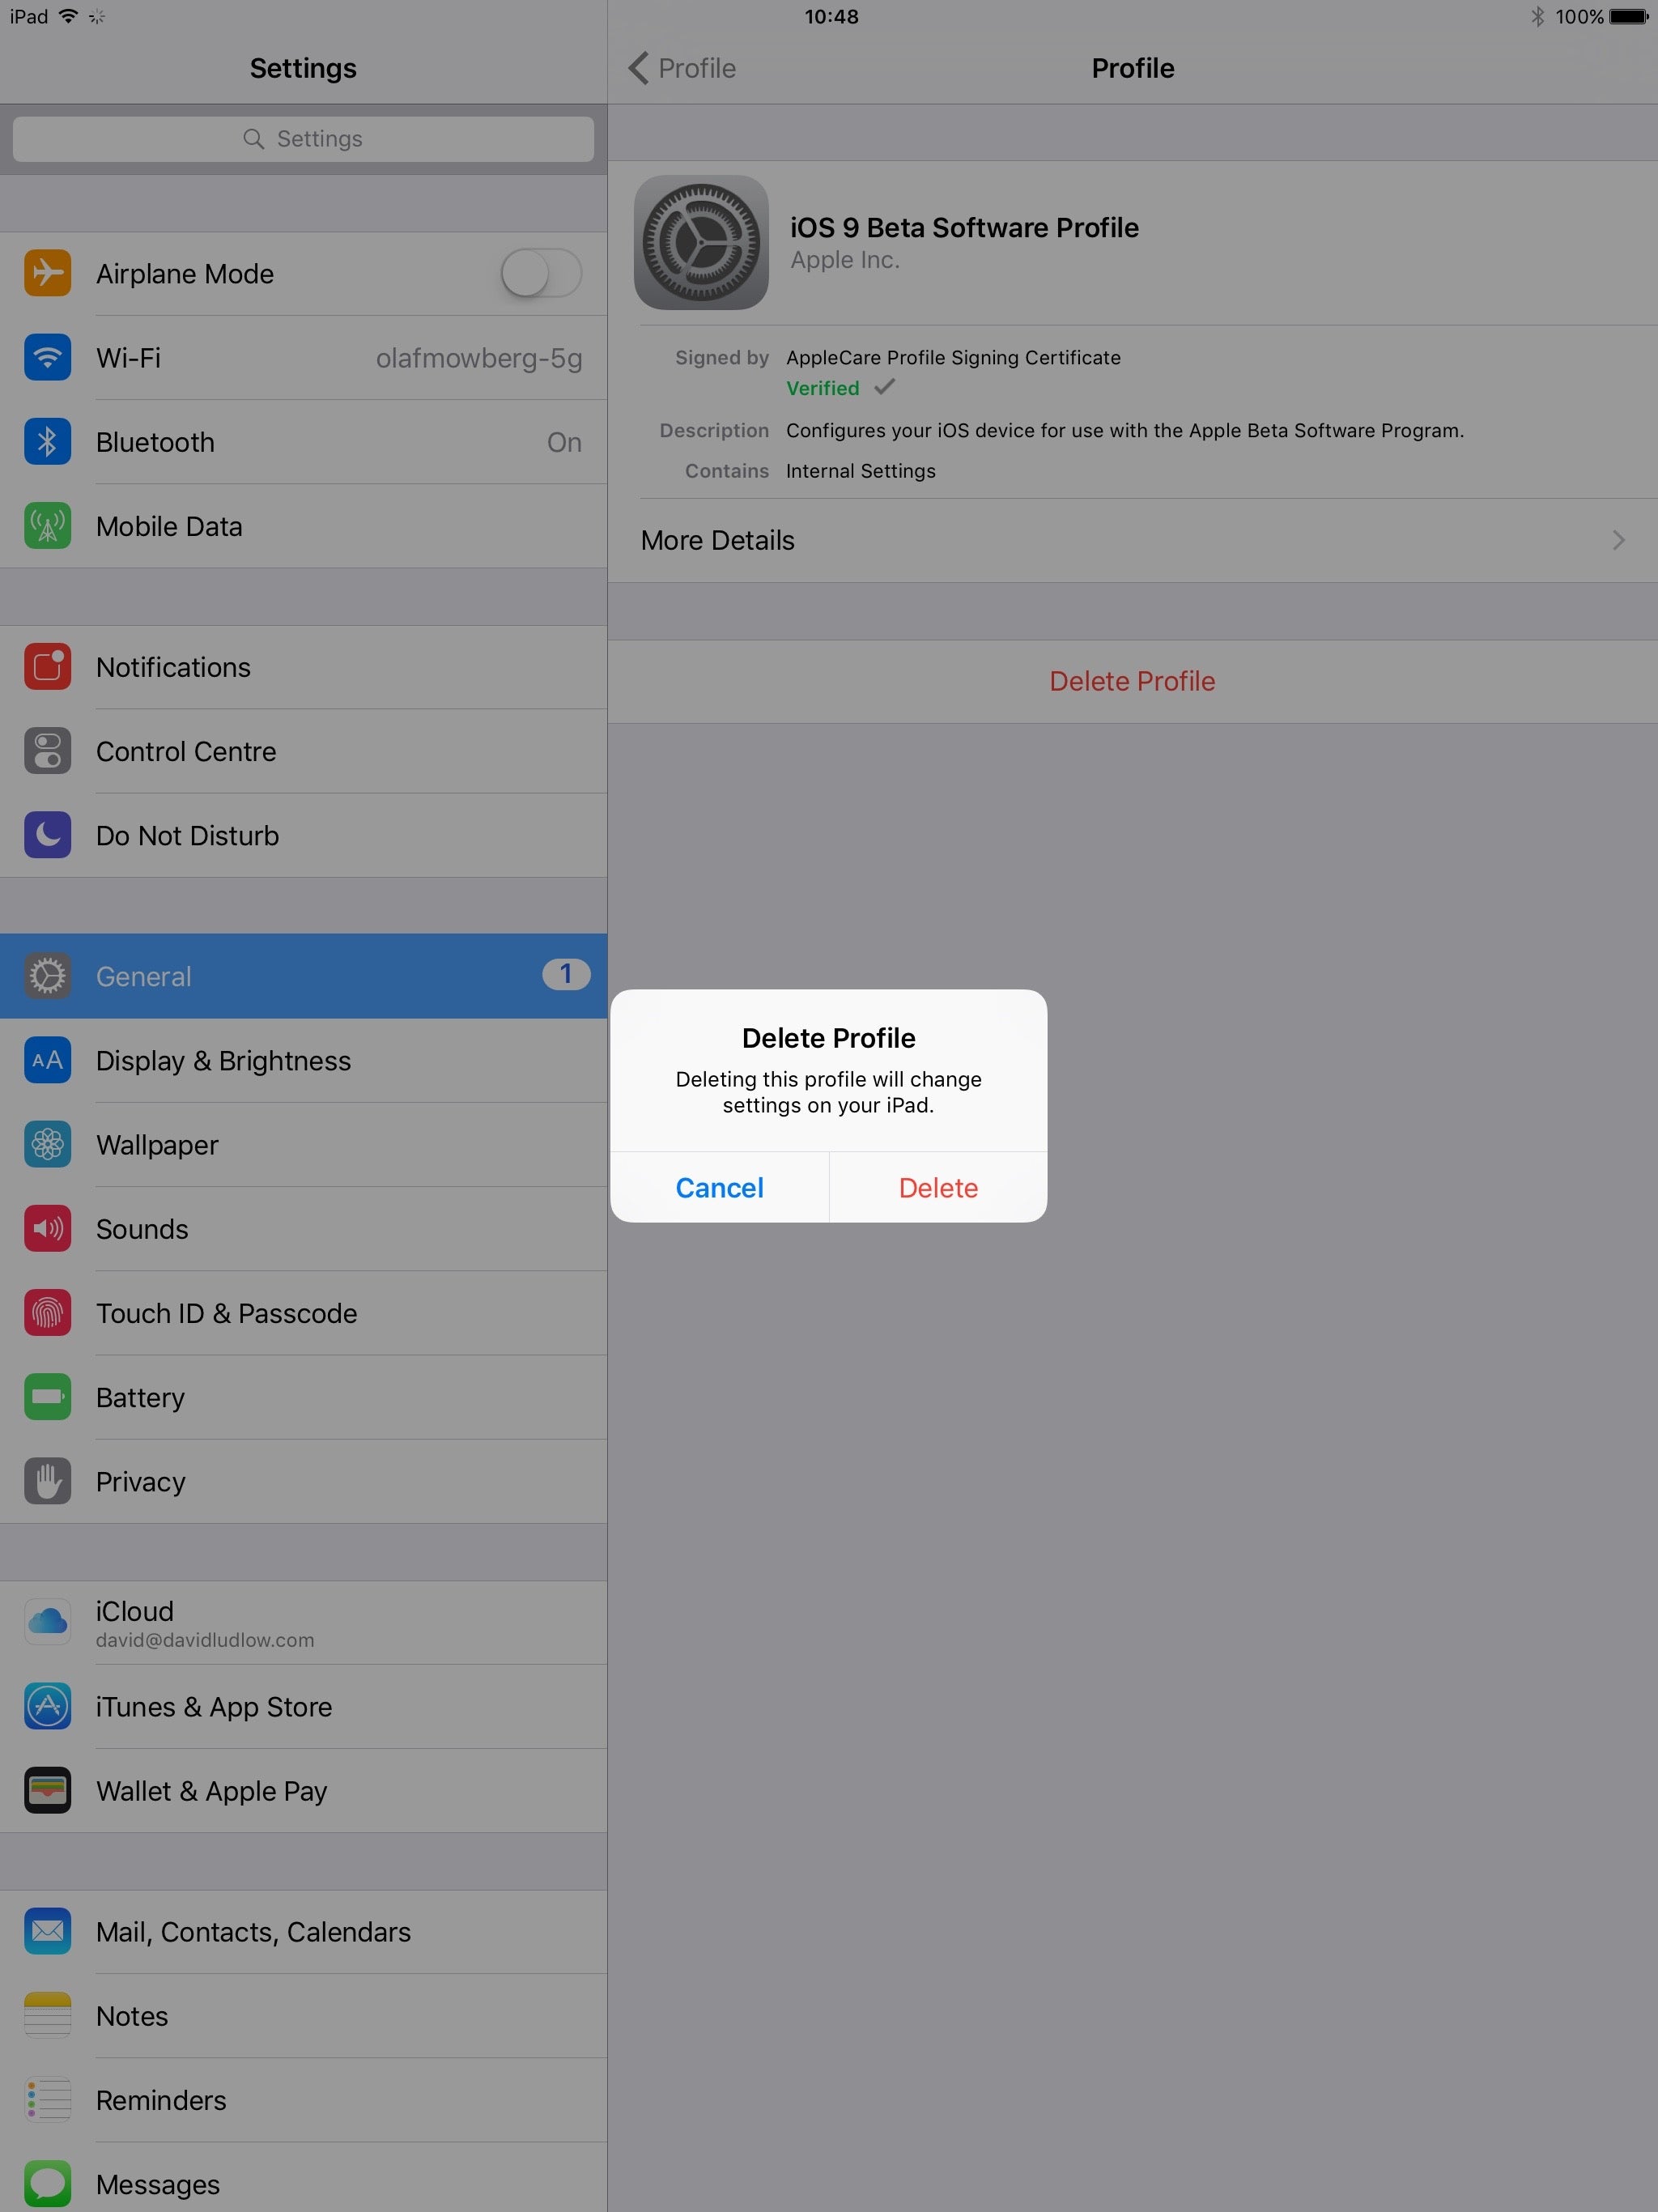
2. Delete the beta profile
Go to Settings | General | Profile (you only get the Profile menu if you’ve got multiple profiles installed, such as joining the beta programme). Tap the Beta Software Profile option and tap Delete Profile, then tap Delete to remove it. At this point, I’d reboot your iPad or iPhone.
3. Update your device
Go to Settings | General | Software Update and check for a new official update. Download and install this as you would any other update. Once complete, rejoin the beta programme following the link above, reinstall the beta profile and then you can re-run Software Update and get the latest beta version of iOS.