To help us provide you with free impartial advice, we may earn a commission if you buy through links on our site. Learn more
- Makes great coffee
- Solid build
- Easy to use – and even easier to clean
- Base gets hot after use
- Four times the price of the original AeroPress
- Funnel and filter holder are no longer included as standard
I’ve been making coffee with the AeroPress – on and off – for around 11 years. It was the first brewer I owned when I first got seriously into making coffee, and one of my most prized possessions when I went to university. When I moved to Australia for a few months (I studied abroad, you know), I bought another one there.
I’ll stand by the AeroPress as one of the most consistent and forgiving methods of making really great quality filter coffee. So when I was emailed about the brand’s new steel variant, I jumped at the opportunity to review it.
I’ve not been disappointed with the AeroPress Steel. It’s a fair bit heftier than the original and you’ll need to take care when it gets hot after use, but it makes just as good coffee and is equally easy to use. However, it’s four times the price of the original coffee maker, which some will find hard to justify.
AeroPress Steel: What do you get for the money?
Launched at £160, the AeroPress Steel is one of several AeroPress models, all of which function in the same fundamental way. This manual “3-in-1” coffee maker combines pour over, immersion and pressure brewing, resulting in coffee that’s “full-bodied like a french press”, “smooth like a pour over” and “rich like espresso”. Its cylindrical design works a bit like a large syringe: after pouring water over ground coffee, a plunger is used to create an air-tight vacuum before pushing the brewed coffee through a small paper filter into your cup or serving vessel.
The AeroPress first arrived on the scene in 2005. It was designed by Alan Adler, a lecturer in mechanical engineering at Stanford University and the inventor of the Aerobie flying disc. Since its launch, it’s taken on a cult status in specialty coffee circles, lauded by baristas and home brewers alike, so much so that thousands of professionals compete in the World AeroPress Championship every year.
Following the sale of the Aerobie brand to Spin Master in 2017, several versions of the AeroPress have emerged, including the dinky travel-friendly AeroPress Go, AeroPress Premium and AeroPress XL.
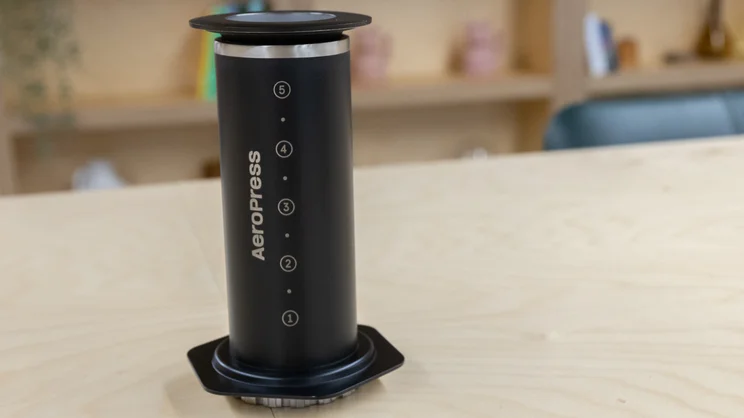
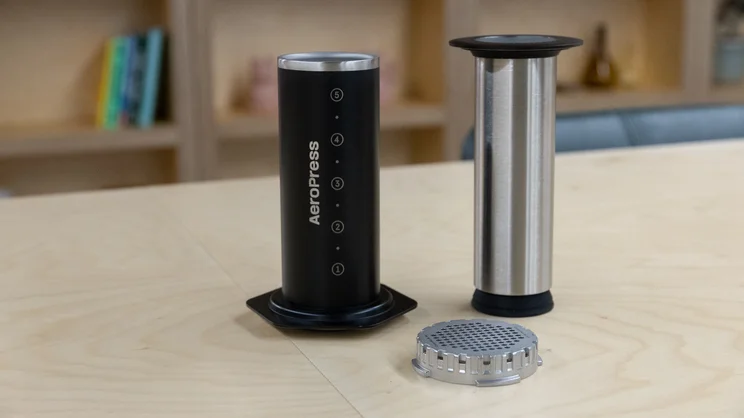
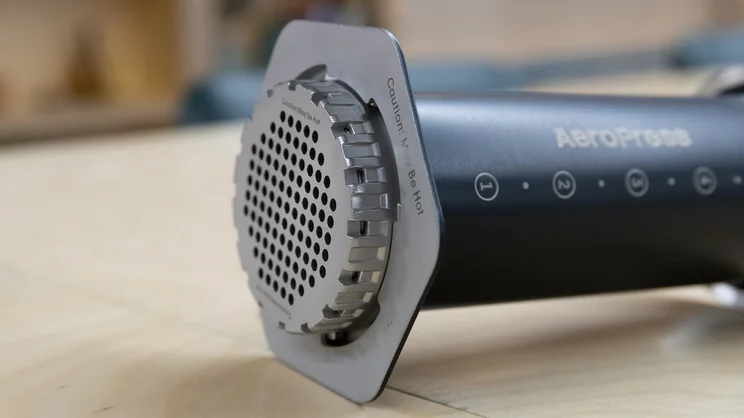
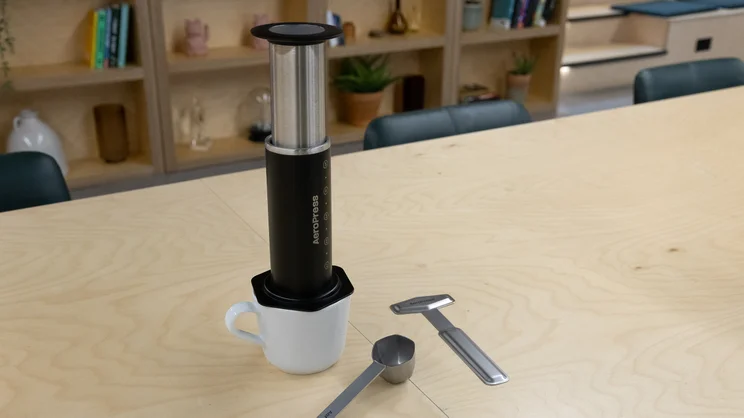
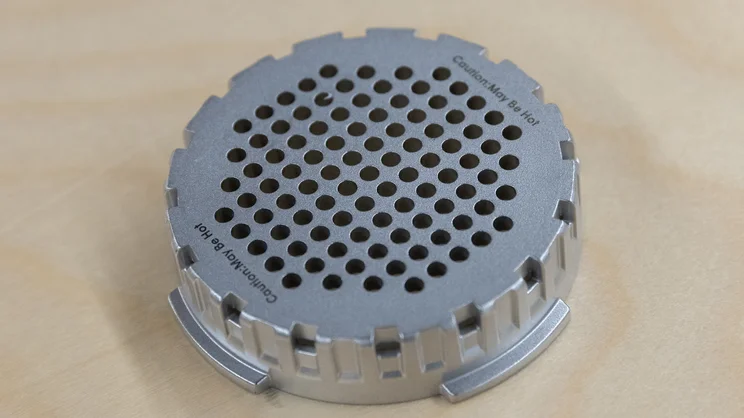
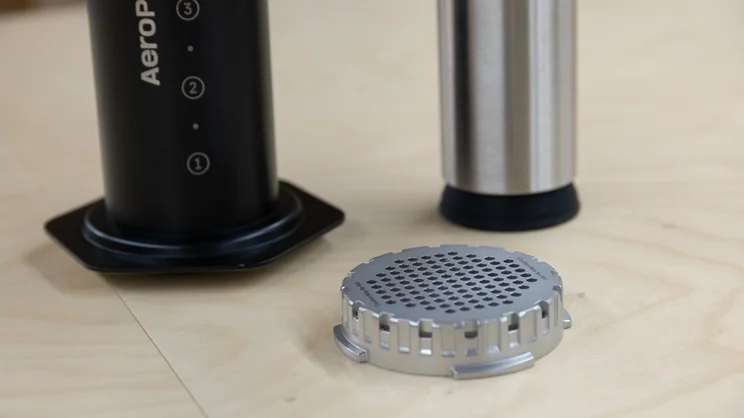
The AeroPress Steel comes in three parts: the main chamber, plunger and filter cap. Beyond its stainless steel build, the main design departures from the Original model are a double-walled chamber and a larger capacity: 12oz (360ml), instead of the Original’s 10oz (around 300ml). Note that the XL model is even bigger than this, with 20oz of capacity for up to four cups. This uses XL filter papers, while the AeroPress Steel is compatible with standard size.
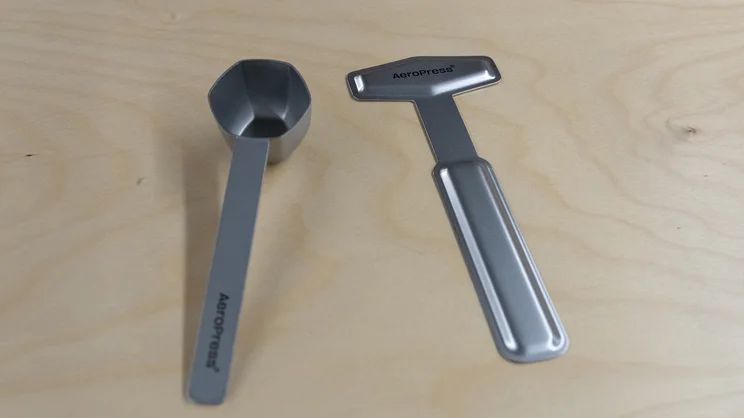
It comes in two colours: silver and black. Also in the box is a metal scoop, stirring paddle, and a small pack of around 50 filter papers to get you started. These normally cost £9 for 350, which is pretty great value as far as coffee filter papers are concerned.
How I tested the Aeropress Steel
I used the Aeropress Steel over a period of a few weeks to make undiluted black coffee – alternating with my other regular brewing methods, such as pour over and espresso.
There’s no shortage of recipes and techniques for the AeroPress, so for the purposes of testing, I followed the instructions included with the brewer’s manual. However, I also used the popular “inverted method” (which involves flipping the AeroPress upside down to begin with) as well as the method recommended by James Hoffman.
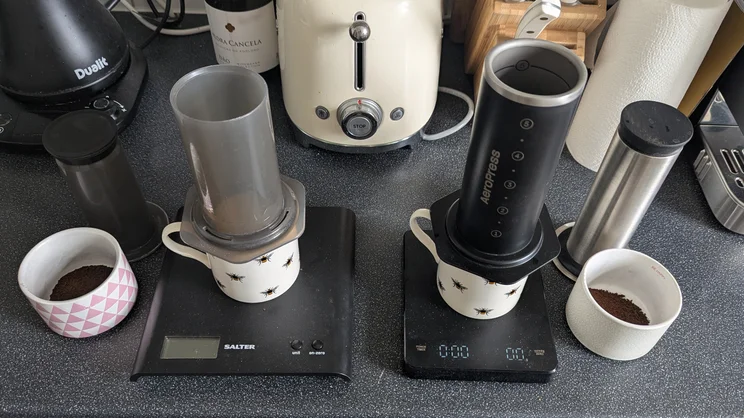
I didn’t carry out any standardised tests when reviewing the AeroPress Steel. However, for the sake of comparison, I did use it side-by-side with my trusty AeroPress Original: an old, but reliable, brewer that I’ve been using on-and-off for years.
In addition to taste testing, I also considered how easy the AeroPress was to use, how long the brewing process took and how easy it was to clean up afterwards. Lastly, I took into account the price of the brewer, as well as the price of its replacement filter papers.
What’s it like to use?
For those new to the AeroPress, it might seem like a rather odd way of making coffee. But once you’ve got the hang of it and have made your first few coffees, it becomes very straightforward.
What’s more, I’ve found the AeroPress to be a very forgiving brewing method: you can afford to take some liberties with your grind size, ratios and timings. In fact, depending on the coffee you’re using, it’s encouraged to experiment a little. You’ll rarely be left with an undrinkable cup if you don’t follow a recipe exactly.
The additional weight that the AeroPress Steel brings doesn’t make an awful lot of difference to its ease of use. In fact, its solid build makes for a very pleasant experience. However, I’ve avoided using it on my glass carafe, as I’m not very comfortable with the risk this poses to the carafe and – more importantly – my hands. You might be okay with a sturdier, thick-walled glass vessel but, if you share my concern, know that AeroPress has its own shatterproof carafe made from Tritan plastic.
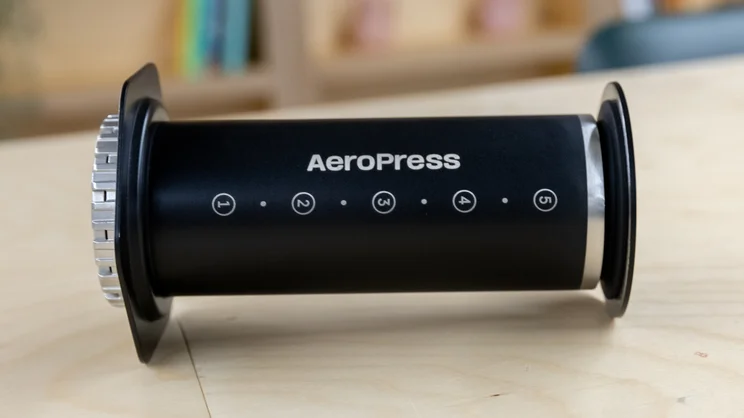
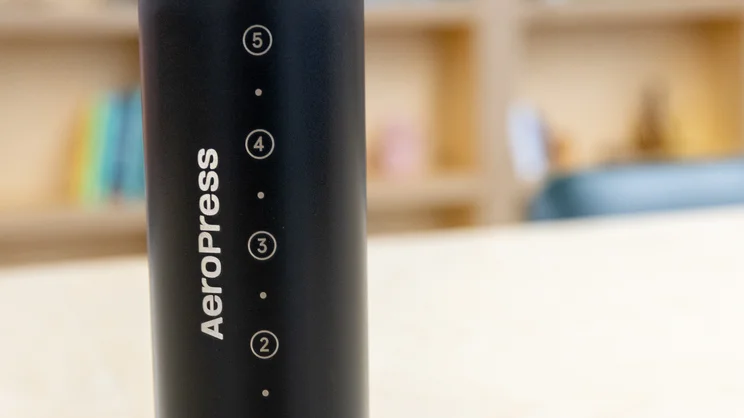
I have a couple of other caveats to add about the Steel variant. One complaint I’ve noticed online is that you’ve only got one marking on the inside of the chamber to locate the maximum fill line, while the outside is marked with points one to five. Seeing as the AeroPress Steel is not even remotely translucent, there’t not much point on having these exterior markings (beyond the fact that they’ve become part of the AeroPress’ recognisable branding). And unless you’re shining a torch directly into the chamber of the AeroPress Steel, I can’t imagine interior fill lines would be much help either.
Furthermore, the numbered markings are a remnant of the AeroPress’ original intended use: making concentrated “espresso-style” coffee that can then be diluted with water or milk. These numbers correspond to how many scoops of coffee you use. So, for one scoop of coffee, fill the chamber with water up to the number one mark. For two scoops of coffee, fill up to the number two mark, and so on.
Since the AeroPress has evolved beyond this “espresso” function into something more closely resembling filter coffee, it makes sense to ignore the numbers altogether. In any case, as with any filter brewing method, you’re best off using digital scales to weigh out your water and coffee. That’s the way I do it.
Lastly, when unscrewing the filter cap after brewing, you need to be much more careful with the AeroPress Steel than you do with the Original AeroPress. Being metal, it naturally gets very hot and also can feel a little more stiff, too (perhaps a result of thermal expansion). You can either let it cool a bit before unscrewing the cap or run it under cold water and use a cloth to help prise it off. I’ve not found this to be too much of an inconvenience, but it does draw out the cleaning process a little.
What’s the coffee like?
As I mentioned above, the AeroPress is a forgiving brewer and I got some great cups of coffee out of it. Depending on how you’re using it, you’ve got quite a lot of freedom when it comes to choosing a roast, but you’ll of course get the best results with fresh beans. I’ve been testing it with a medium-light single origin Ethiopian coffee and a medium Kenyan roast.
As with any coffee, a good quality grinder makes a huge difference. I’ve been using the AeroPress Manual Coffee Grinder, which I’ve been reviewing alongside the AeroPress Steel, and grinding at a medium-fine consistency at the grinder’s recommended AeroPress setting.
Following the instructions included with the AeroPress Steel, I used around 20g of coffee, with water heated to 85°C and poured up to the maximum fill mark on the inside of the chamber. In successive uses I upped the temperature to around 93°C and used my usual filter ratio of 6g of coffee to 100ml of water. In all of my attempts, I’ve ended up with results I’ve been very pleased with: for the most part, strong, full-bodied cups of coffee.
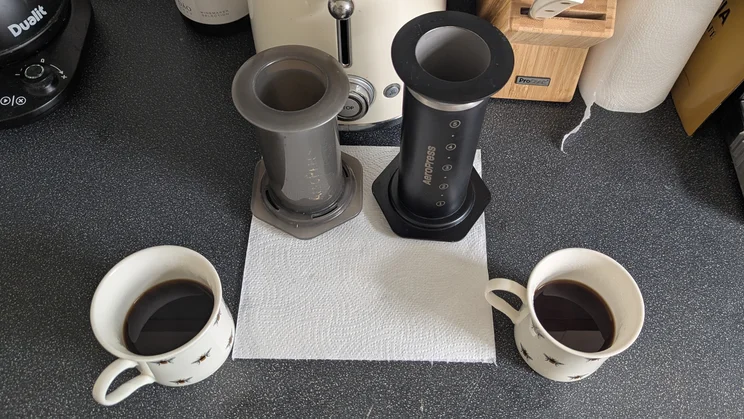
I was also keen to compare the AeroPress Steel with my older AeroPress Original side by side. For this test, I kept my water temperature at 93°C and used 6g of coffee with 100ml of water, to make a small amount of coffee in each brewer. For both brews, I stirred for three seconds after pouring and allowed to brew for 30 seconds before plunging – as per the AeroPress Steel’s instructions.
The results produced were, as I’d expected, comparable: both mellow cups that – if I have to be critical – were perhaps a bit on the tart side. Both brewers were comparably easy to use, too. If anything, the Steel variant felt a bit smoother in operation, while the plunger on my AeroPress Original shot quickly down the chamber once most of the coffee had been extracted (this could be a sign of the plunger’s age and wear over the years).
The recipe offered by James Hoffman (the messiah to many coffee enthusiasts) does away with the stirring paddle altogether, in favour of a gentle swirl at the two-minute mark. Hoffman describes this as a “great default technique”, which I’m inclined to agree with. This was perhaps the nicest brew I got from the AeroPress Steel – strong and flavourful – even if the medium roast beans I used might have benefited from a slightly coarser grind.
The last method I tried was Alan Adler’s original recipe, using the AeroPress to make a concentrated “espresso-style” coffee (15g of coffee to 90ml of water, heated to 80°C). This uses a short extraction time, with 20-40 seconds of plunging following just ten seconds of stirring. And while the word “espresso” should be used loosely here, the resulting concentrate was punchy and not too sour. There was even a slight hint of crema around the edges of the cup. Diluted it was nice too, but not as full-bodied as Hoffman’s approach.
What’s it like to clean?
The Aeropress is a real gem when it comes to cleaning. In fact, with the exception of the Hario V60, it’s perhaps one of the easiest brewers to clean and maintain.
After plunging, the coffee grounds are compressed into a compact puck that can be popped neatly into the bin. Then it’s simply a matter of washing the AeroPress, again taking care with any parts that have become hot. For daily cleaning, I’d argue you can get away with rinsing it in water, giving it a more careful cleaning with soap every week or so.
Do be aware of the rubber end of the plunger, though. This attracts lint very easily, so you might want to avoid drying it off with a tea towel – or do so very carefully.
Is there anything we didn’t like?
When it comes to performance, I can’t really fault the AeroPress Steel. It’s just a shame that it’s four times the price of the AeroPress Original. Yes, it feels extremely well-made, the build quality is excellent and you can get more coffee out of it. But, as my taste tests demonstrated, there’s not much of a difference in the quality of coffee between the Steel and the Original brewer. And while my Original is showing its age after over 10 years, it still feels very solid, which is more praise for the AeroPress Original than it is a criticism of the Steel model.
It’s also unfortunate that Aeropress doesn’t include the funnel and filter holder in the box with the brewer anymore. These were still accessories included as standard when I got my first AeroPress, but they’re now £9 each, among a whole host of accessories you can purchase. A sign of the times, perhaps.
Should I buy the AeroPress Steel?
The AeroPress is a fantastic brewer: it’s easy to use, easy to clean and makes lovely coffee across a variety of methods and recipes. Should you buy it? If you’re looking to move away from instant or cafetiere coffee, then yes, absolutely.
But should you buy the AeroPress Steel? Well, on the face of it, it’s hard to fault. I like it for the very same reasons that I like the Original, and there are even aspects that I think the Steel model improves on: it offers greater capacity while remaining compatible with the standard AeroPress filter papers, the build quality is lovely, and it feels sturdy and wieldy. However, I’m not totally convinced that you need to spend £160 on it when the Original is available for £40.
That makes it a little tricky to deliver a clear-cut verdict. If you’re won over by the heavy-duty build, it may well be the right option for you. It’s a five-star product, no doubt about that. However, you could just as happily spend £40 on the Original and save the £120 for good quality coffee. If I was buying an AeroPress today, I’d still probably opt for the latter.