To help us provide you with free impartial advice, we may earn a commission if you buy through links on our site. Learn more
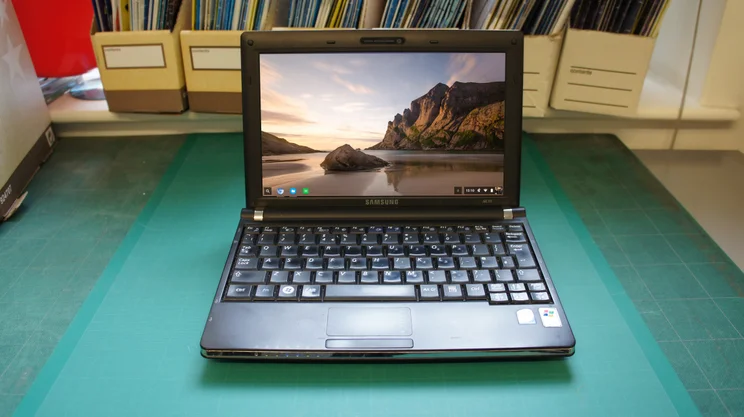
It’s easy to be quite sentimental about something like an old laptop. Even after they’re no longer at the cutting edge of technology you can still be quite attached to them. Admittedly, my Samsung NC10 netbook from circa 2008 might never have been at the ‘cutting edge’, even when it was new. Still, it got me through university, accompanied me on trips halfway across the globe, took several batterings, and it still works to this very day. So it was with a degree of sadness that it’s been sat in the bottom of a cupboard for the last few years.
Yes, it’s 30mm thick and yes it weighs a not insubstantial-for-a-10in-netbook 1.33kg. Yes the display has fewer pixels than a smartphone and less memory, too. But now, the old workhorse has a new lease on life courtesy of Neverware’s CloudReady, which easily converts old laptops into Chromebooks. The other great thing? CloudReady is absolutely free for personal use.
CloudReady is in fact based on Chromium OS, the open-source version of Google’s Chrome OS, replicating many of the same features you find on newfangled Chromebooks. If you’re interested, you can read about some of the main differences here, but essentially, the experience is very similar to any Chromebook you might buy today, save for any hardware limitations of the original laptop (or desktop PC) you’re looking to use.
As Chromium OS is designed to be lightweight compared to an operating system like Windows or OS X, your old hardware might well surprise you. My Samsung NC10 originally launched with Windows XP, so it’s certainly showing its age.
Installing CloudReady on your old system is thankfully an easy task and I’ve outlined the instructions below. All you need to get started is a USB flash drive 8GB or 16GB in size, a PC with Chrome installed that you can used to create a bootable recovery image, and your old system you’re looking to upgrade.
CloudReady doesn’t officially support every item of hardware, so your experience may well vary. Most laptops released within the last five years with more common Intel components should be supported, and a list of certified compatible hardware is available here. The list isn’t extensive, however, so it’s worth a go even if your laptop isn’t listed. In my case, no Samsung laptops are mentioned at all yet my NC10 works absolutely flawlessly. Even two-finger scrolling, which was never supported by default in Windows XP, works perfectly.
Create a CloudReady bootable image
First you’ll need to head over to the Neverware page where you can download the free personal version of the CloudReady operating system as a zip file. There’s no need to extract it. Then download the Chromebook Recovery Utility from the Chrome Web Store’. Open up the Chromebook Recovery Utility. The utility will warn you that the flash drive will be erased to create an image, so make sure you’ve backed up anything important. Don’t hit Get Started.
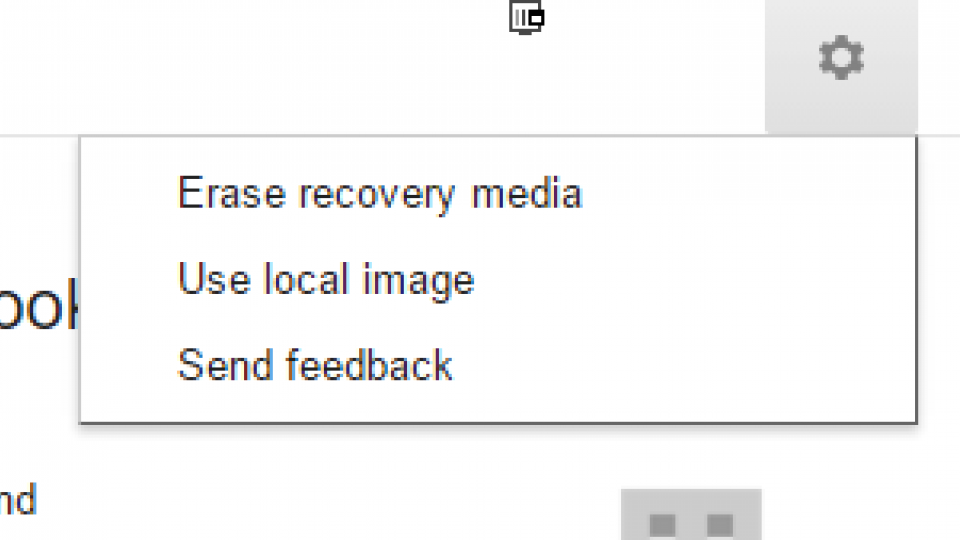
Instead, click the gear icon at the top right of the screen, see above. This will bring up a menu where you want to select ‘Use local image’. This will open up an explorer window where you’ll need to locate the CloudReady zip file you downloaded earlier.
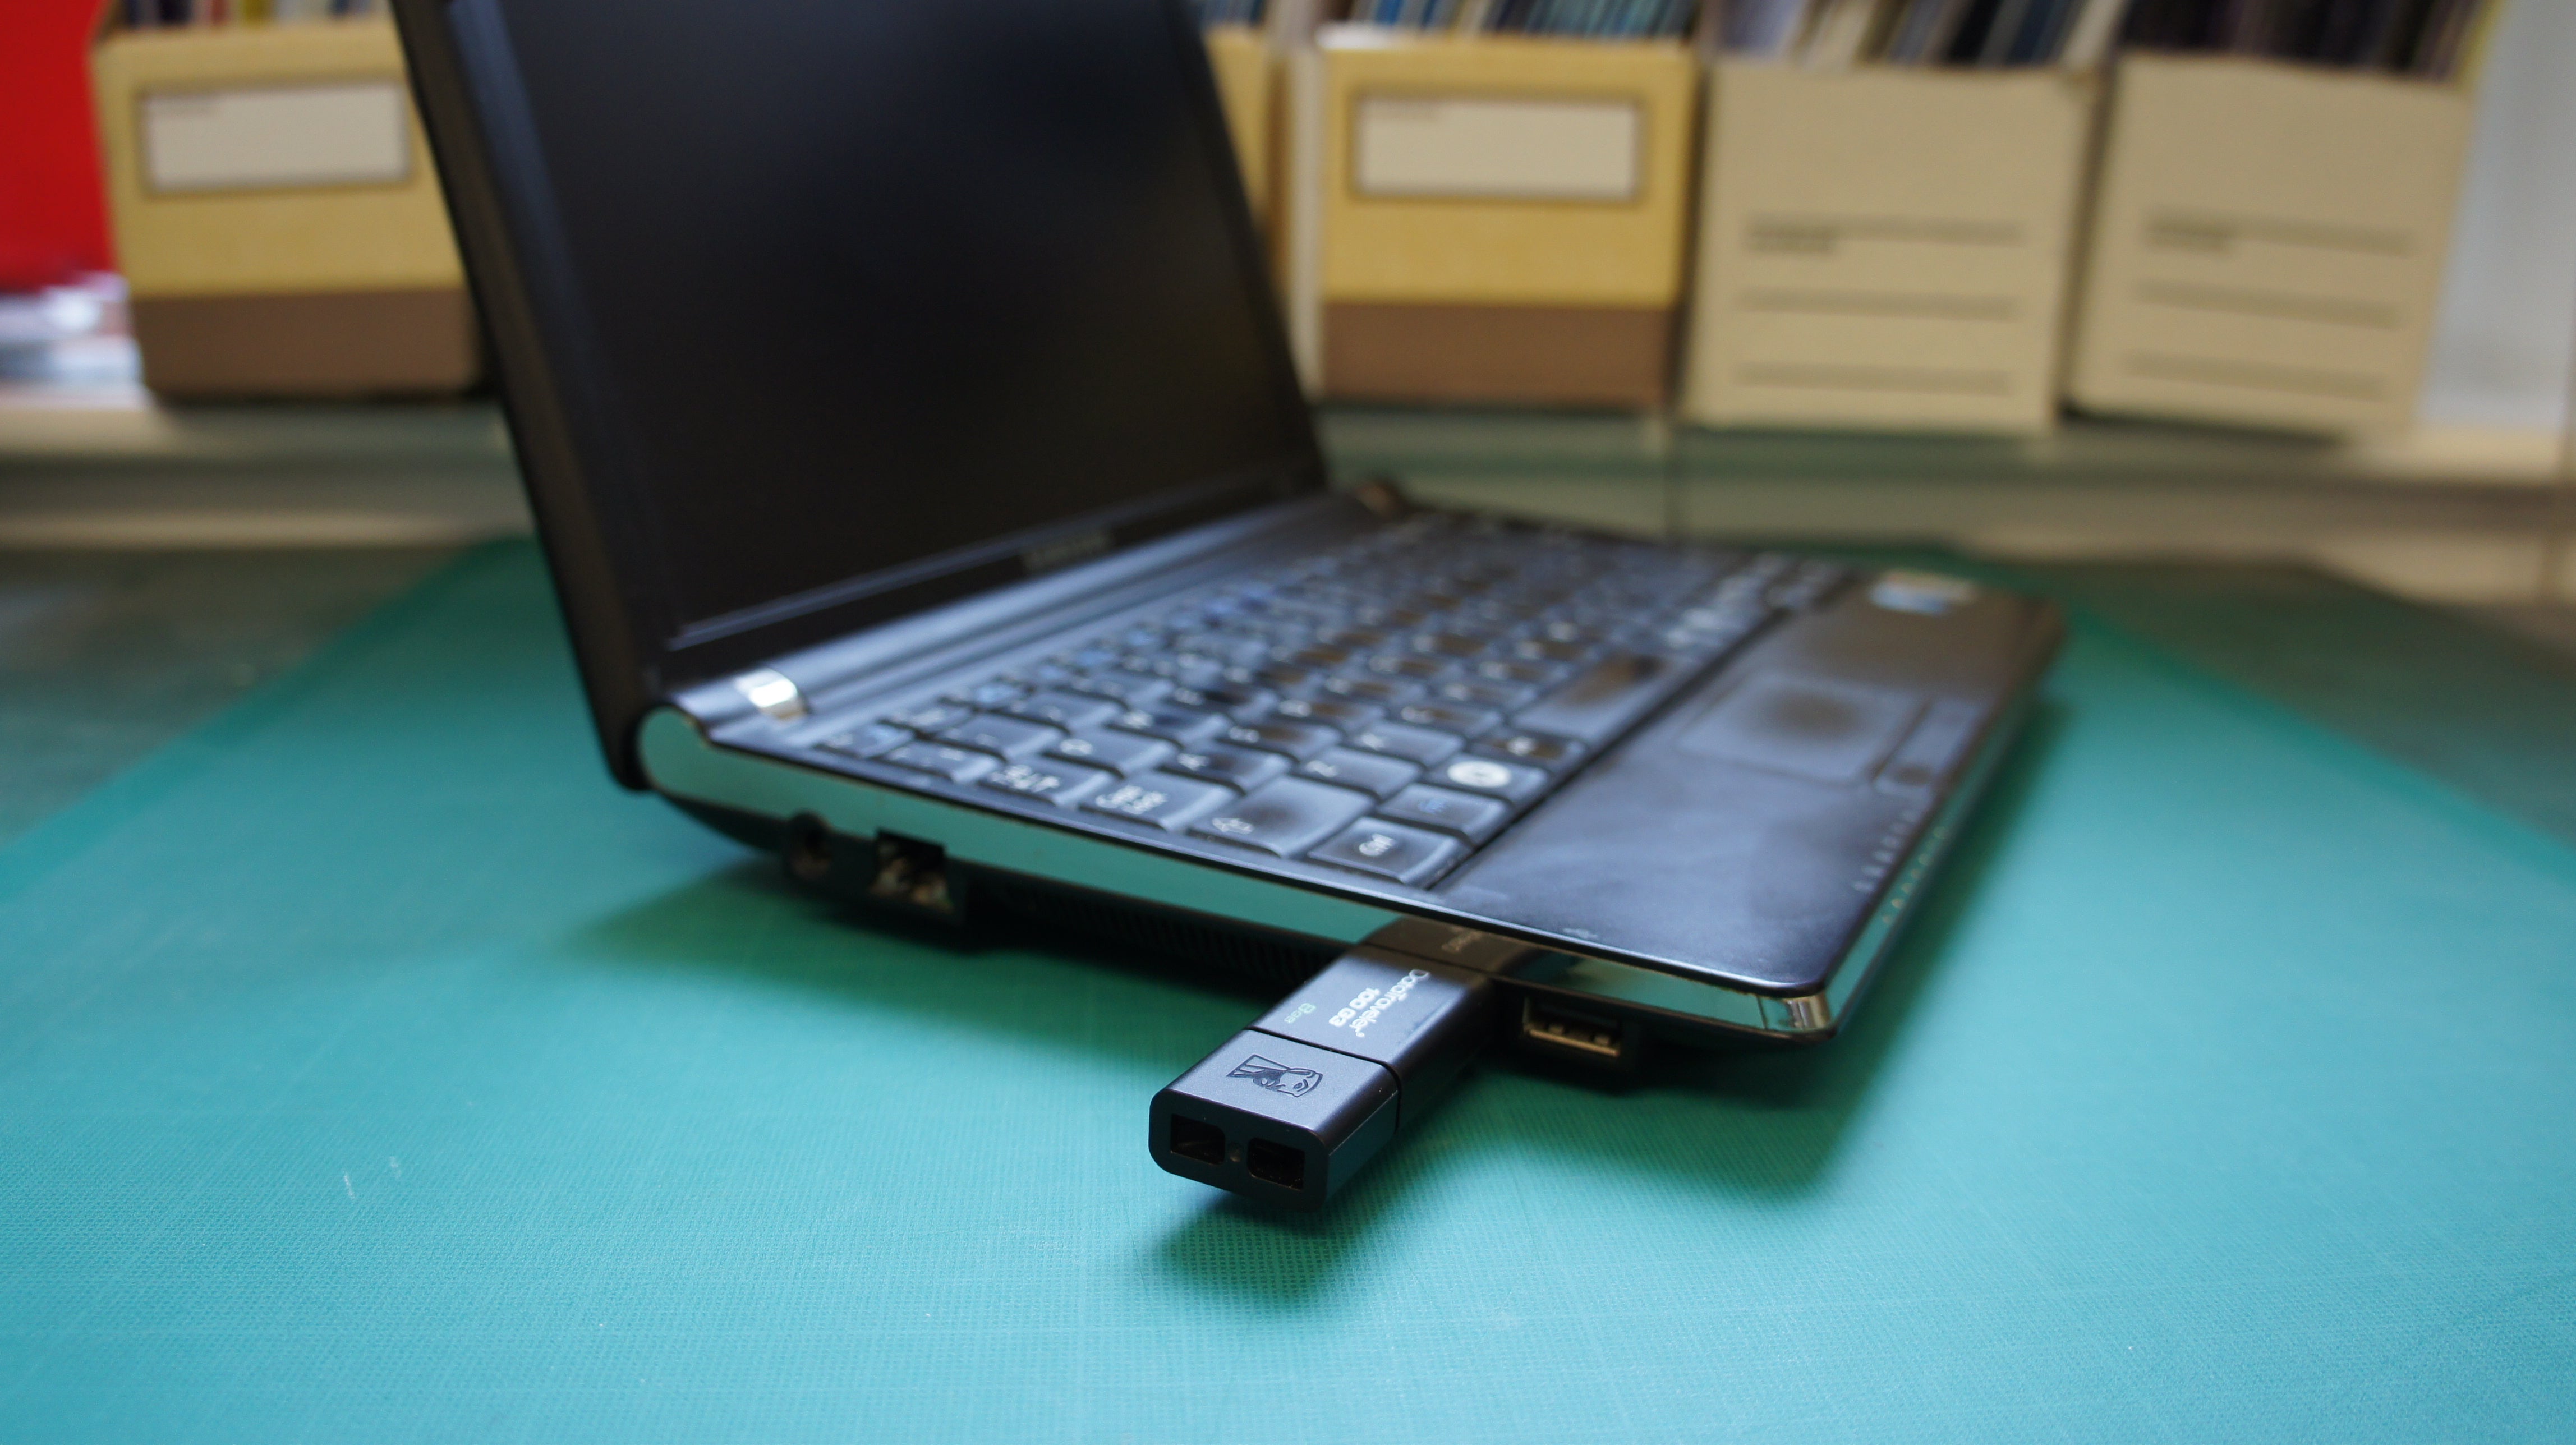
Insert your USB drive if you haven’t already done so, then select if from the dropdown list. Make sure you select the correct one as it’s about to get wiped. Hit Continue when you’re sure.
The Chromebook Recovery Utility will then begin creating a recovery image. You’ll get a Chrome security prompt pop up during the process that you’ll need to hint Continue on to progress. Don’t be alarmed if the percentage complete goes beyond 100%. Just leave it running and the whole process should take about 15 minutes in total. After that, your USB flash drive should be ready.

Booting from your USB flash drive
Now, it’s time to turn your attention to your old laptop. First you’ll need to make sure it will boot from a USB flash drive. This will differ from manufacturer to manufacturer but through a specific button press immediately after powering on, you should be able to either access a boot menu where you can choose the flash drive, or you might need to jump into the BIOS settings and change boot priority so that your system boots first from the flash drive rather than the internal HDD or SSD. Accessing the BIOS is usually done through pressing F2, F10 or Del just as system is turning on. In the case of the Samsung NC10, you need to hit F2.
Install CloudReady
After you’ve got the system primed to boot from a USB flash drive, turn it off, insert the flash drive and turn the system on again. You should be greeted by the CloudReady logo, which will stay on your screen for a few minutes while it does things in the background.
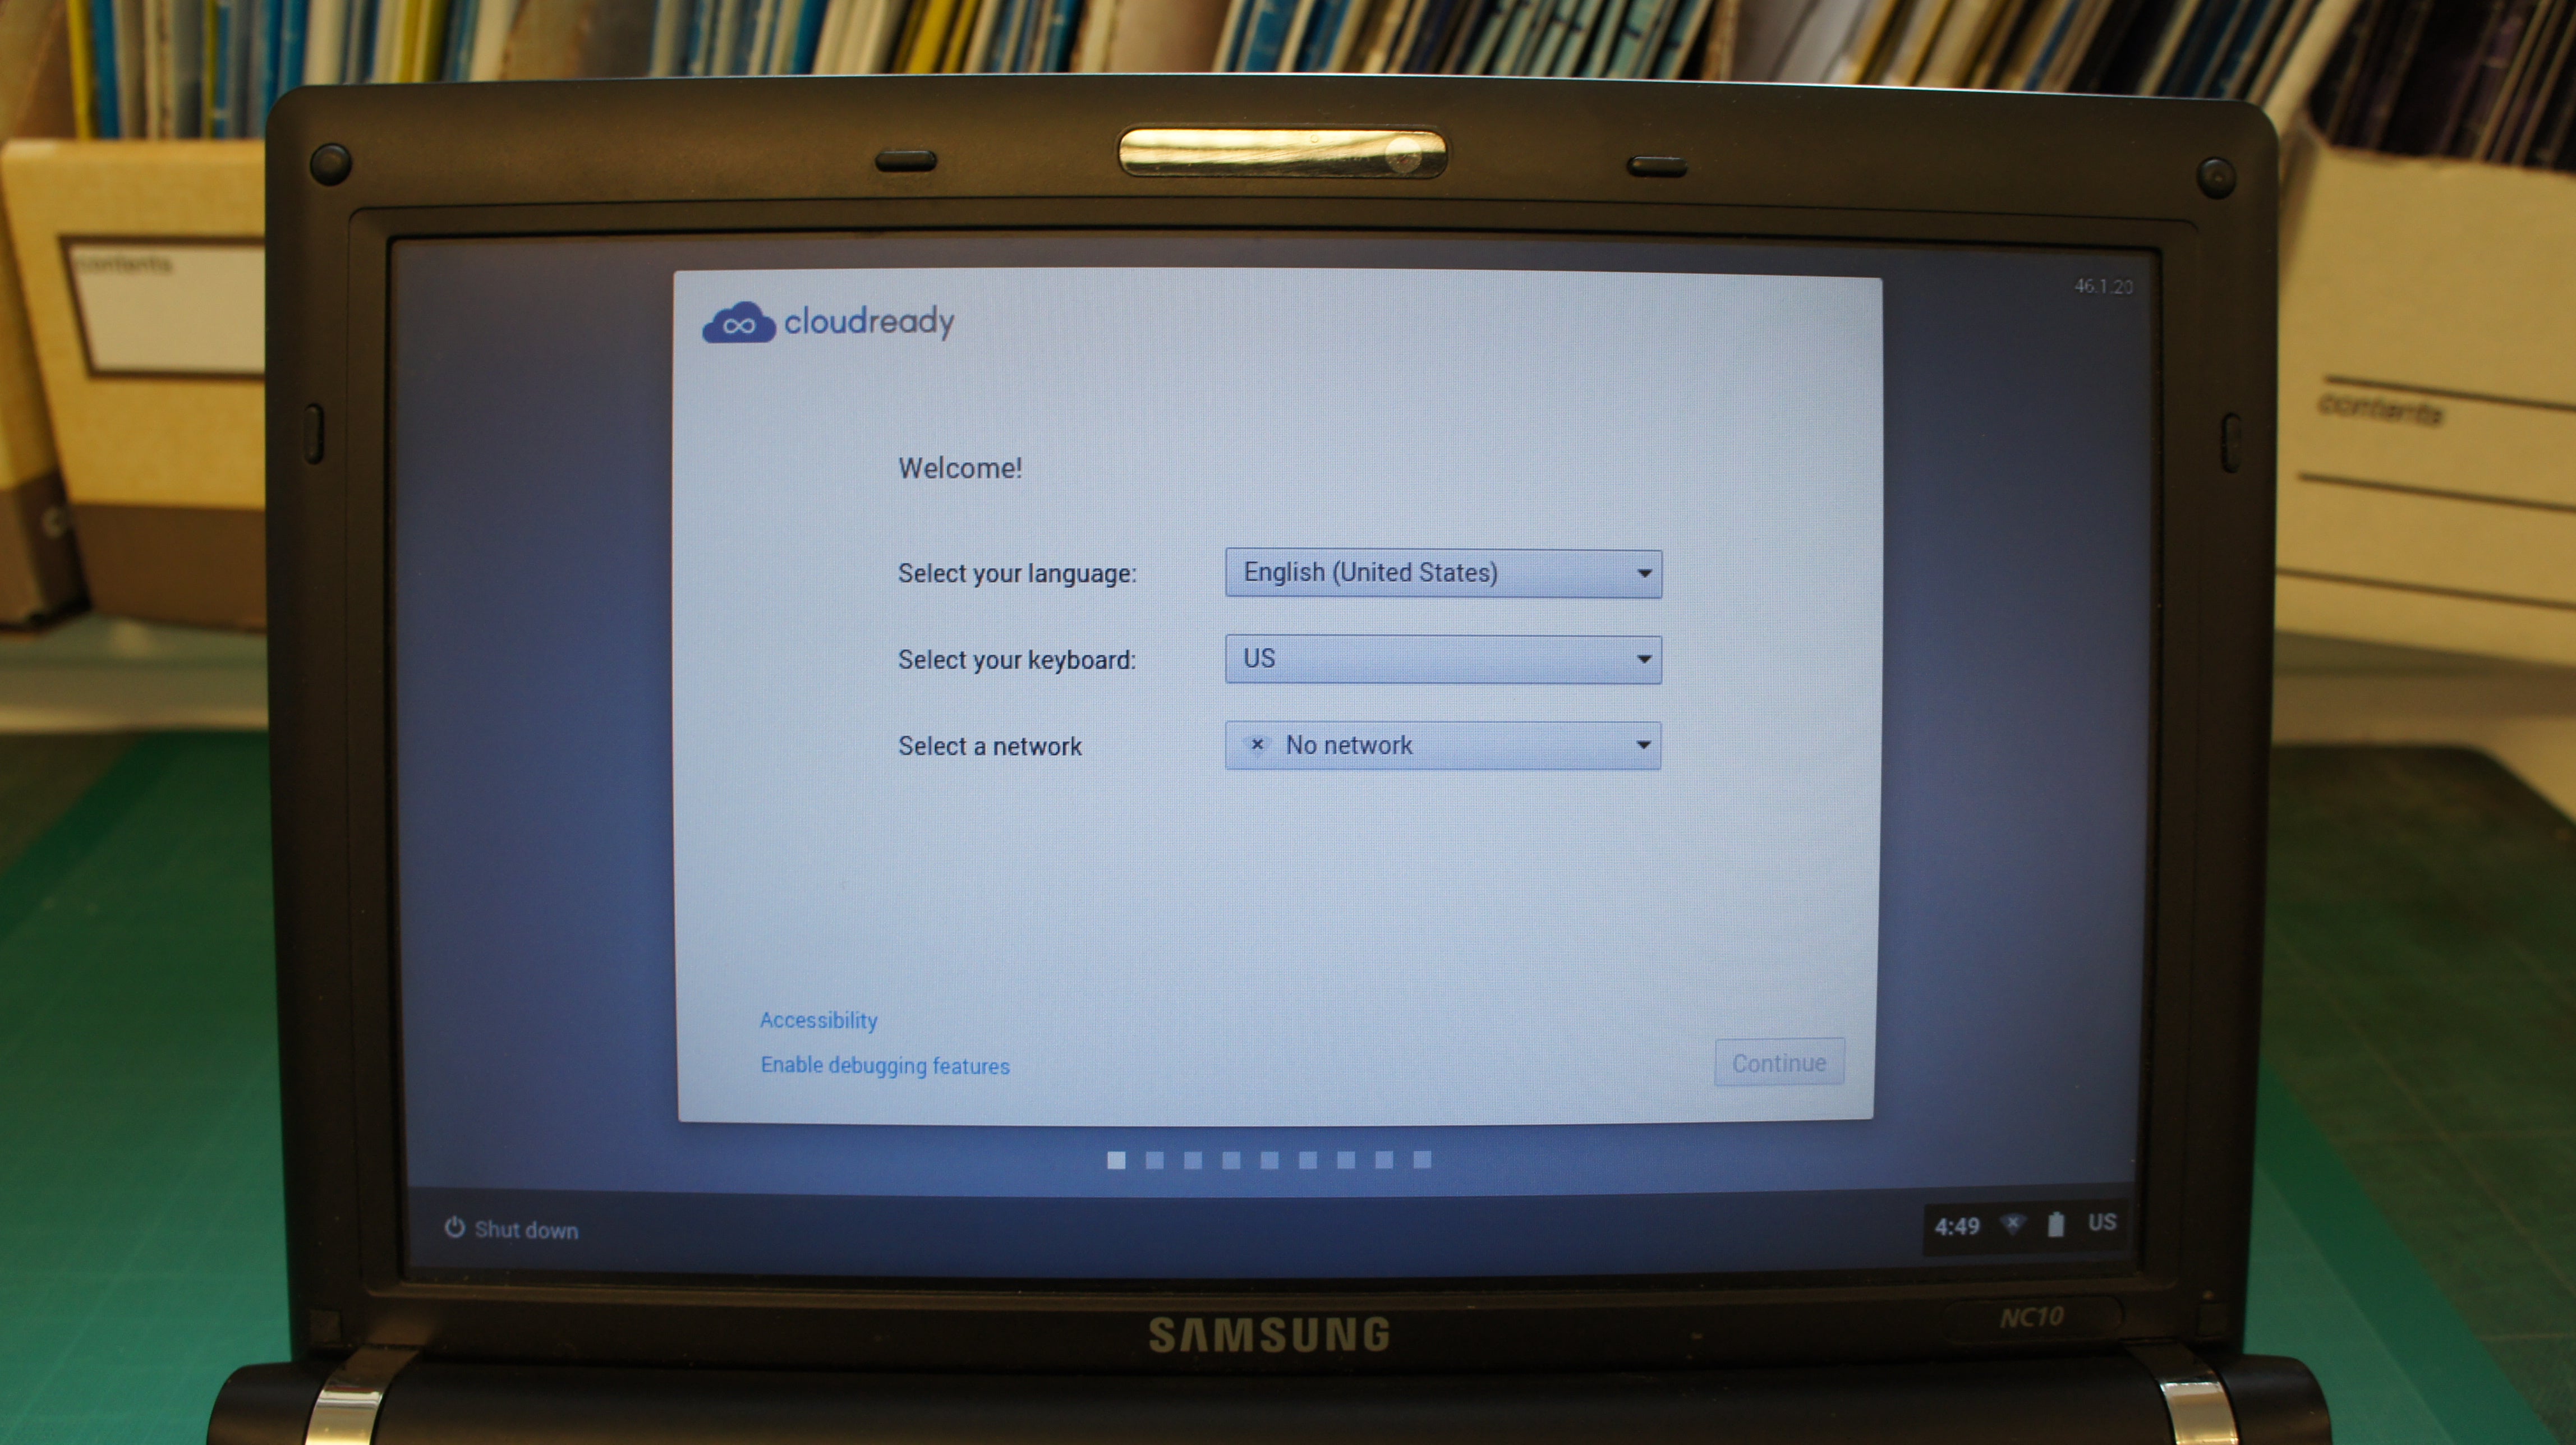
You’ll need to set your operating system and keyboard language on the next screen, as well as connecting to your wireless network. The next screen will install Adobe Flash, which doesn’t come as standard with Chromium OS. The next step is to sign into your Google account. If you’re dead set on installing you can skip signing in, as you’ll just need to do it again after you’ve installed. Instead, select Guest mode.
After this is all done, you’ll be at the Chromium OS desktop. You might find everything feels a little unresponsive for now. This is because if you’ve used a Chromebook before, or use Chrome as your desktop browser, Chromium OS is synchronising all of your extensions and web apps. Annoyingly, there’s no option to choose what to sync when you first sign in. So just leave it for a few minutes to download in the background.
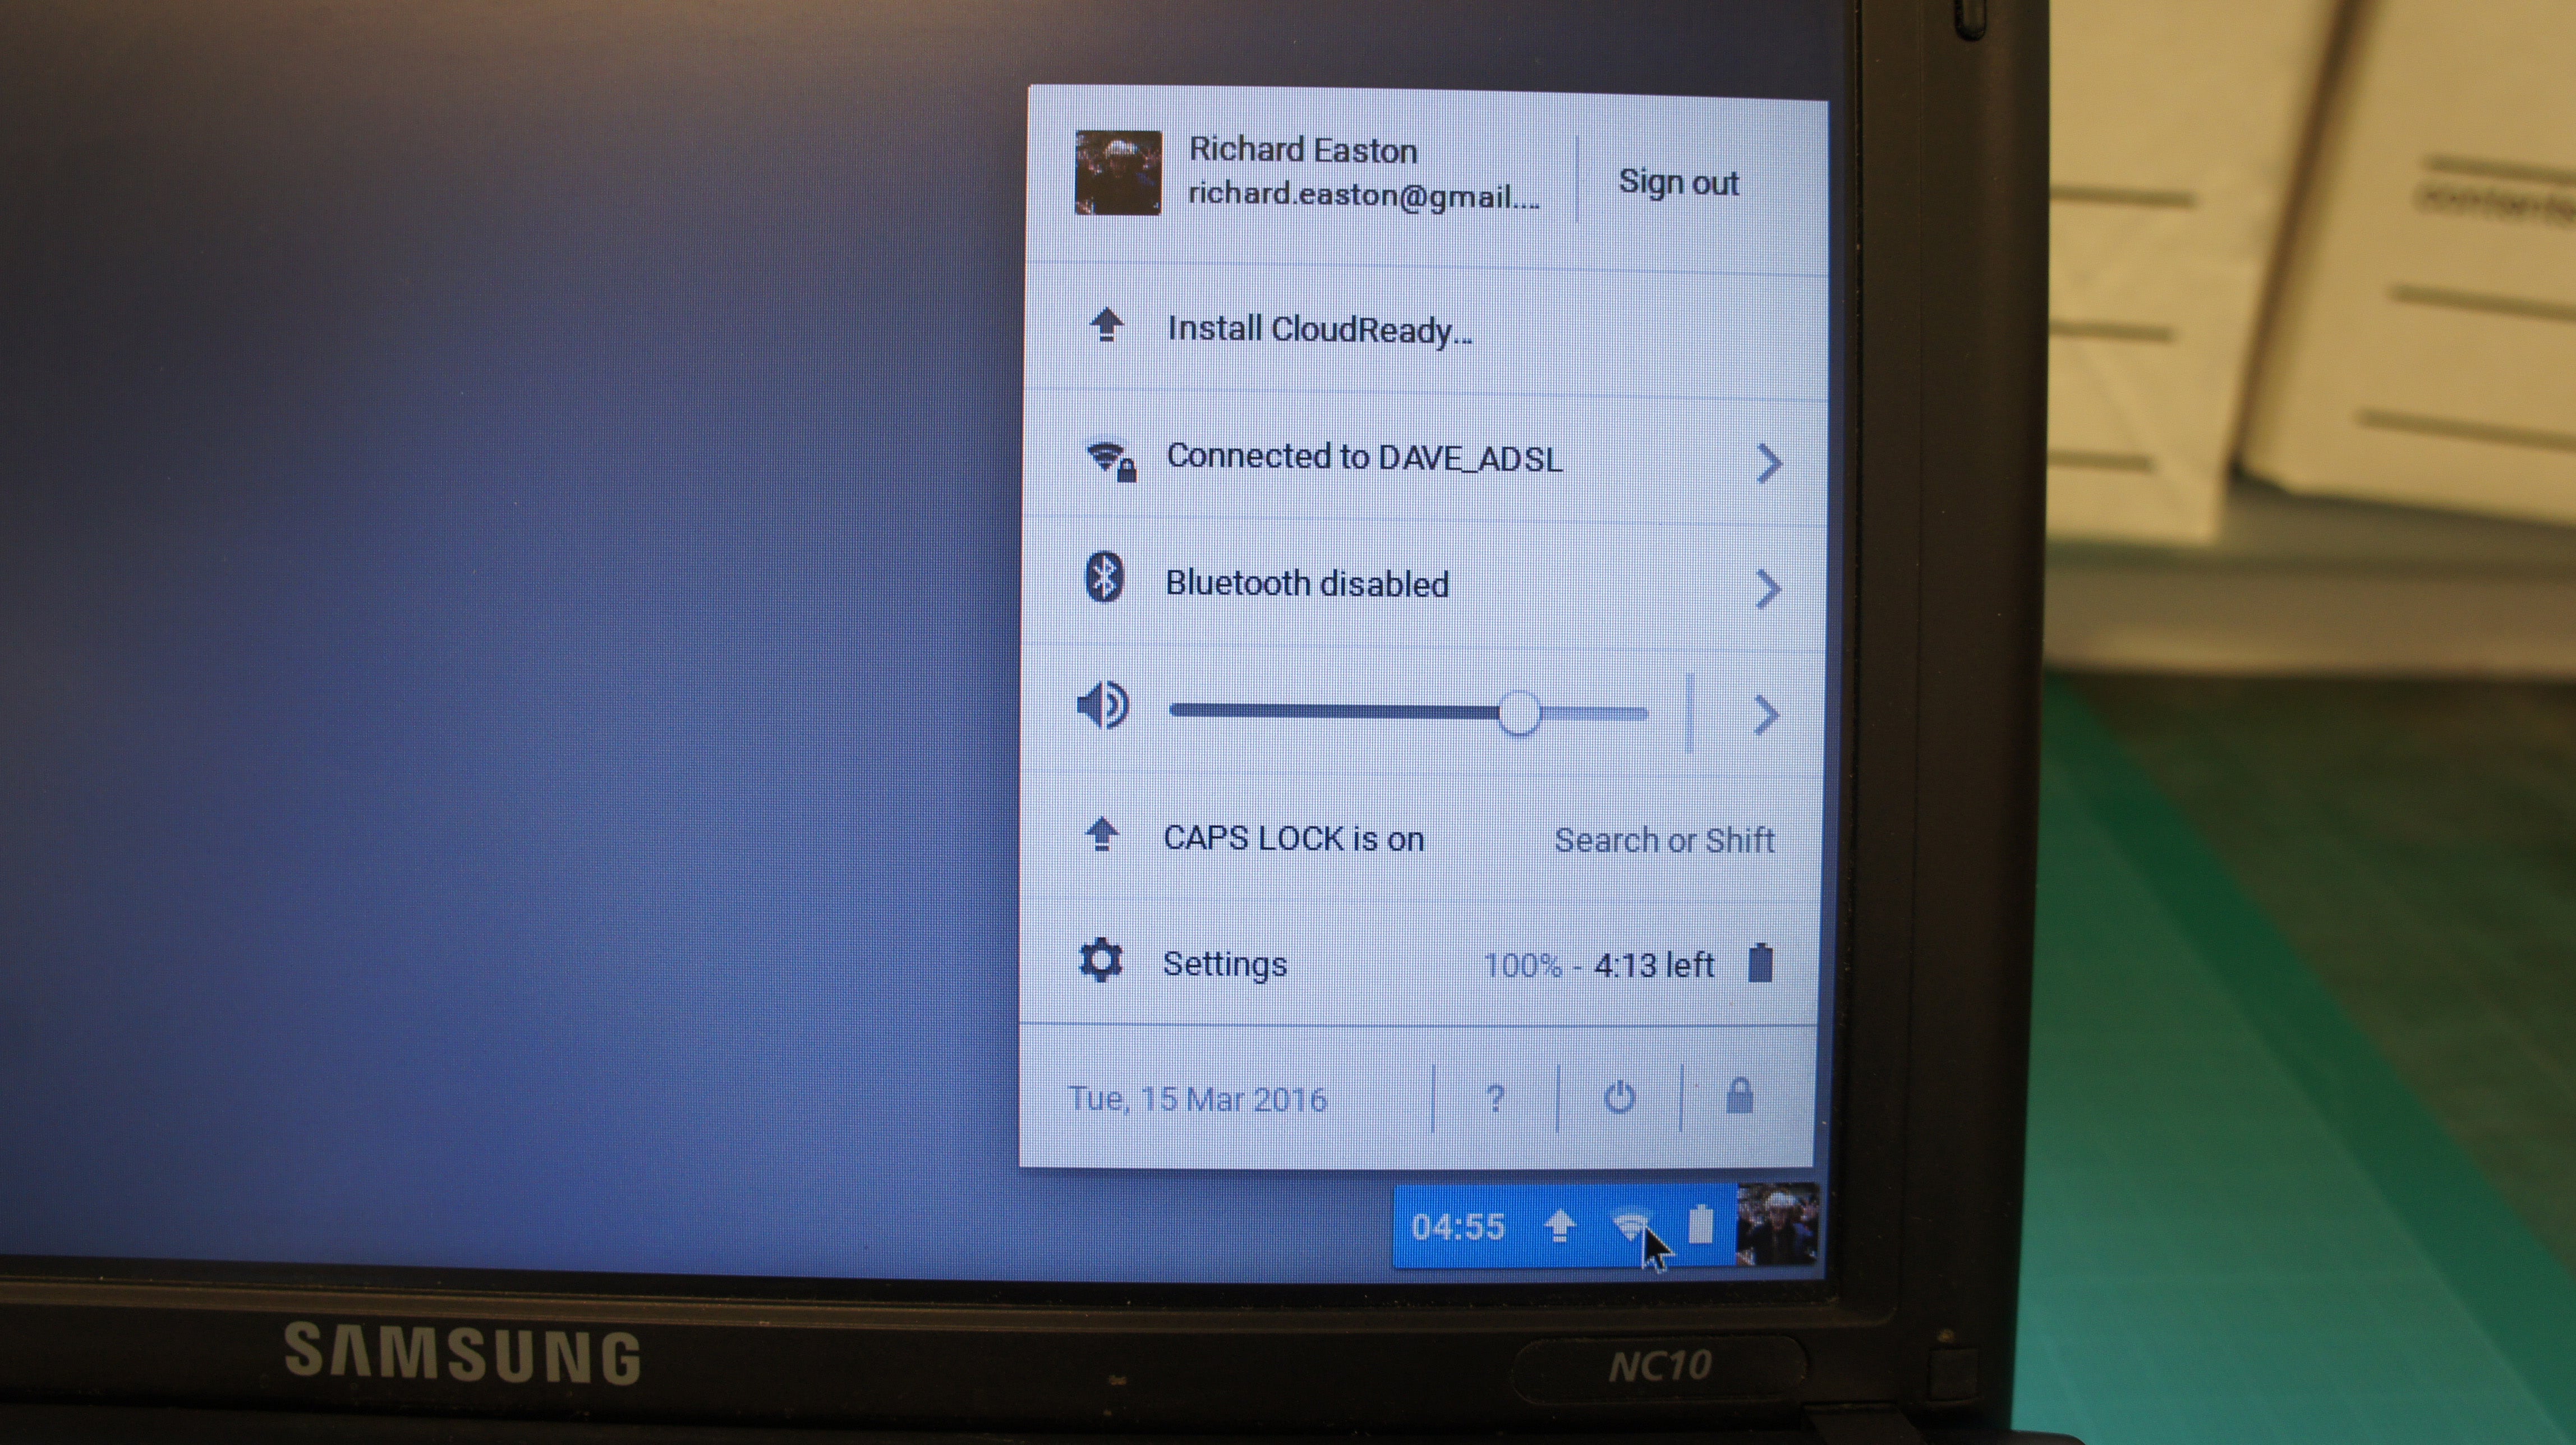
Once things become a bit more responsive, you’ll need to actually install CloudReady to your system. You see, at the moment, Chromium OS is running on the USB flash drive. To install Chromium to your laptops HDD or SSD, click the bottom right of the system tray to bring up the menu. Now, select ‘Install CloudReady…’ from the list of options.
This will start the CloudReady Installer. You’ll be warned that you might lose the data on your hard disk if you install. If you want, you can dual boot CloudReady alongside your existing Windows installation. This gives you a choice of operating system whenever you turn your system on and also means you won’t lose your existing data.
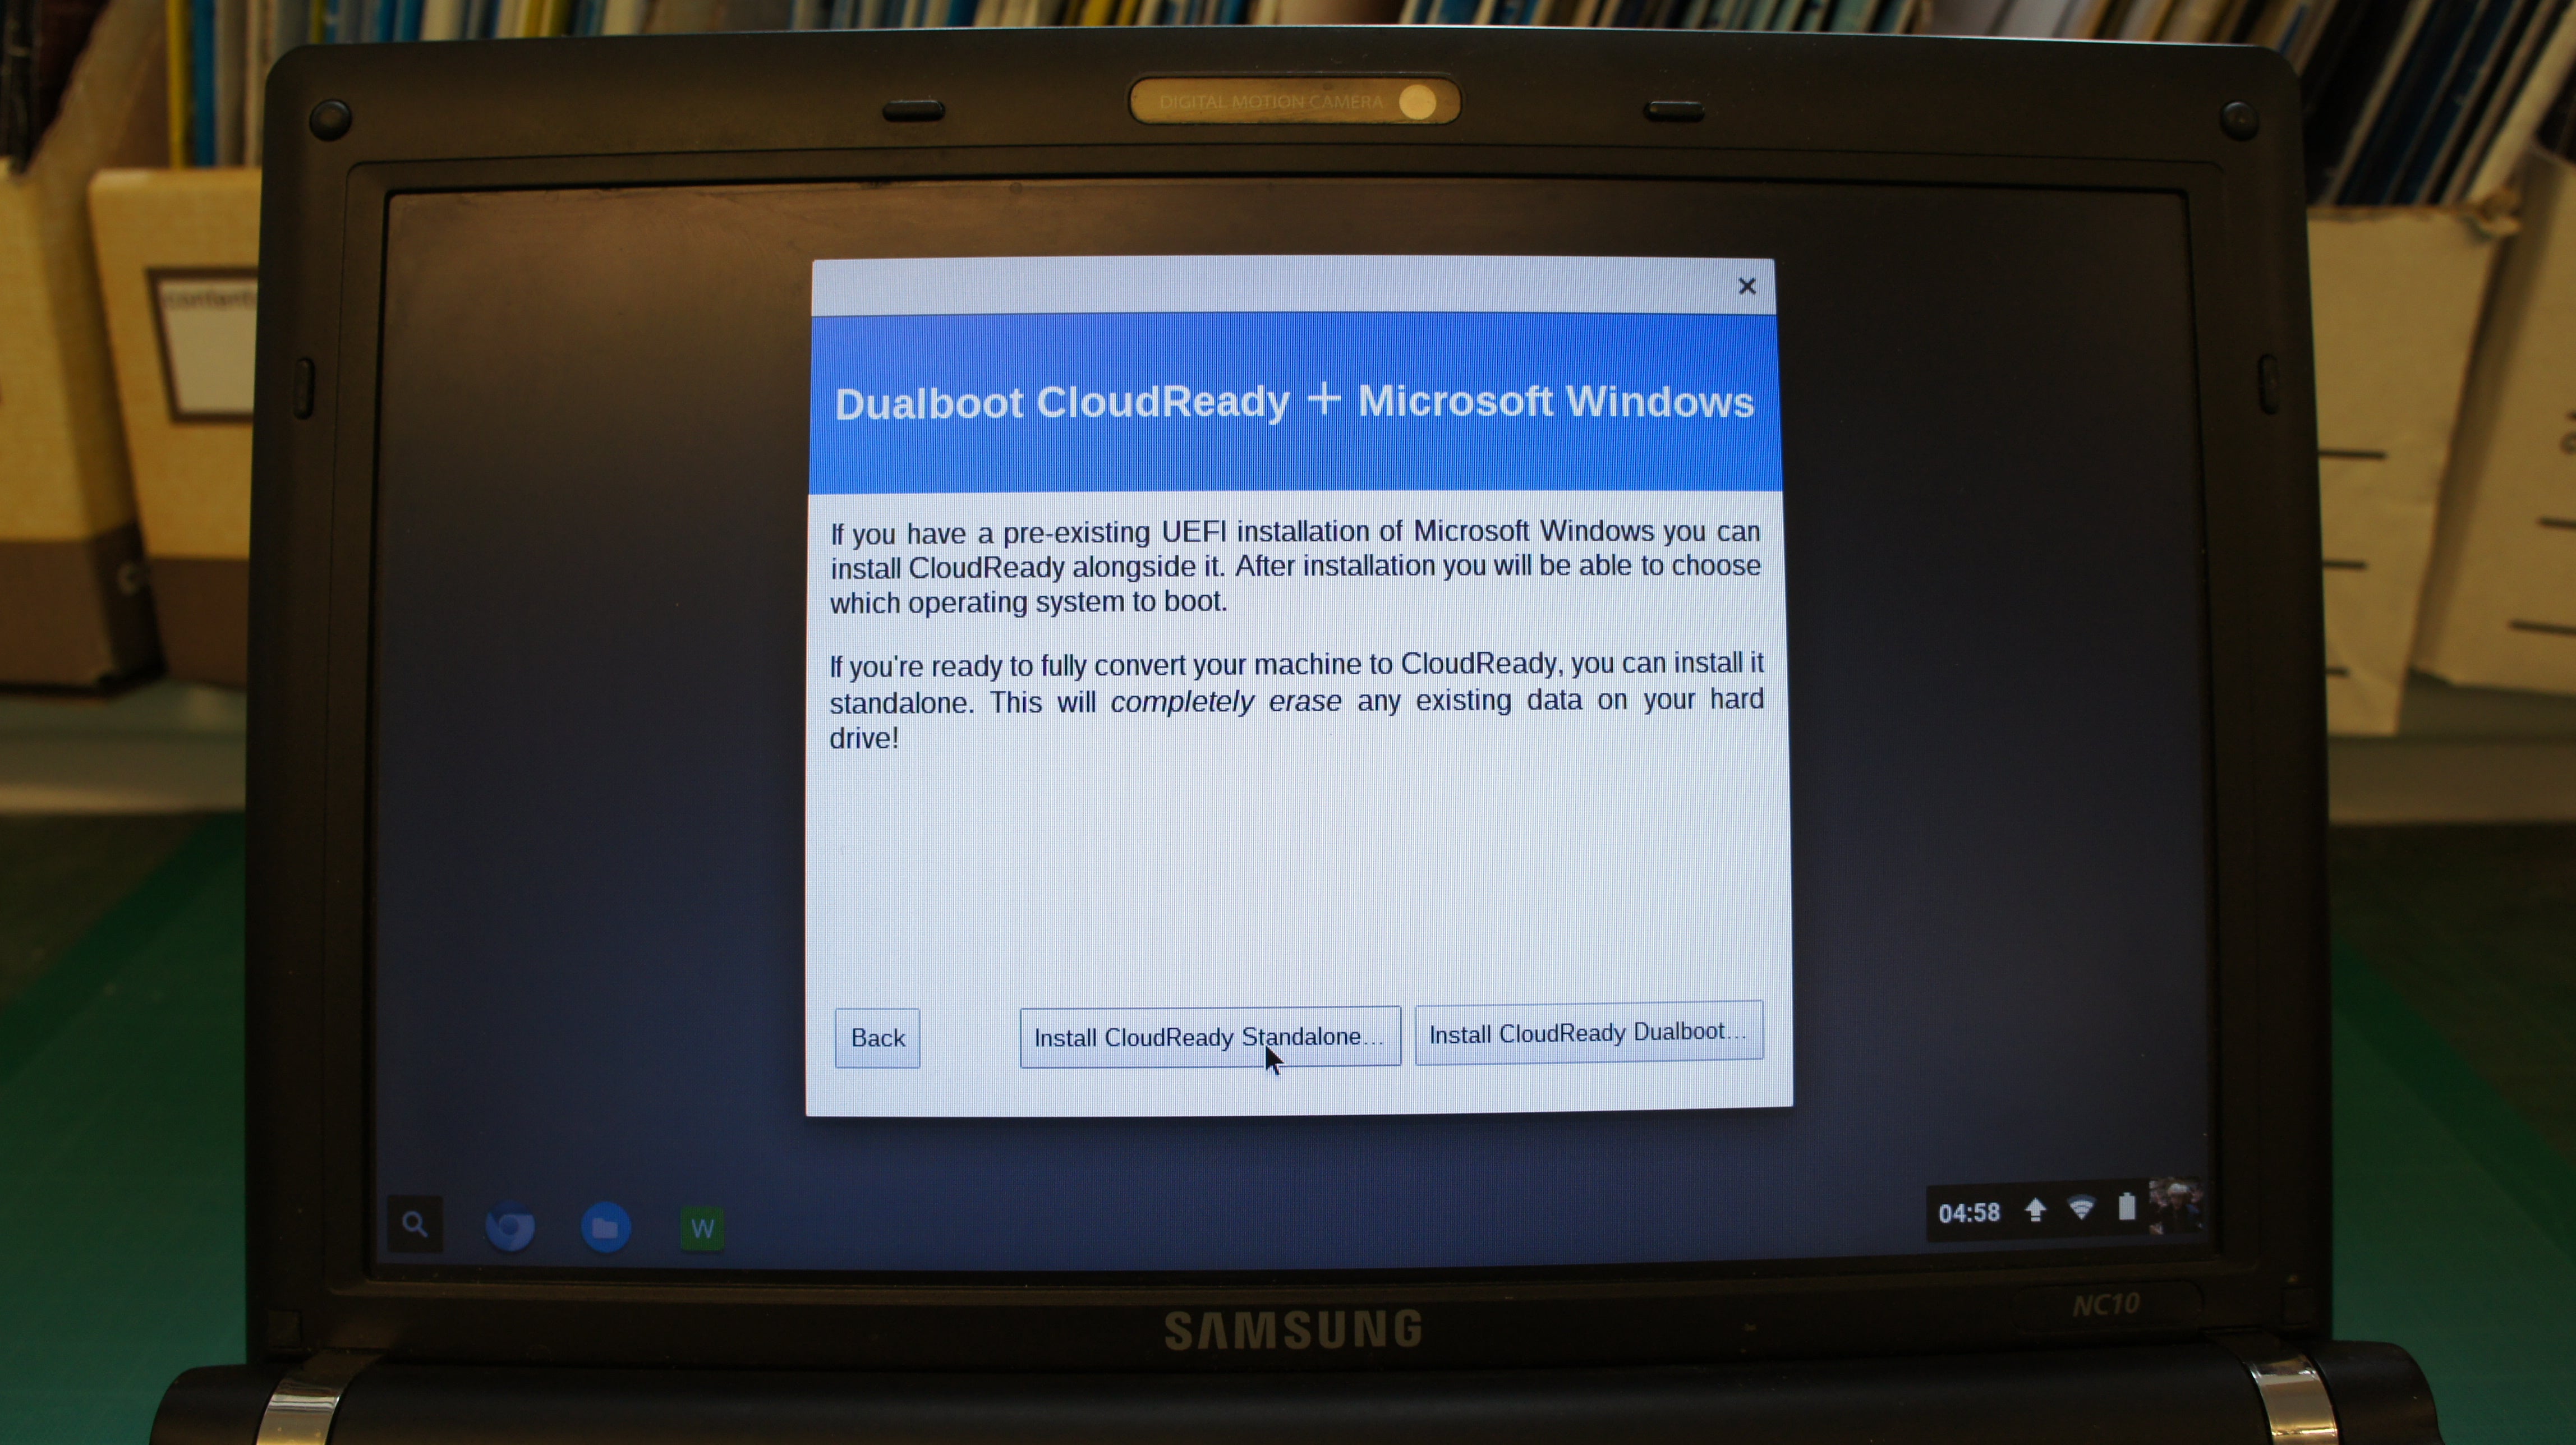
If it’s an old system that’s not been used in a long time, you probably don’t really care what’s on there and the old operating system might be sluggish. If so, select Install ‘CloudReady Standalone’ to install Chromium OS. You’ll get a second warning screen telling you this will wipe everything on your hard disk, so back up anything important before you proceed.
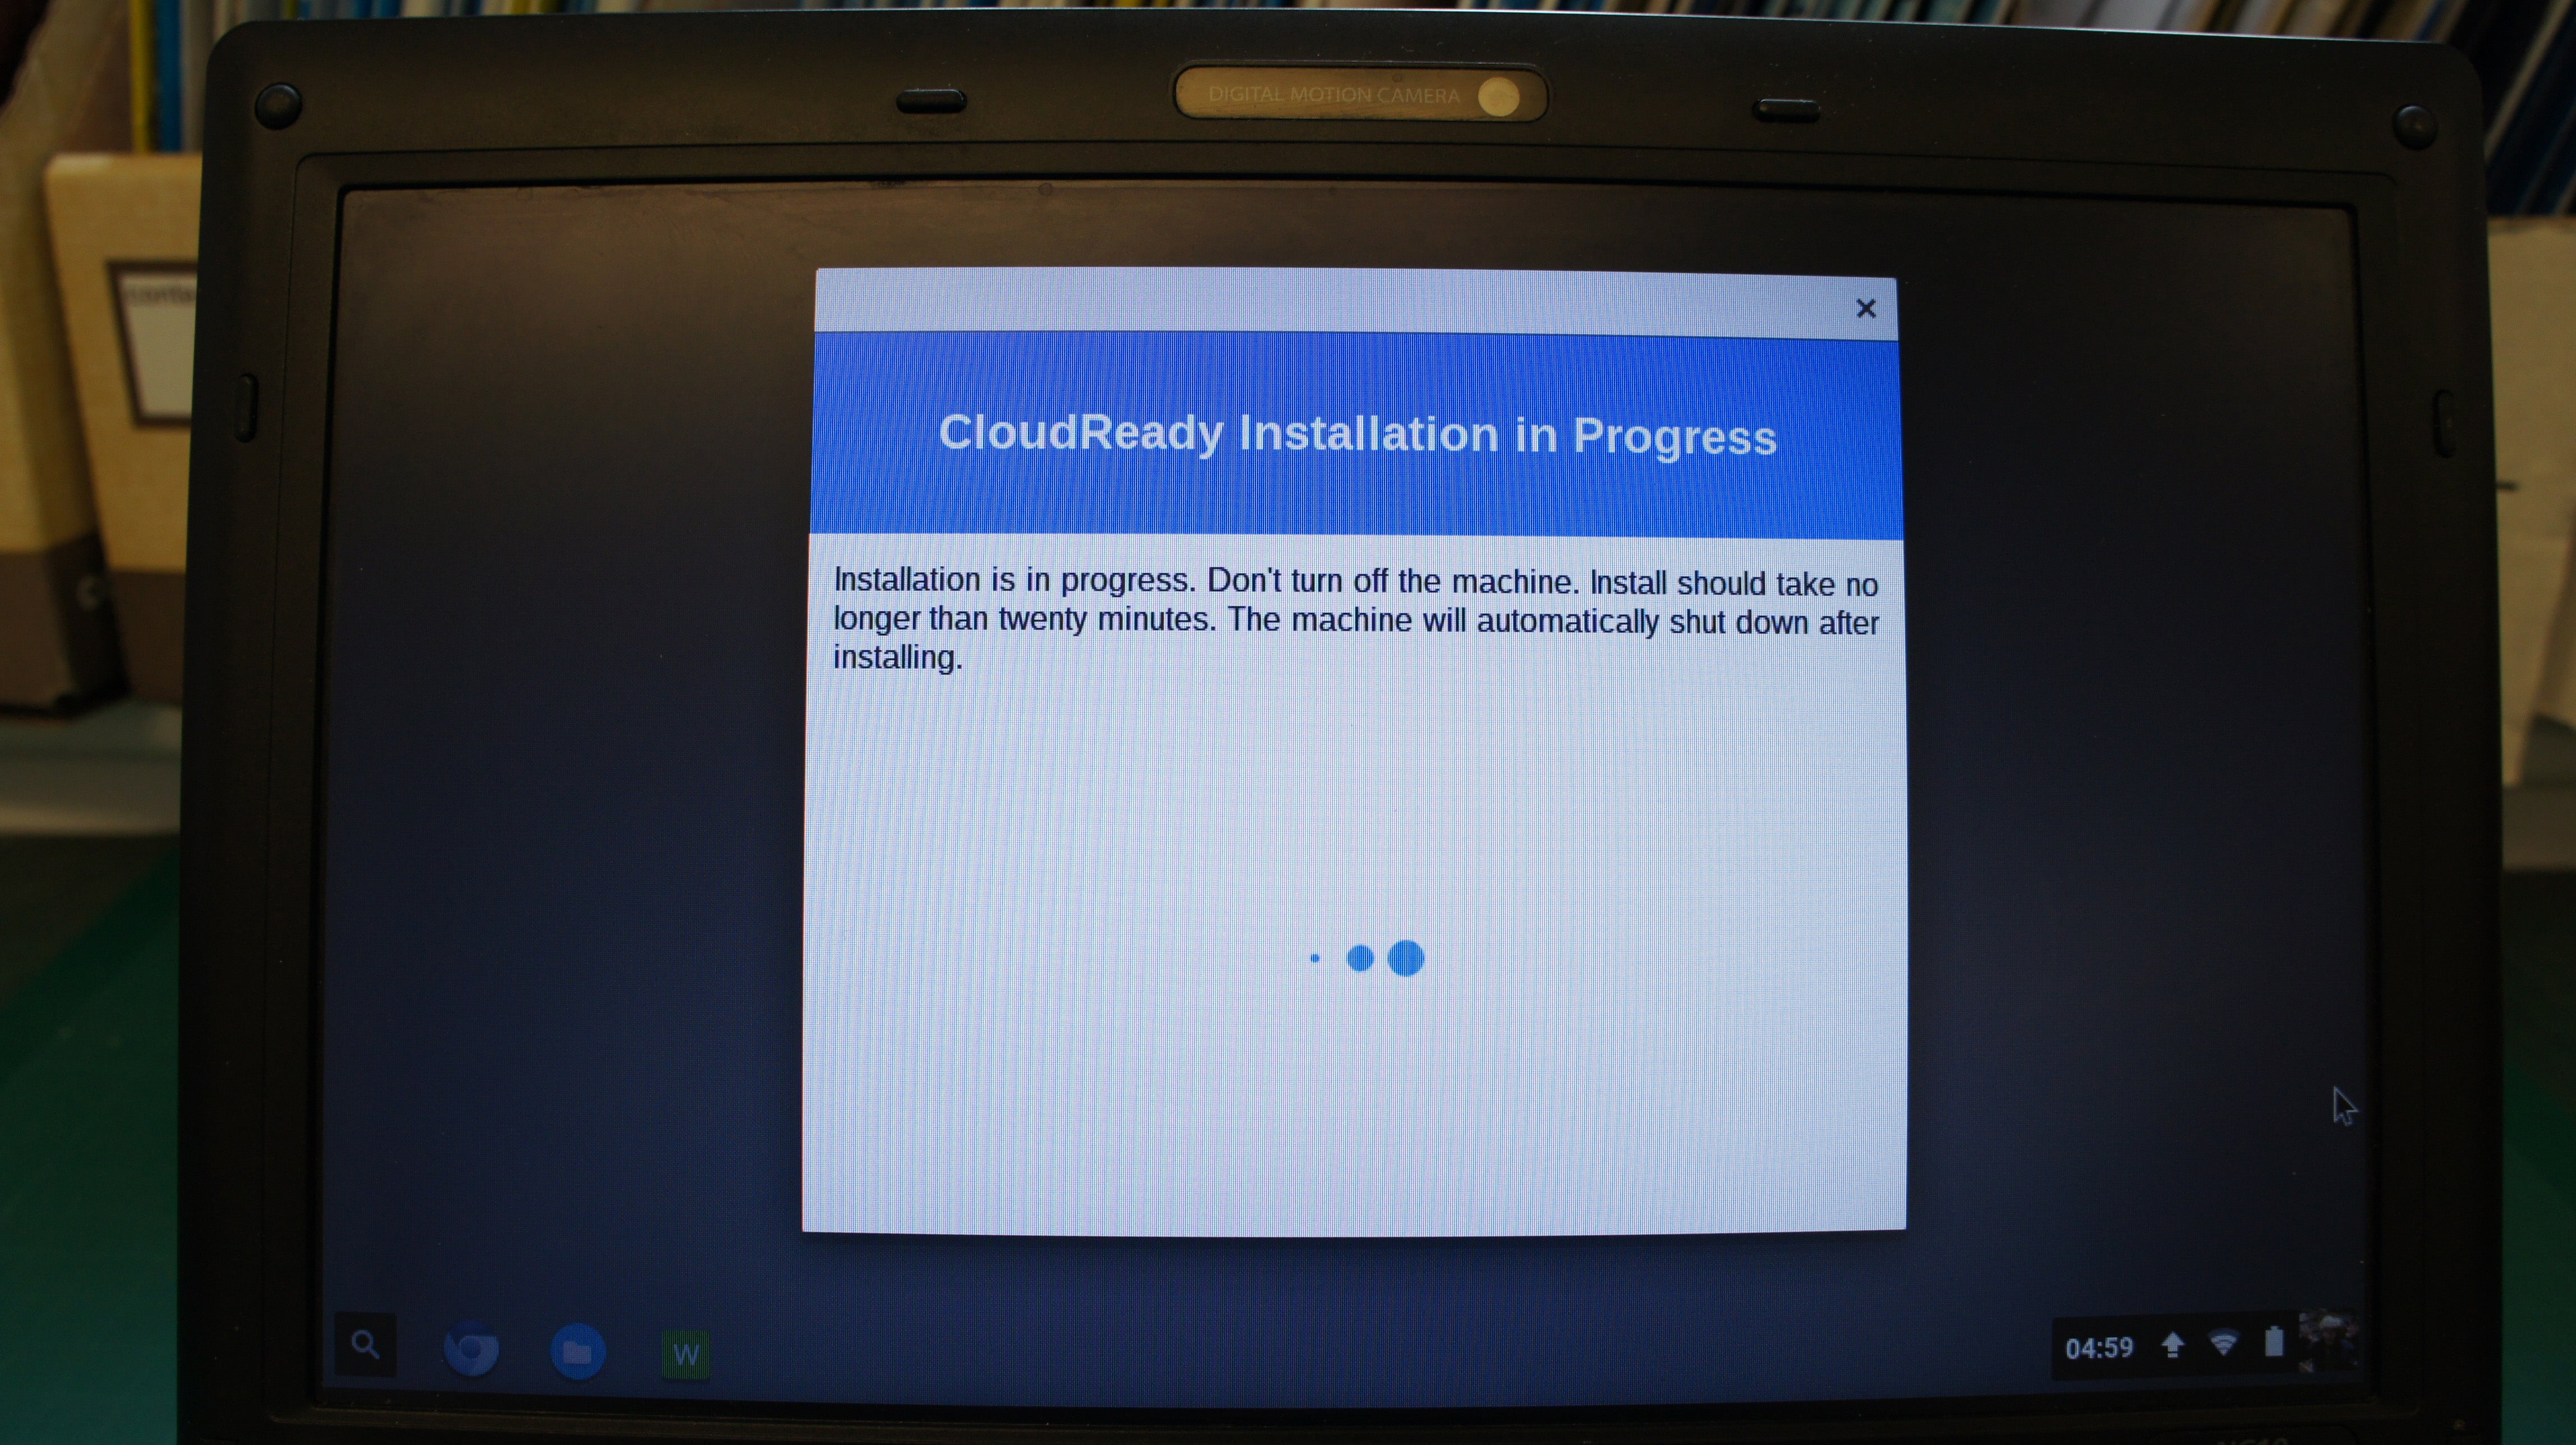
Once you’re sure you want to proceed, the CloudReady installation will start. You can leave the system alone at this point. The whole installation will take about 20 minutes and the system will automatically shut itself down. Go make a cup of tea and come back. If the system is turned off when you get back, the job is complete. Boot it back up.
Now you can remove the USB flash drive. It’s probably a good time to jump back into the BIOS to set booting from internal storage as the first priority option as well. Once that’s done, the system should boot into Chromium OS by default. You’ll be presented with the language selection and wireless network selection screen again. You’ll also need to sign back into your Google account.
This time, however, the system will check for updates to CloudReady before you arrive at the desktop. This ensures it’s up to date with fixes. The latest update is important if you want to watch Netflix, which I’ll come to below. Once all of the updates are done, your system is finally ready. Stand back and appreciate what you’ve created.
Enabling Netflix in CloudReady
Until recently, Netflix wasn’t supported by CloudReady even though Netflix works absolutely fine in standard Chrome OS. This was because the resources needed to securely play Netflix content were not available. Fortunately, this has now changed but you do have to go through a few steps to get there.
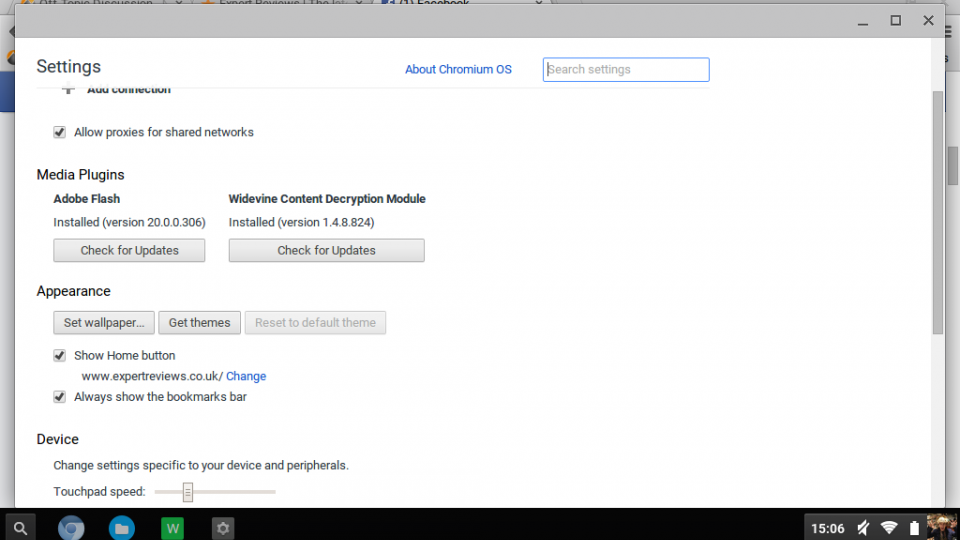
First, ensure your CloudReady is on the latest version. Then, open up the settings by clicking the bottom-right of the system tray. Then click Settings. Under ‘Widevine Content Decryption Module’ click ‘Install’ to install the module. Once it’s installed, reboot your system so it commits.
Next, you’ll need to install the Chrome User Agent Switcher extension. Once the extension is installed, you’ll see its icon in the top right of the Chromium browser. Right click it and select ‘Options’.
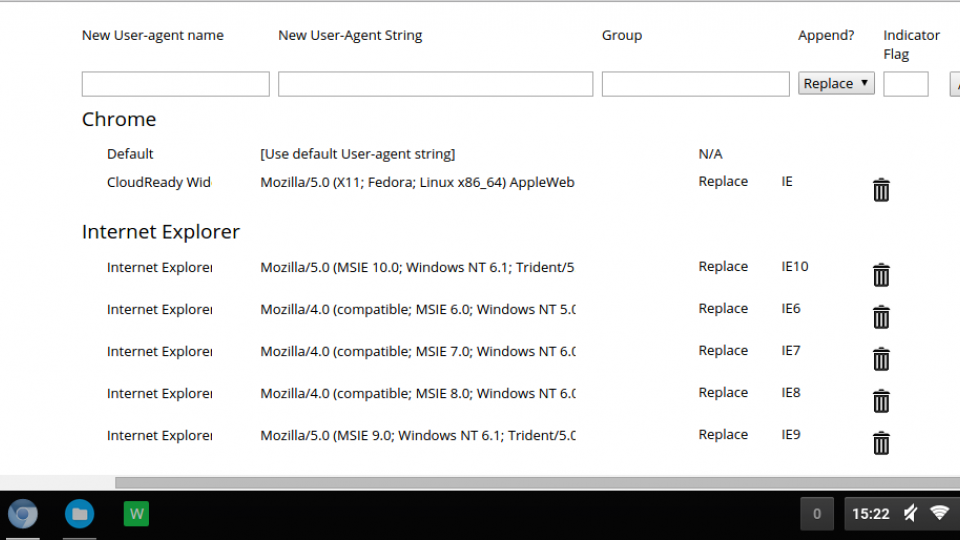
On the next screen, use the form to add a new User Agent with the following details (without the quotation marks):
-
Name: “CloudReady Widevine”
-
String: “Mozilla/5.0 (X11; Fedora; Linux x86_64) AppleWebKit/537.36 (KHTML, like Gecko) Chrome/46.0.2490.86 Safari/537.36”
-
Group: “Chrome” (should be filled automatically)
-
Append: “Replace”
-
Indicator Flag: “IE”
Now when you open up Netflix in your browser, left click the User Agent Switcher icon, go to Chrome, then select ‘CloudReady Widevine’ and Netflix should be able to play perfectly. With all of these steps followed, you should have your very own fully functioning Chromebook alternative of your own creation.
Using Chromium OS and Performance
If you’ve used Chrome OS before, everything should feel familiar. The only nuances you’ll encounter are the fact that your keyboard is likely a standard keyboard and one not designed for a Chromebook. Your manufacturer’s keyboard shortcuts for volume, that normally need a Fn modifier to be pressed as well, won’t work in Chrome OS. Chromebooks also don’t have a function row of keys, but the F1-F12 keys will operate as though they were on a Chromebook keyboard. They translate as follows:
F1 – Back
F2 – Forward
F3 – Refresh
F4 – Reload
F5 – Full screen
F6 – Switch window
F7 – Brightness down
F8 – Brightness up
F9 – Mute
F10 – Volume down
F11 – Volume up
There’s no lock button, but your laptop’s power button should lock the system instead. Your Caps Lock key should function as the Chromebook’s ‘Search’ key. In the case of Chrome OS, the Search key can be set to act as a Caps Lock, so this doesn’t really matter. All of the keyboard shortcuts worked exactly as they would on a Chromebook. You can also hit Ctrl + Alt + ? to bring up the other keyboard shortcuts that use Ctrl and Alt as modifiers.
In my case, hardware-wise, everything worked straight after installation. The wireless card was fully operational, I had two-finger scroll on the touchpad, the speakers worked. Bluetooth paired without a hitch. Everything just worked perfectly.
Not forgetting that this is a piece of hardware dating back to 2008, performance is more than acceptable when working within the limitations of Chrome OS. The Samsung NC10 only has a 1.6GHz Intel Atom N270 single-core processor with 1GB of DDR2 memory after all (admittedly I upgraded mine to 2GB of memory years ago).
Running a few benchmarks that we use for Chromebooks, it managed a SunSpider score of 2,062.5ms and a JetStream score of 17.6. Compared to the Acer Chromebook R11 we reviewed recently, that’s a SunSpider score three times slower and a JetStream score just over twice as low. So obviously don’t expect miracles, but for simple web browsing it performed fine. Let’s not forget the Samsung NC10 is approaching eight years old, which in technology terms is positively ancient.
Obviously, performance will be dependent on what system you decide to use but converting an old laptop into a Chromebook could certainly give your old hardware a second wind. As it’s so easy, there’s no reason to not give CloudReady a go rather than letting your old laptop gather dust. You don’t even have to commit off the bat, just run CloudReady off a live USB drive to see how you get on.


